Disposal troubleshooting, Dsb-b150f, 6 software upgrade – Samsung DSB-B150F User Manual
Page 37: 7 copy channel data
GB-31
DSB-B150F
GB
GB-30
D
I
G
I
T
A
L
S
A
T
E
L
L
I
T
E
R
E
C
E
I
V
E
R
DSB-B150F
4.5 System Information
If you have to contact your service provider or a service center
they might ask for information available from this menu.
Place the cursor on this sub menu and press the OK key.
The following will be the on-screen display.
4.6 Software Upgrade
You can download and upgrade the software of this STB
through ASTRA, Hotbird, Sirius or Eutelsat satellite when the new
software is released.
N
No
otte
e
: These satellites for upgrading software on Samsung
Brand can be changed in the future.
During downloading don’t turn off the STB.
If there is a new version of software to download, you are
asked if you will update or not.
If you press OK key, the update starts right away.
In case update is impossible, you get this message “You can’t update software!”
Or in case you don’t need to update, “You don’t need to update software!” will be displayed.
If you get information that a Transponder is changed to different one for Samsung software,
you should select ‘User Advanced Mode’ at Menu mode by using the
ᮤ
/
ᮣ
key.
Then you should set exact parameters for the new transponder for Samsung.
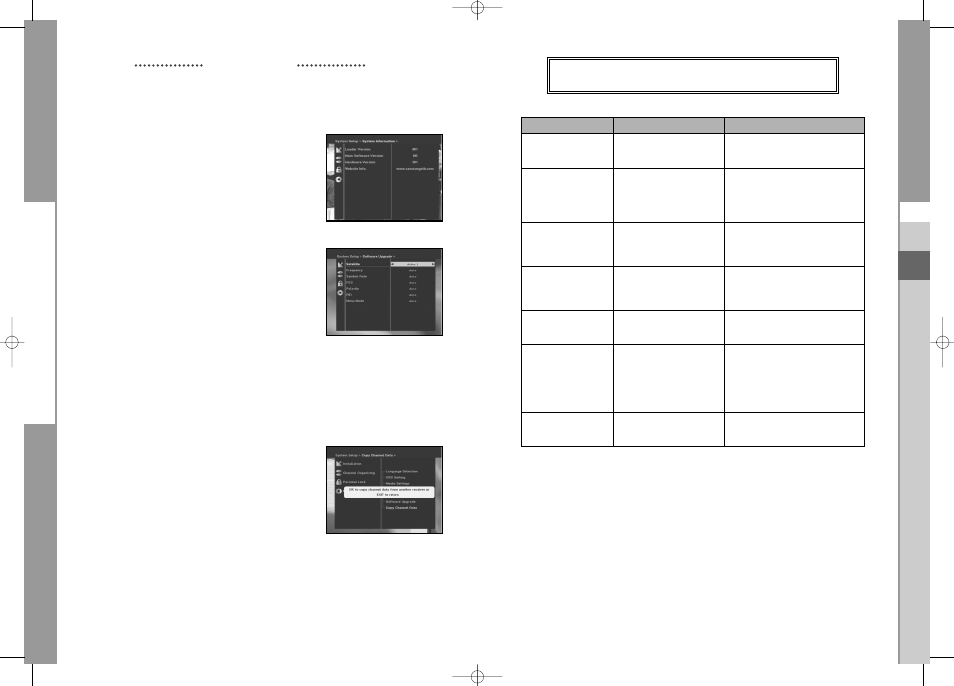
4.7 Copy Channel Data
If you want to copy the channel data from one receiver
to another, please follow the instruction below.
Please make your own channel data, such as favorite
& lock channel with your own master box.
Then take your master box when you install another box.
1. Plug on both master & slave receivers
2. Master Box(Installed Box) : Stand-by Mode
3. Slave Box(Installing Box) : Menu Mode
4. Connect 2 Boxes with RS232 serial cable
(Both end should have male connector with crossed signals)
5. Select the ‘System Setup’ and press the OK key.
6. Select the ‘Copy Channel Data’ with the
ᮡ
/
ᮢ
keys.
7. Press ‘OK’ to start channel data copy
OPERATING THE RECEIVER
Problem
Possible cause
Solution of the problem
No display LED on
Power cord
Power cord plug in correctly
the front panel;
not plugged in correctly
No power supply
No pictures on the screen
Receiver in Standby mode;
Set receiver to “On”;
Scart not connected tightly
Check connection and correct;
to video output of television;
incorrect channel or video
Check channel and video output and
output selected on television
correct (TV instruction manual)
No sound
Audio cord connected
Check connection and correct;
incorrectly;
Loudness level = 0;
Increase loudness on television set;
Muting active
Press the MUTE key
Remote Control does not
incorrect operation;
Point remote control
operate directly
towards the Receiver.
Batteries dead or inserted
Replace batteries or insert correctly
incorrectly
Poor picture quality
Signal strength to low
Check all wire connections. Check the
signal strength in
“Manual Scanning” menu, correct
alignment of your antenna
On-Screen Error Message
Antenna cable not connected
Check connection and correct;
“Searching for signal”
or not tight;
LNB defective;
Change LNB;
incorrect position of the
Check position and correct,
satellite antenna;
Check the signal strength in
LNB is set to "OFF" in
the “Manual Scanning” menu
LNB Setting menu
On-Screen Error Message
Satellite not yet set
Scan of in “Auto scanning” or
“Channel data
“Manual scanning” menu
does not exist.”
The device, packaging material (e.g. Styrofoam) and the batteries must never be disposed of with
household refuse. Please obtain appropriate information about the regulations in your community,
and dispose of all refuse in accordance with regulations at the separate locations provided.
DISPOSAL
TROUBLESHOOTING
MF68-00362A_GB 8/25/05 2:14 PM Page 30