Elevator servo and linkage installation – E-flite F-86 Sabre 15 DF ARF User Manual
Page 18
18
E-flite F-86 Sabre 15 DF ARF Assembly Manual
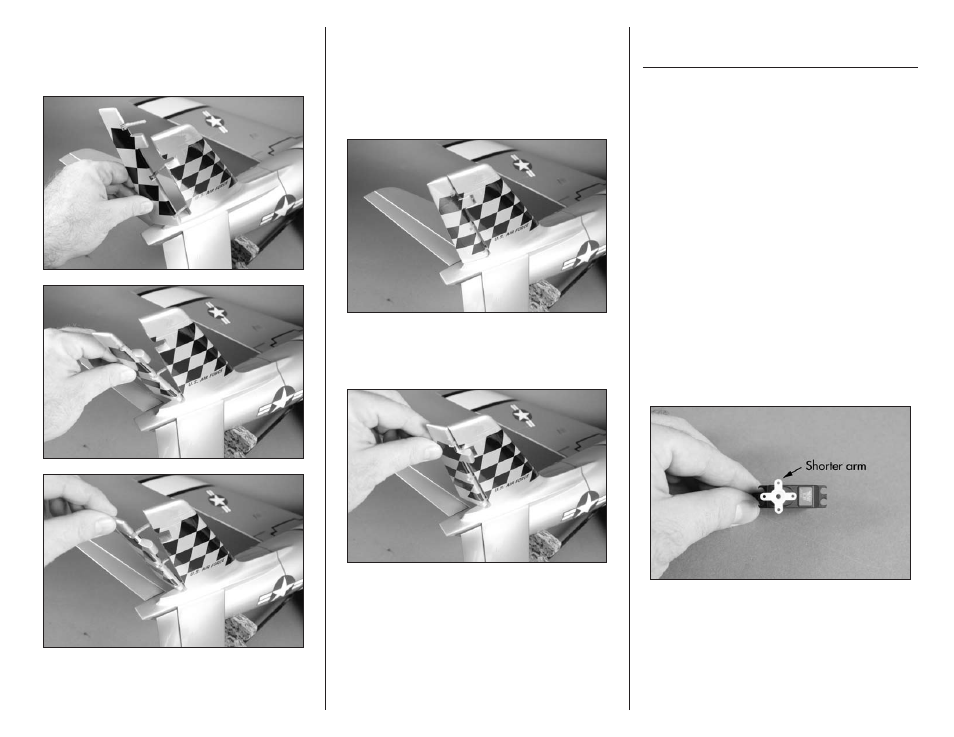
8. Check the fit of the rudder to the fin. Start by
setting the hinges for about 45-degrees of throw.
Insert the bottom hinge, then work upward inserting
the middle then top hinge.
9. Once the fit has been checked, use 6-minute
epoxy to glue the hinges in place. You will need to
remove the rudder so you can use a toothpick to
apply epoxy in the hinge pockets of the fuselage
and to the hinges. Use rubbing alcohol and a
paper towel to remove any excess epoxy from the
hinges or rudder.
10. Once the epoxy has fully cured, work the
rudder through its range of motion a number of
times to make sure there is no epoxy in the knuckle.
Elevator Servo and
Linkage Installation
Required Parts
Transmitter
Servo with hardware
Receiver
Assembled airframe
2mm nut
3mm x 4mm machine screw
2mm washer
Elevator control horn (2)
Pushrod connector (large)
Elevator pushrod keeper (2)
Elevator pushrod wire, 19
11
/
16
-inch (500mm) (2)
Required Tools and Adhesives
Side cutter
Hobby knife with #11 blade
Needle-nose pliers Medium CA
Pin vise
Drill bit: 5/64-inch (2mm)
Threadlock
Felt-tipped pen
Thin CA
Phillips screwdriver: #1
1. Remove the screw holding the servo horn to the
servo using a #1 Phillips screwdriver. Use the radio
system to center the elevator servo so the shorter
arm is positioned as shown. The pushrod connector
will attach to this arm.