E-flite T-34 Mentor 25e ARF User Manual
Page 7
7
E-flite T-34 Mentor 25e ARF Assembly Manual
2. Use medium CA to glue the plywood servo
plates in position for the rudder and elevator
servos. Make sure to align the plates with the
openings before the CA can cure.
The servo openings in the servo tray are designed
to fit the E-flite servos that come with the RTF
version of the model. The plywood plates are
necessary for the installation of standard servos.
3. Use a #1 Phillips screwdriver to thread a servo
mounting screw into each of the eight holes in the
servo tray.
4. Apply 2–3 drops of thin CA in each of the eight
holes. Steps 2 and 3 prepare the holes so the
screws fit securely and won’t vibrate loose in flight.
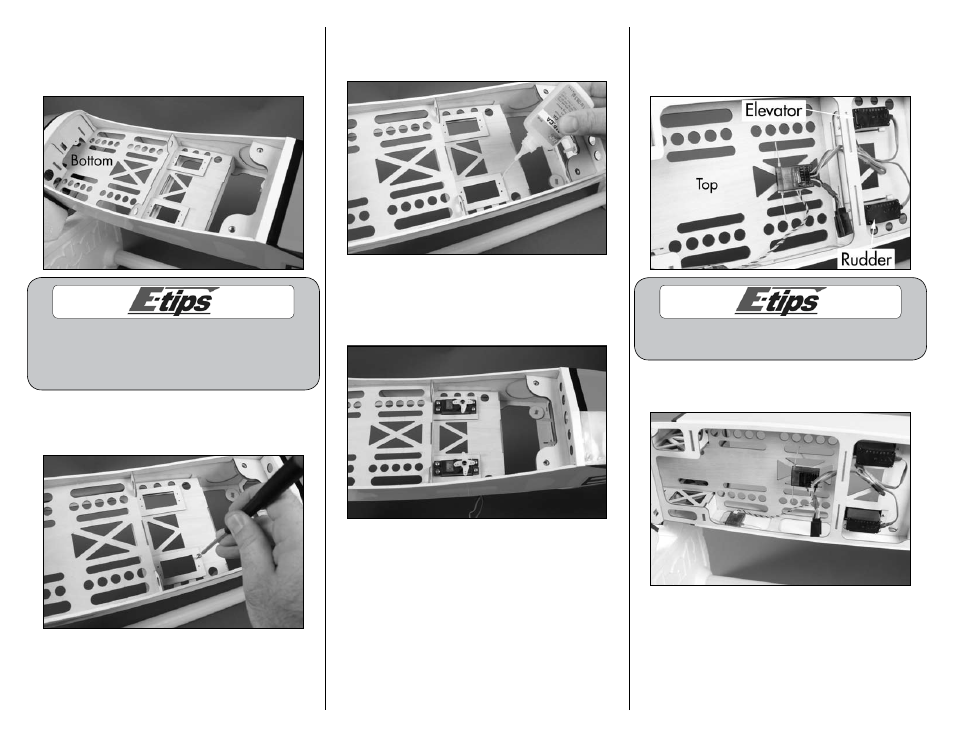
5. Install the elevator and rudder servos using the
screws provided with the servo. Use a #1 Phillips
screwdriver to tighten the screws. Note that the
output of both servos face the rear of the fuselage.
6. Use hook and loop tape to mount the receiver in
the fuselage. Plug a Y-harness in the AIL port of the
receiver. Also plug the rudder and elevator servos
in the receiver as well.
Secure the excess from the servo leads so they do
not interfere with the operation of the radio system.
7. Mount the remote receiver to the side of the
fuselage using hook and loop tape.