E-flite T-34 Mentor 25e ARF User Manual
Page 5
5
E-flite T-34 Mentor 25e ARF Assembly Manual
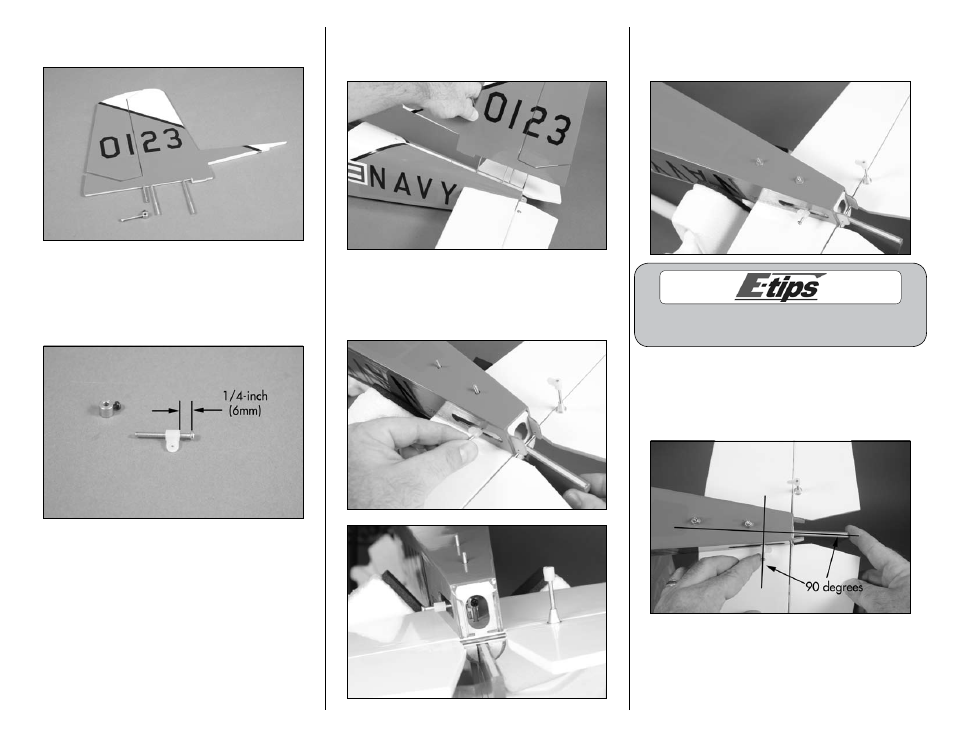
5. Use a #1 Phillips screwdriver to remove the
rudder control horn.
6. Using a #1 Phillips screwdriver, remove the long
silver screw from the control horn collar. Thread a
nylon control horn on the screw until it is 1/4-inch
(6mm) from the head of the screw head as shown.
Thread the screw back in the collar.
7. Insert the threaded rods from the fin through the
holes in the fuselage and stabilizer. You may need
to position the stabilizer to accomplish this step.
8. While sliding the fin in position, you will need
to place the rudder control horn in position.
Make sure the black screw faces to the rear of the
fuselage so it can be tightened later.
9. The fin is secured using two 4-40 locknuts and
two #4 washers. Use a 1/4-inch box wrench or nut
driver to tighten the nuts.
Make sure not to over-tighten the
nuts, damaging the fuselage.
10. Check that the rudder control horn is
positioned 90 degrees to the rudder. If not, you will
get unequal throw of the rudder from right to left.
You can use a piece of low tack tape to tape the
rudder in place.