Flap servo installation – E-flite T-34 Mentor 25e ARF User Manual
Page 17
17
E-flite T-34 Mentor 25e ARF Assembly Manual
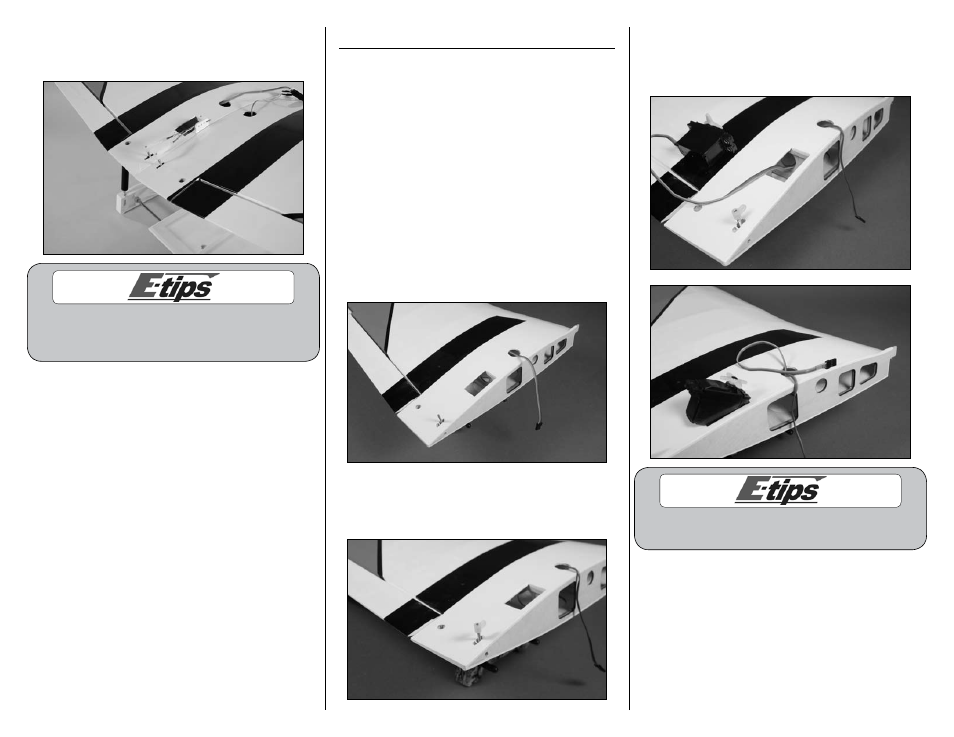
5. Connect the linkage to the nylon control horn.
Adjust the clevis so the flap is aligned with the
trailing edge of the wing as shown.
The wing is displayed joined to show
that both flaps will need to be aligned
when the wing is joined together.
Flap Servo Installation
Required Parts
Wing panel (left)
Nylon control horn
Flap linkage
Nylon clevis (2)
Pushrod keeper
Servo with hardware
Radio system
Silicone keeper (2)
Battery
Required Tools and Adhesives
Pin vise
Hobby knife with #11 blade
Thin CA
Phillips screwdriver: #1
Ruler
Drill bit: 1/16-inch (1.5mm), 5/64-inch (2mm)
1. Use a hobby knife and #11 blade to remove the
covering from the opening from the wing for the
flap servo.
2. Thread the control horn on the flap linkage.
The top of the horn will be flush with the top of the
threads as shown.
3. Prepare the flap servo by installing the grommets
and brass eyelets. Pass the servo lead through the
hole inside the wing, then through the hole in the
top of the sheeting.
Place a piece of tape on the flap servo lead so it can
be easily differentiated from the aileron servo lead.