Cowling installation – E-flite Sukhoi SU-26m 480 ARF User Manual
Page 7
7
E-flite Sukhoi SU-26m 480 ARF Assembly Manual
Cowling Installation
Required Parts
Fuselage w/motor installed
2mm x 8mm wood screw (4)
Cowling
Propeller
Prop adapter (for outrunner motor)
Dummy motor (optional)
E-flite 1
3
/
4
-inch aluminum spinner (optional)
Required Tools and Adhesives
Thin CA
T-pin
Phillips screwdriver: #1
Optional Tools and Adhesives
30-minute epoxy
Mixing stick
Epoxy brush
Rubbing alcohol
Paper towel
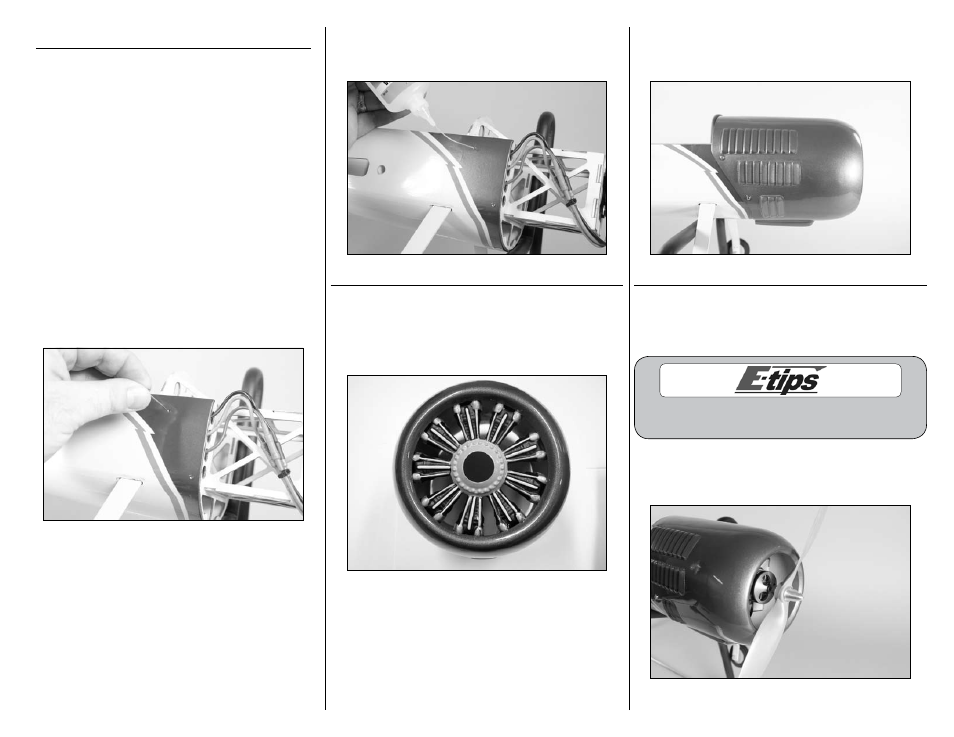
1. Use a T-pin to poke a hole through the fuselage
side to locate the center of the hardwood cowl
mounts inside the fuselage.
2. Use thin CA to harden the holes in the
hardwood cowl mounts. This will help to prevent
the screws from vibrating loose in flight.
IF INSTALLING dUMMY MOTOR
3. After painting the dummy motor, use 30-minute
epoxy to glue it into the cowling as shown.
Make sure to allow the epoxy to fully cure before
proceeding to mount the cowl to the fuselage.
4. Slide the cowling onto the fuselage. Use a #1
Phillips screwdriver to secure the cowl using four
2mm x 8mm sheet metal screws.
IMPORTANT INFORMATION ABOUT YOUR PROPELLER
It is very important to check to be sure the propeller
is balanced before installing onto the shaft. An
unbalanced propeller may strip the gears or cause
poor flight characteristics.
Make sure to check the balance of the propeller
after enlarging the hole in the propeller.
5. Install the propeller assembly onto the motor
shaft. Tighten the propeller nut using a hex wrench
slipped through the hole in the propeller nut.