E-flite Sukhoi SU-26m 480 ARF User Manual
Page 11
11
E-flite Sukhoi SU-26m 480 ARF Assembly Manual
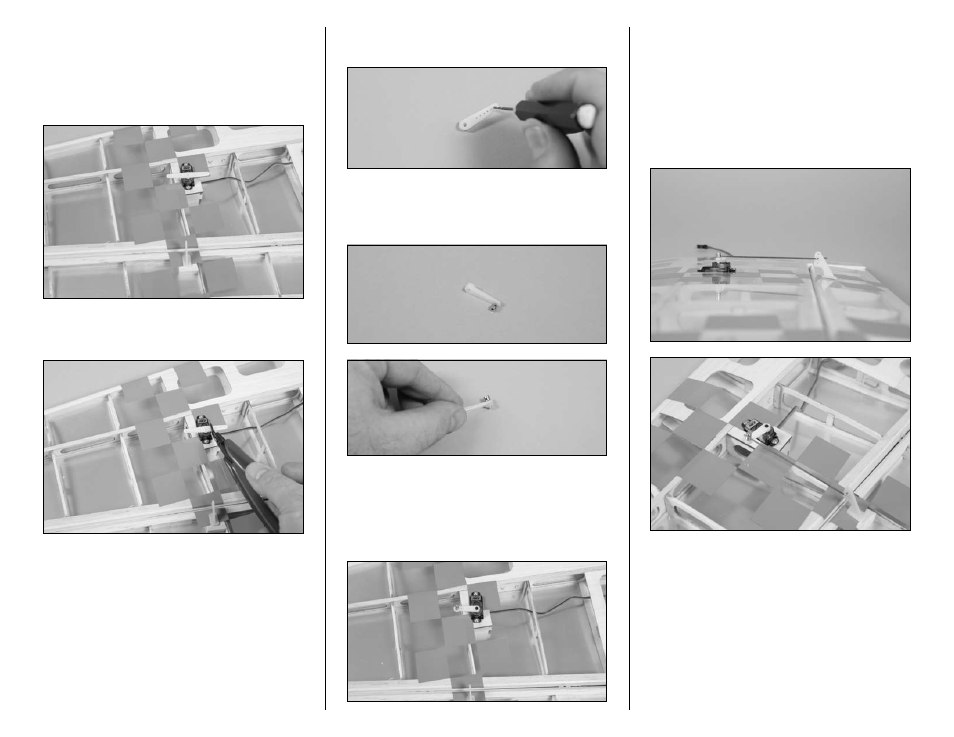
8. Place a 3D servo horn on the aileron servo.
The horn should align with the hinge line when the
radio is on and the aileron servo plugged into the
receiver. There are an odd number of splines on the
servo, so you may need to remove the horn and
rotate it 180 degrees to get it to align correctly.
9. Use side cutters to remove the arm from the servo
horn that does not align with the control horn.
10. Use a pin drill and 1/16-inch (1.5mm) drill bit
to enlarge the outer hole of the aileron servo horn.
11. Attach the micro control connector to the servo
horn. Be sure to use the included retainer to secure
the micro control connector.
12. Secure the servo horn prepared in the last
few steps using the screw from the servo and a #0
Phillips screwdriver. Make sure the horn aligns with
the aileron hinge line when the radio system is on
and the aileron servo is centered.
13. With the radio system on, make sure to center
the aileron trim and stick. Make sure the aileron
servo is operating properly using the transmitter.
Insert the z-bend of the 3
1
/
2
-inch (89mm) pushrod
into the center hole of the aileron control horn.
Slide the pushrod wire through the micro connector
on the servo horn. Center the aileron, and secure
the position of the wire using the 2mm x 4mm
screw and a #1 Phillips screwdriver.
14. Repeat Steps 1 through 13 for the remaining
servo and linkage.