Installing the watts model a2-ls leak sensor, Intelliflow, Calibration procedure – Watts A2C-WB User Manual
Page 4: Description, Installation, Calibration: (startup), Calibration using intellitimer accessory, Recalibration
4
Installing the Watts Model A2-LS Leak Sensor
Description:
The Watts Model A2-LS Leak Sensor plugs into the receptacle
on the front panel of the Watts IntelliFlow
®
Series A2C-M1 or A2-
WB-M1. The base of the sensor is placed on the floor close to
the washing machine. Upon detection of water at the sensor the
IntelliFlow
®
immediately shuts off the water supply to the wash-
ing machine hoses preventing catastrophic water damage.
Installation:
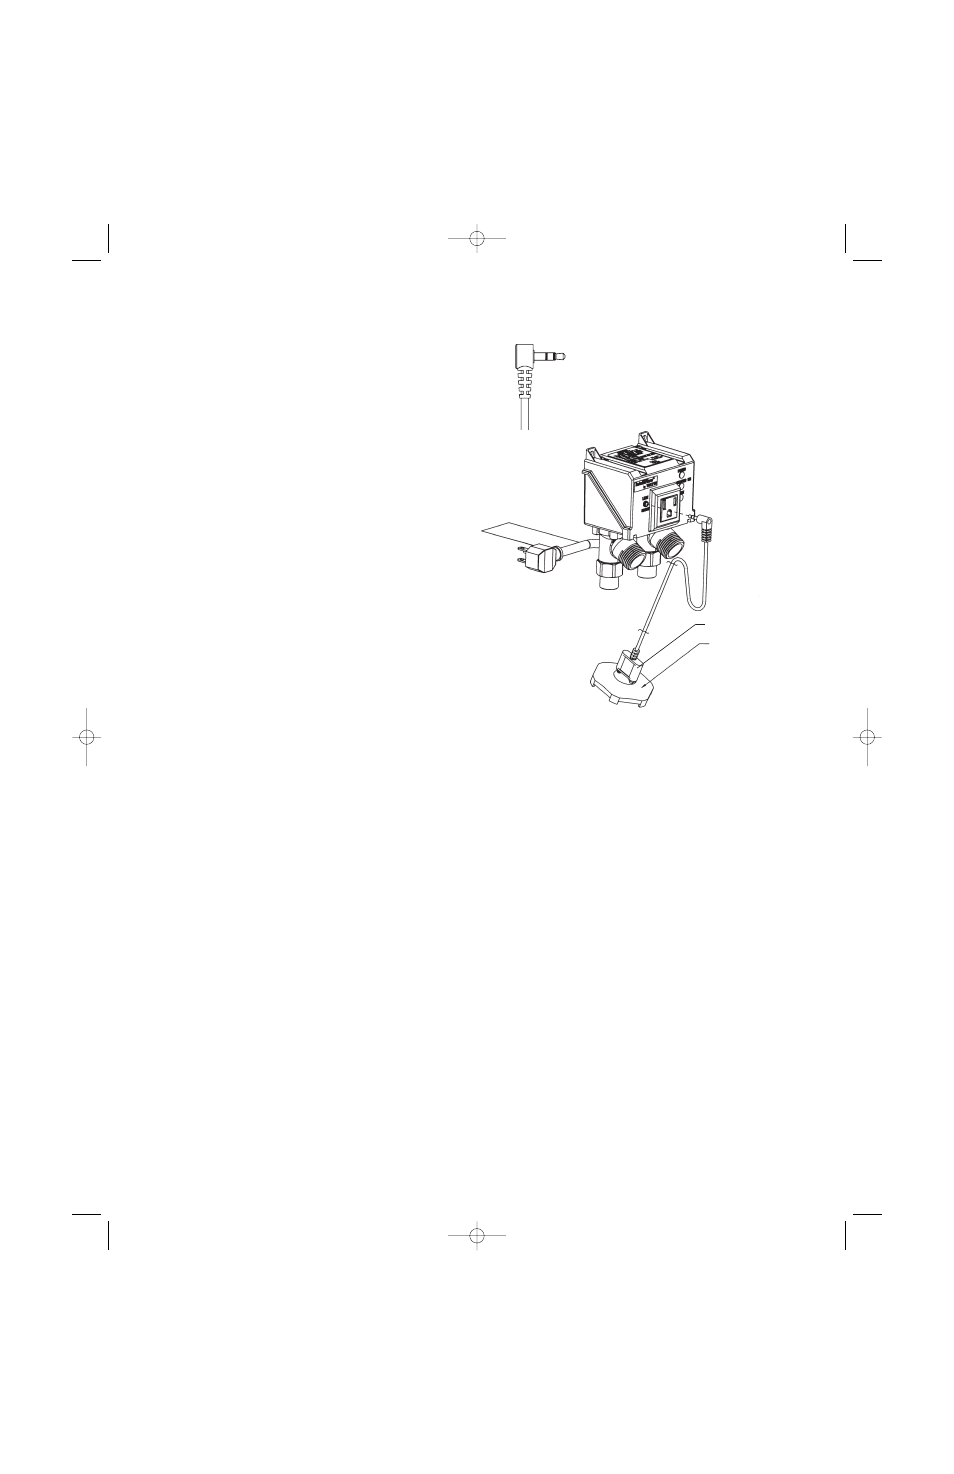
1. Insert the leak sensor contacts into the two holes on the top
of the sensor base until the plug comes to a stop (Figure 2).
2. Place the sensor base on the floor behind the washing machine
as close to the fill hoses as possible. Insure that the sensor base
is lying flat with all feet in contact with the floor surface.
3. Insert the leak sensor plug (Figure 1) into the leak sensor
receptical on front panel (Figure 2).
Some washing machine models include circuitry that causes a
slight current draw at all times. These models when connected
to the IntelliFlow
®
can cause the water supply to be energized
continuously (Yellow LED: on). Calibration allows the IntelliFlow
®
to “learn” the off or standby current draw of the washing
machine to prevent this condition.
Calibration: (Startup)
Calibration must be performed with the washing machine in the
off position.
1. Before plugging in the IntelliFlow
®
power cord into an electri-
cal receptacle, ensure that the leak sensor plug (Figure 1) is
unplugged from the IntelliFlow
®
unit (Figure 2).
2. Plug the IntelliFlow
®
power cord into an electrical receptacle.
The green LED lamp should be on and stay on continuously.
The red LED lamp should light for a few seconds then start
to blink on and off, as an indication that the leak sensor is
not plugged in.
3. Be sure that the washing machine is off. Plug the washing
machine into the IntelliFlow
®
’s electrical outlet.
4. Plug the leak sensor plug into the leak sensor receptacle on
the front panel. This will calibrate the IntelliFlow
®
to the wash-
ing machine's off or standby position current draw. During the
calibration sequence, the red LED lamp will remain lit for
approximately 3-5 seconds. When calibration is complete the
red LED lamp will blink four (4) times and shut off.
Calibration using IntelliTimer Accessory:
Calibration must be performed with the washing machine in the
off position.
To calibrate the IntelliFlow
®
for use with the IntelliTimer be sure
that the washing machine is off and ensure that the power sup-
ply to the IntelliTimer is plugged into the IntelliFlow
®
unit.
Remove the leak sensor plug (Figure 1) from the receptacle, wait
5 seconds, then reinstall the sensor plug. During the calibration
sequence, the red LED lamp will remain lit for approximately 3-5
seconds. When calibration is complete the red LED lamp will
blink four (4) times and shut off.
Notes:
The IntelliFlow
®
is designed to maintain its calibration in the
event of a power failure. Should calibration ever be required, fol-
low the procedure below.
Recalibration:
Calibration must be performed with the washing machine in the
off position.
To recalibrate the IntelliFlow
®
, be sure that the washing machine
is off. Remove the leak sensor plug (Figure 1) from the recepta-
cle, wait 5 seconds, then reinstall the leak sensor plug. During
the calibration sequence, the red LED lamp will remain lit for
approximately 3-5 seconds. When calibration is complete the
red LED lamp will blink four (4) times and shut off.
Sensor Base
Sensor Contacts
Figure 1
Sensor Plug
Figure 2
IntelliFlow
®
Calibration Procedure
IS-A2C-M1-A2C-WB-M1.qxd 6/22/09 2:30 PM Page 4