Watts TWS User Manual
Series tws, Wall hydrant, Installation instructions
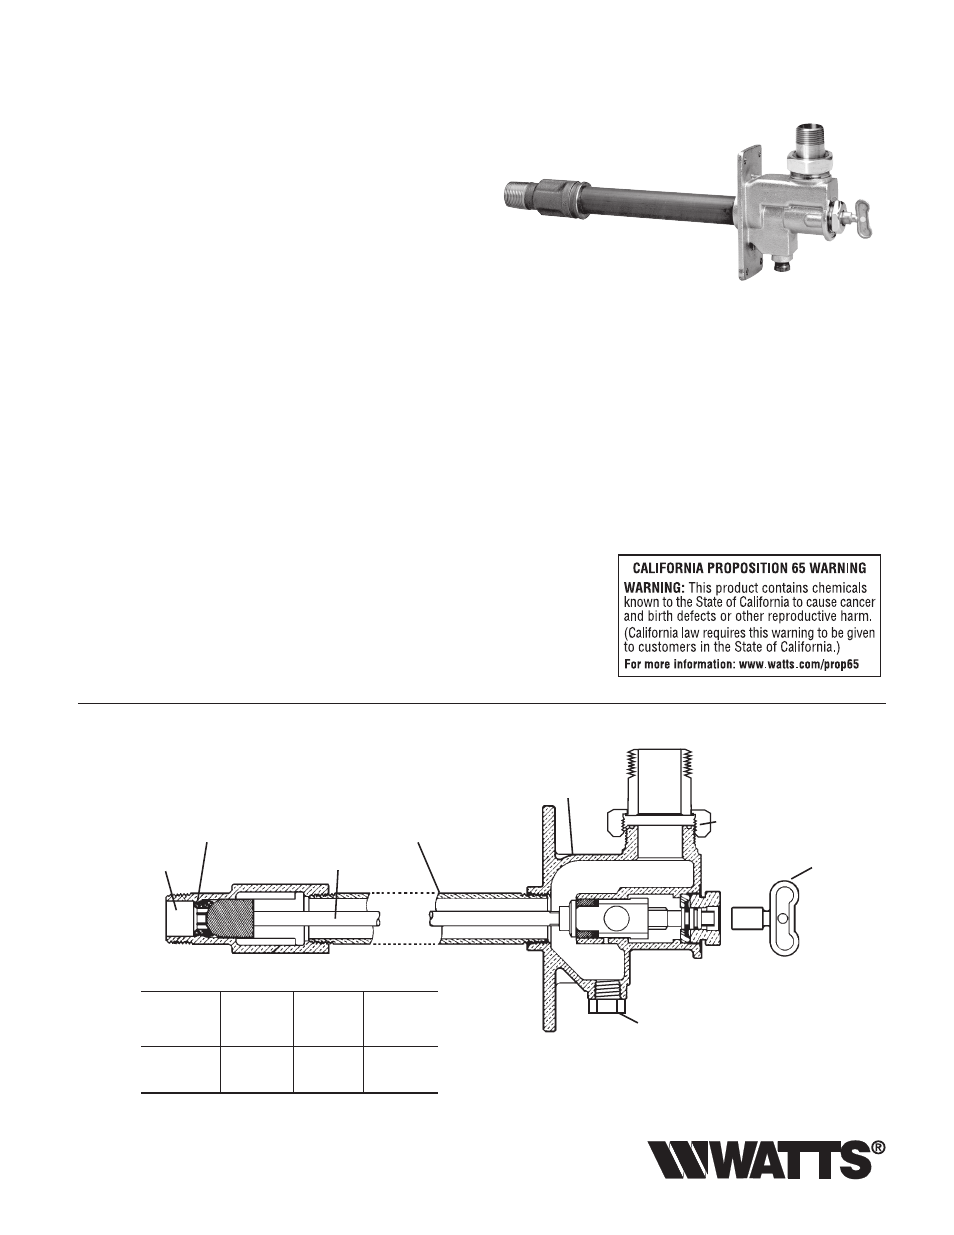
IS-TWS
O-ring
Plunger Assembly
Valve Body
Seat
Union Nut
Drain Plug,
Blow Down
Installation Instructions
1. Drill a 1
7
⁄
8
" diameter hole in the wall and insert the barrel
through the wall.
2. Determine system requirements:
a. If using a vacuum breaker, install the union outlet of the
TWS Hydrant in the vertical up position (see Fig. 1 and Fig. 2).
b.
If using a Reduced Pressure Assembly, install the union
outlet of the TWS Hydrant in the vertical up orientation (see
Fig. 1 and Fig. 3).
Watts Regulator suggests the use of the Watts Series
U009AQT for added installation savings.
c.
If using a Double Check Assembly in meter box (see Fig. 4
and Fig. 5), install the union outlet in the vertical down posi-
tion.
3. Secure to the wall, anchoring through the faceplate.
4. Connect the threaded
3
⁄
4
" or 1" (20 or 25mm) inlet to the do-
mestic supply. (see Fig. 1)
5. If the inside connection is to be a sweat (soldered) connection,
turn hydrant key counterclockwise to the full open position.
Wrap hydrant side connection with a wet rag and/or heat sink
before applying heat.
6. Restore water supply, slowly open hydrant and fl ush thor-
oughly.
7. Connect union outlet to the backfl ow preventer.
Note: TWS does not include Backfl ow Prevention Assembly.
Consult local codes for proper protection.
Note: The Watts TWS is designed for maximum fl ow and
should be operated in the wide open position. The TWS hy-
drant should not be used as a throttling valve.
Figure 1
Head Body
Key
Series TWS
Wall Hydrant
Sizes:
3
/
4
" and 1" (20 and 25mm)
Size
3
⁄
4
" and 1" (20 and 25mm)
Nom.
Pipe
Stem
Model No.
Distance
Length
Length
in. mm in. mm in. mm
TWS-8
8.0
200
9.0 229 12.3 312
TWS-10
10.0 255 11.0 279 14.3 363
TWS-12
12.00 305 13.0 330 16.3 414
TWS
IS-TWS.indd 1
9/5/08 2:15:13 PM