Installing the a2c-m1 intelliflow – Watts A2C-WB User Manual
Page 2
2
Installing the A2C-M1 IntelliFlow
®
1.
Shut off electrical power supply.
2.
Shut off both hot and cold water supply lines.
3.
If retrofitting to an existing installation, disconnect the wash-
ing machine hoses from the existing shutoff valve(s).
4.
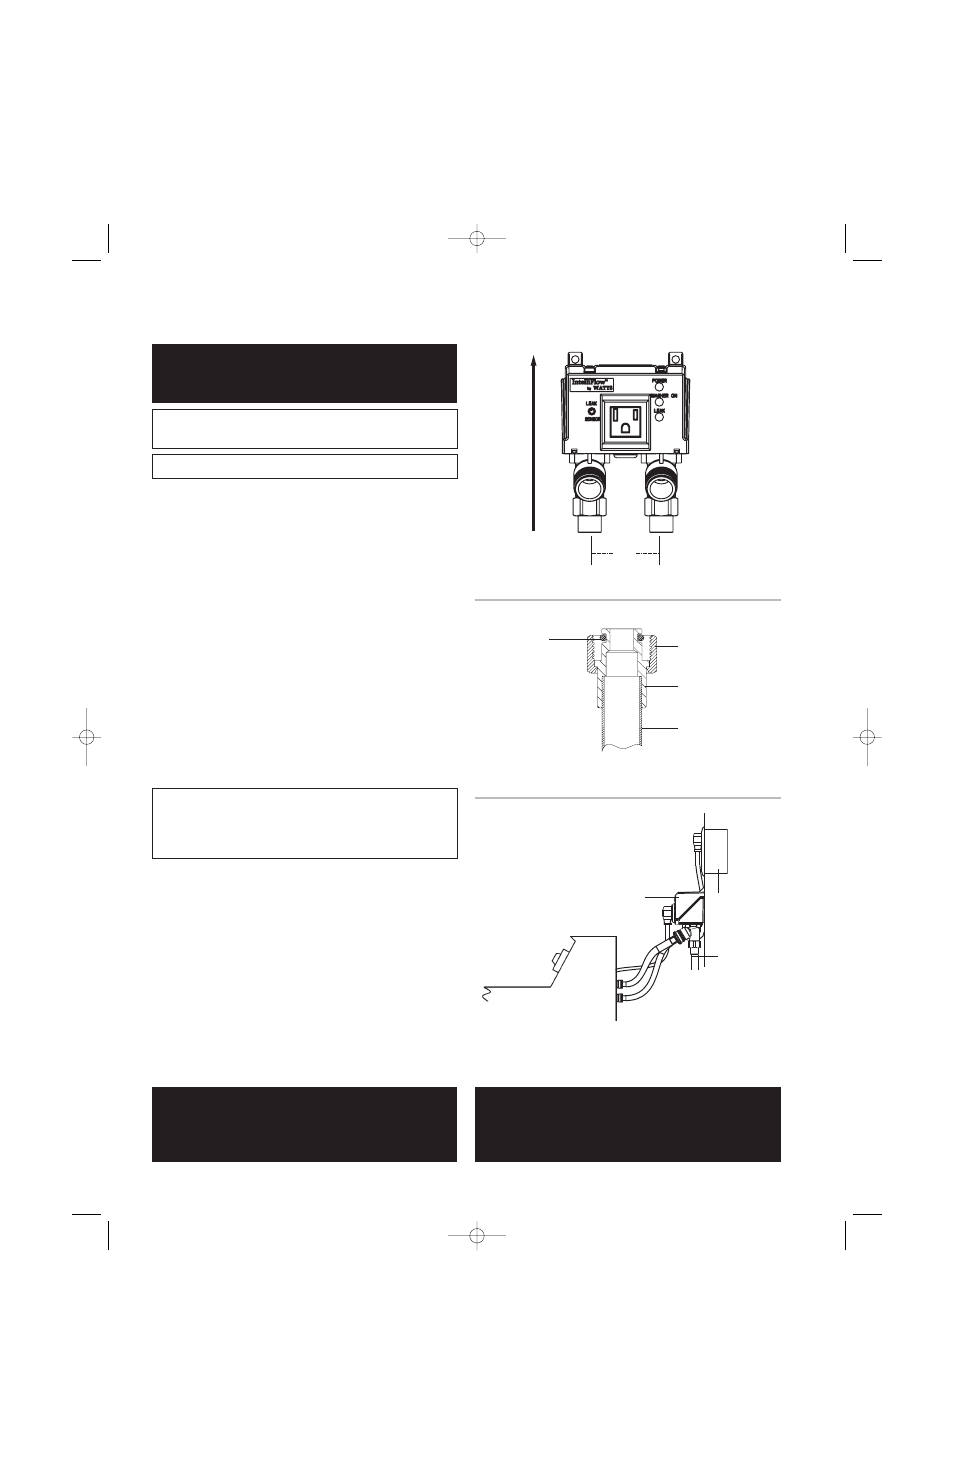
Loosen the two (2) adapter nuts and remove both adapters
from IntelliFlow
®
valve body.
5.
Place adapter nuts over piping prior to soldering adapters.
6.
Solder adapters onto piping.
Note: Piping must be 2
3
⁄
8
" on center (Figure 3).
7.
Place O-rings on adapter grooves (Figure 3A).
8.
Align and slip the valve body over adapters. Tighten adapter nuts.
Caution: Do not over-tighten nuts.
Caution: To avoid cross threading, check thread alignment.
9.
Connect the washing machine hoses to the IntelliFlow
®
’s hot
and cold water outlets.
10. Plug the washing machine into the IntelliFlow
®
’s electrical outlet.
Note: Appliance current rating must not exceed 15 amps.
11. Plug the IntelliFlow
®
’s power cord into a house electrical
receptacle (Figure 4).
Note: The IntelliFlow
®
requires a 120VAC, 60Hz, 15 amp
ground-fault protected receptacle.*
IMPORTANT: The IntelliFlow
®
will detect any current flow to
the washing machine when the washing machine is off. The
IntelliFlow
®
must be calibrated to adjust the current flow
threshold required to activate the shutoff valves. To calibrate
the IntelliFlow
®
see Calibration: (Startup) on page 4.
12. Turn on both hot and cold water supply lines, and check for leaks.
13. If there are no leaks, turn on the electrical power. Installation
of the A2C-M1 IntelliFlow
®
is now complete.
*Ground Fault Interrupter – A GFI circuit is not required
for proper operation of the IntelliFlow
®
, but is strongly
recommended as a safety device.
WARNING:
Power MUST be off during installation or
servicing of the valve!
IMPORTANT: Do not plug valve into supply circuit
until completion of assembly.
For Vertical Installation Only!
Figure 3
Figure 3A
Figure 4
2
1
⁄
2
"
Install Upright
O-Ring
Adapter Nut
Adapter
Water Supply Piping
Power supply
ground fault
protected
Water supply
Washer
Watts
A2C-M1
IMPORTANT:
Do not plug valve into electrical supply circuit until
you have completed installing the unit and
reconnecting the water supply lines.
CAUTION:
Use of the Watts Automatic Washing Machine Valve
outlet for appliances other than a washing machine
is not recommended and voids the warranty.
IS-A2C-M1-A2C-WB-M1.qxd 6/22/09 2:30 PM Page 2