Watts 650 00AP User Manual
Watts Accessories for electrical
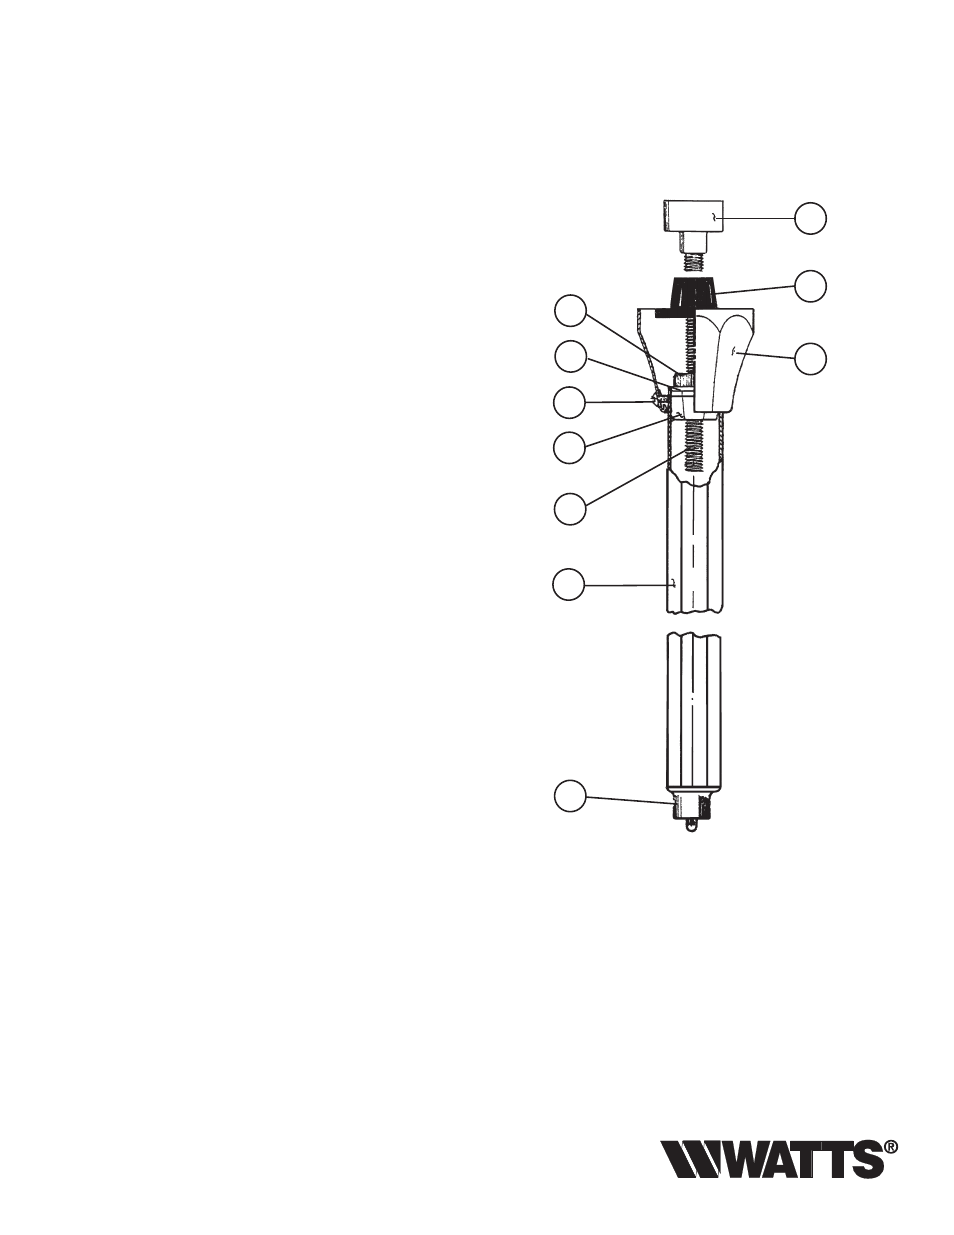
Fig. No. 65000AP
All Purpose Basin Lavatory Legs for China or Iron Enamel Basin
Installation Instructions
These all purpose basin lavatory legs can be used in con-
junction with china or iron enamel basins.
When using these legs on china basin, discard universal
adapter, item (7B).
When using these legs on iron enamel basin, discard rub-
ber hat washer, item (7A) and hex bell escutcheon, item
(8) with screw, item (9).
1. Press in threaded top plug (2) into the hexagonal leg (1).
2. Press in pointed bottom plug (3) into other end of hexago-
nal leg (1).
3. Thread on square nut (6) onto one end of threaded rod (4)
approximately 1
1
⁄
2
" from end of rod or as required.
4. Slip on round washer (5) over end of rod (4) and thread rod
into threaded top plug (2).
5. a. For China Basin
Press on rubber has washer (7A) onto other open end of
threaded rod (4) and discard universal adapter (7B).
b. For Iron Enamel Basin
Thread on universal adapter (7B) onto other open end of
threaded rod (4) and discard rubber hat washer (7A) and
hexagonal bell escutcheon (8).
6. For China Basin only slide on hexagonal bell escutcheon (8)
onto hex leg (1) with round diameter facing upwards and
screw (9) facing the side of hex leg (1).
7. Place completed leg assembly under the basin.
a. For China Basin
The rubber hat washer (7A) should fit into the hole on the
underside of the basin.
b. For Iron Enamel Basin
The universal adapter (7B) should engage the protrusion
on the underside of the basin.
8. Thread up the threaded rod (4) until there is sufficient ten-
sion on the hex leg (1).
9. For China Basin - Bring up hex bell escutcheon (8) to cover
exposed rod and tighten screw (9).
10. Repeat the same steps on the second leg.
NOTE: When installing legs over a smooth tile floor, it is sug-
gested that you drill a small diameter hole into the tile to permit
the pointed end of the bottom plug (3) to anchor itself to the
floor to prevent sliding.
7B
8
6
5
9
2
4
1
7A
3
IS-65000AP/650003