Dulce Systems PRO RXqp User Manual
Page 7
Page 13
PRO RXqp Installation and User’s Manual
4.2.
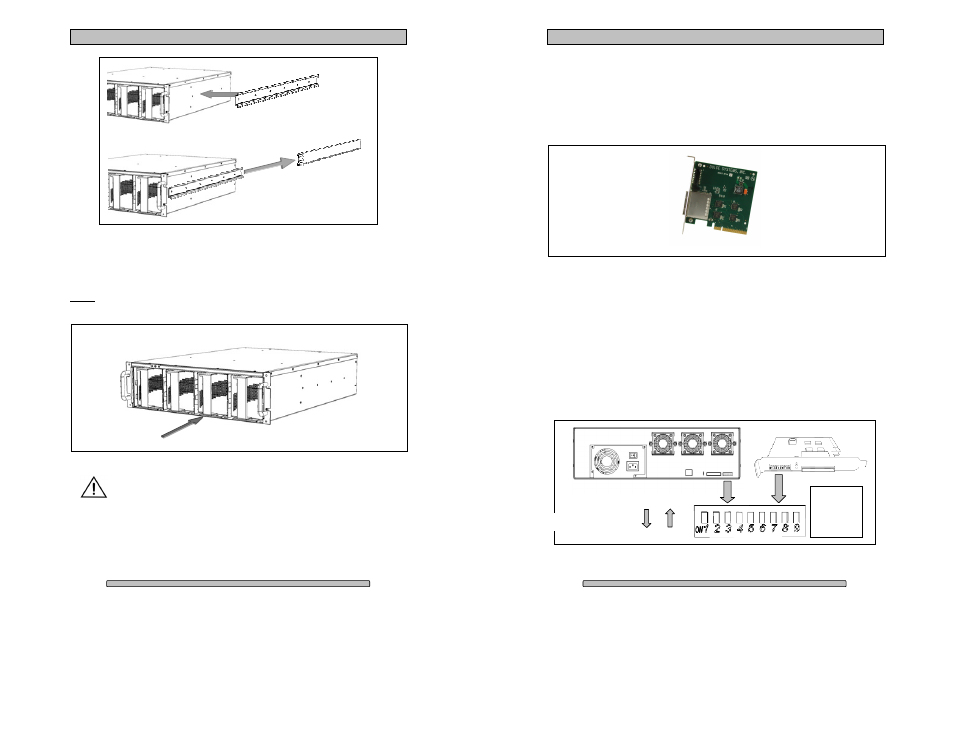
Disk Module (Pack) Installation
Install each Disk Module (Pack) into an open slot. Pull the Lock Pin down and
insert drive pack fully, release Lock Pin to secure.
Note: On a new installation the order in which the Disk Modules (Packs) are
installed does not matter. It will matter once the array(s) are configured.
DO NOT ship the PRO RXqp with the Disk Modules (Packs) installed,
the Disk Modules (packs) MUST be packaged separately in a single or
multi-pack to properly protect them during shipment.
Slider
Rail mounted
to rack.
Page 14
PRO RXqp Installation and User’s Manual
4.3.
Host Bus Extender Card
Turn off the computer and unplug the power source before proceeding with the
Host Bus Extender (HBE) Card installation.
A PCI-e HBE Card is supplied with your PRO RXqp. The HBE Card will require
an available PCI-e slot in your computer.
PCI-e and PCI-x are not compatible or interchangeable with each other. A PCI-e
card can only be installed in a PCI-e equipped computer. Some computers
support both PC I-e and PCI-x such as the HP xw series but not Apple Macs.
4.3.1. Switch Settings
Determine the correct switch settings. Set both the HBE and PRO RXqp to same
configuration.
The HBE Card and the PRO RXqp enclosure can operate at 1, 4 or 8 lane speed
configurations. The maximum speed will be determined by the capability and
selection of the computer’s PCI-e slot. The HBE Card and the PRO RXqp must
be configured to match the speed of the computer PCI-express slot.
Switch position
ON OFF
PRO
RXqp &
HBE
same
settings
PC I-express Host Bus Extender (HBE)