Dulce Systems PRO RXqp User Manual
Page 21
Page 41
PRO RXqp Installation and User’s Manual
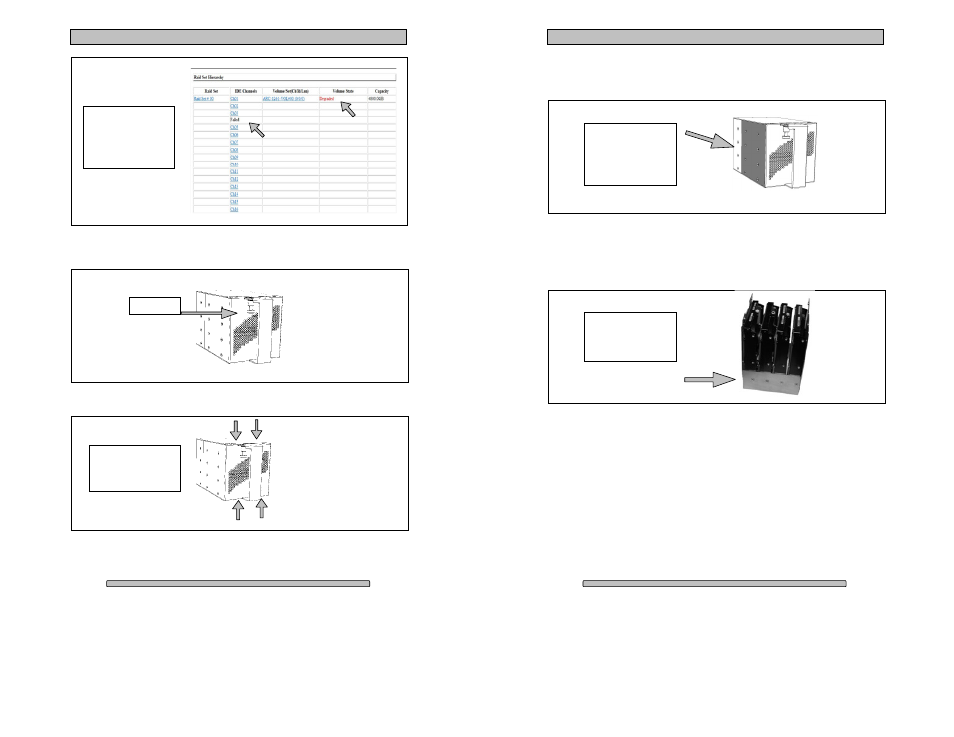
Pull the Lock Pin down and pull the Disk Module (Pack) out that has the failed
disk drive.
First remove the 4 screws located here using a Phillips screwdriver:
Remove these 4
screws first. 2 screws
on top, 2 screws on
the bottom.
Lock Pin
This
screen
shot
denotes disk drive #4
has failed. Disk drive
#4 would be the 4
th
disk drive down in Disk
Module (Pack) #1.
Page 42
PRO RXqp Installation and User’s Manual
After those screws are removed set the Disk Module (Pack) on the table with the
handle facing up and remove the 16 screws (8 on each side) from the colored
portion of the Disk Module (Pack).
After all those screws are removed set them aside. Separate the D isk Module
(Pack) revealing the 4 disk drives. Now we want to identify the last 2 screws
needed to remove the downed drive. Unscrew the 2 screws (one on each side)
needed to remove the downed drive.
Once you have the downed drive removed, insert the new drive and secure it
with the 2 screws you just removed before sliding the other half of the Disk
Module (Pack) back in place.
When you have the other half of the Disk Module (Pack) in place over the 4 disk
drives secure it with the 16 screws you removed. Do this while the handle of the
Disk Module (Pack) is on top. This will make it easier to line the screws up.
Next is to re-install the original 4 screws you removed.
Remove the final 2
sc rews needed to
remove the downed
drive.
Remove the 8 screws
from the colored
portion of the Disk
Module (Pack) on
each side. 16 screws
total.