Installation – Dulce Systems PRO RXqp User Manual
Page 6
Page 11
PRO RXqp Installation and User’s Manual
3.3.
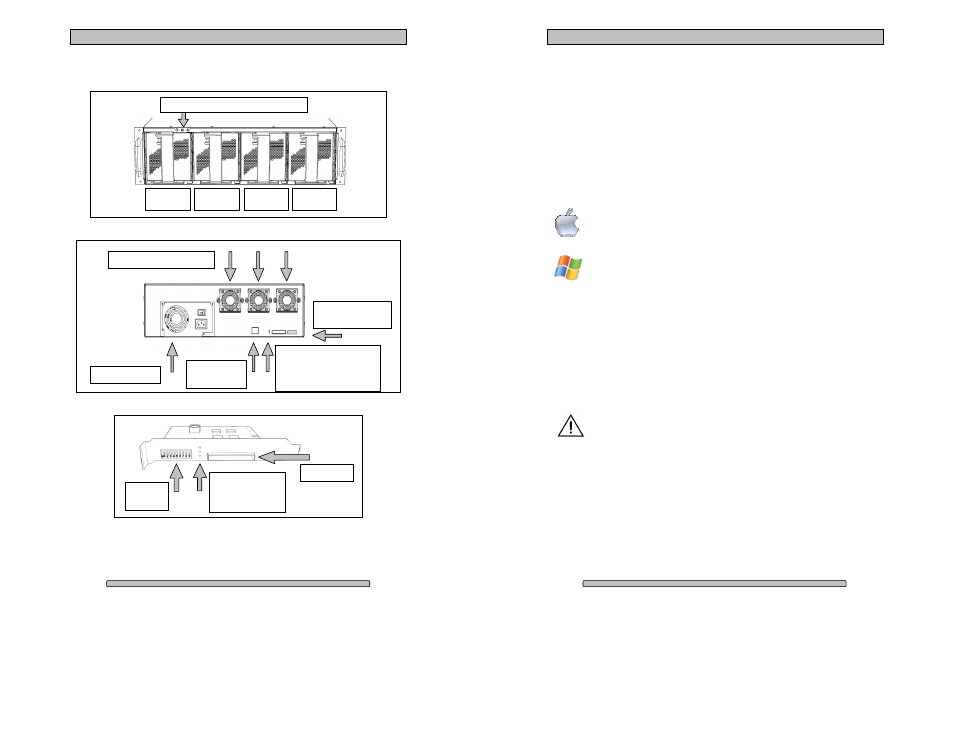
Front, back and HBE
Front view
Rear view
Host Bus Extender Card
Config
Switches
Uplink Port
Link Status:
Cable Installed
Power On
4 or 8 Lane Mode
Uplink Port &
Config Switches
Management
Ethernet port
Power Supply
Removable Cooling Fans
Link Status:
•
Cable Installed
•
Power On
•
4 or 8 Lane Mode
Mute Button, Fan Alarm, Temp Alarm
Quad Pack
Dri ve 1-4
Quad Pack
Dri ve 5-8
Quad Pack
Drive 9-12
Quad Pack
Drive 13-16
Page 12
PRO RXqp Installation and User’s Manual
4. Installation
Please follow these few steps to install the PRO RXqp. This process typically
takes about 20 minutes to complete.
Overview of installation:
• Rack mount installation
• Disk Module Installation
• Host Bus Extender Card Installation
• PCI-e xpress Extender Cable Installation
• Driver Installatio n
• RAID Console Installa tion
The PRO RXqp ship pre-configured in RAID 5 mode and pre-formatted
for Apple Mac OS X. After the driver installation step and a reboot, the
PRO RXqp icon will appear on the desktop ready for use.
Windows operation will require a format/partition process. The PRO
RXqp ships already pre-configured in RAID 5. After the driver
installation, simply run the Windows Disk Management utility to
prepare the RAID for Windows usage.
4.1.
Rack mount Installation
The PRO RXqp can be rack mounted to a standard 19” rack. 3u height space is
required. An optional rack mount kit is available for 24” and 30” depths.
Mount the left and right rails to the rack, ensure sufficient 3u space is available.
Adjust depth as required.
Mount the left and right sliders on the PRO RXqp.
The PRO RXqp can be heavy, install the PRO RXqp to the rack before
installing the drives will make it easier. Install the PRO RXqp carefully
on the rack by aligning the sliders in the rails.