Set the network address, 8 point i/o ethernet/ip adapter publication – Rockwell Automation 1734-AENT Point I/O Ethernet Adapter Installation Instructions User Manual
Page 8
8 POINT I/O EtherNet/IP Adapter
Publication
1734-IN590B-EN-P - February 2005
4. Slide the safety end cap up to remove. This exposes the
backplane and power interconnections.
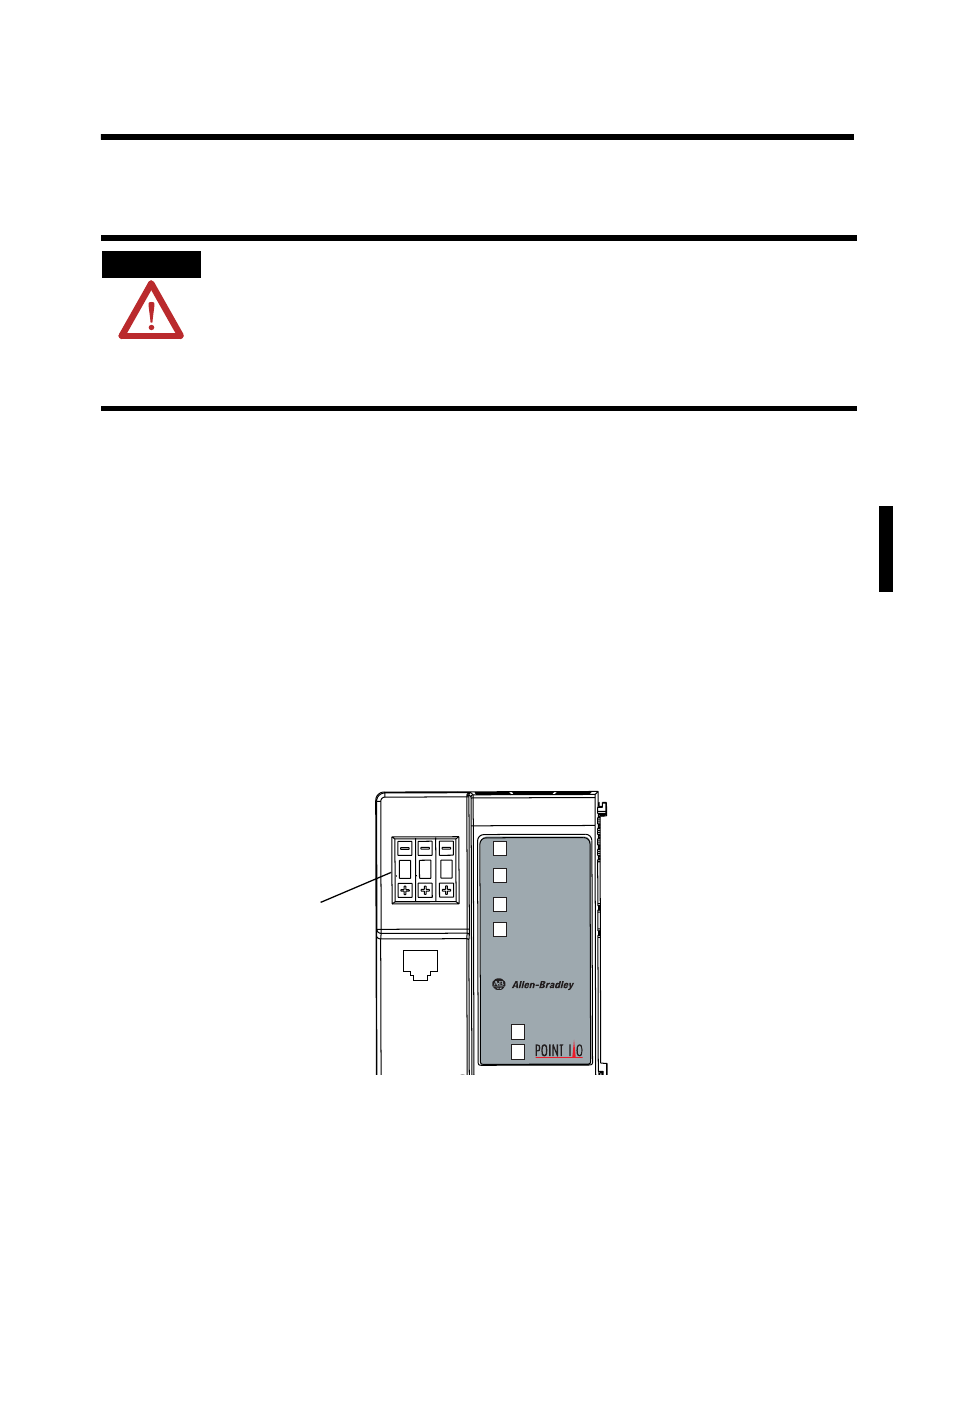
Set the Network Address
The adapter ships with the thumbwheel switches set to 999 and
DHCP enabled. You can set the network Internet Protocol (IP)
address 3 ways:
• Use the thumbwheel switches on the module
• Use a Dynamic Host Configuration Protocol (DHCP) server,
such as Rockwell Automation BootP/DHCP
• Retrieve the IP address from nonvolatile memory
The adapter reads the thumbwheel switches first to determine if the
switches are set to a valid number. You set the node address using
the 3-position thumbwheel switch. Press the + or - buttons to change
the number. Valid settings range from 001 to 254. When the switches
are set to a valid number, the adapter’s IP address is 192.168.1.xxx
(where xxx represents the number set on the switches). The adapter’s
ATTENTION
Do not discard the end cap. Use this end cap to
cover the exposed interconnections on the last
mounting base on the DIN rail. Failure to do so
could result in equipment damage or injury from
electric shock.
Module
Status
Network
Activity
Network
Status
1734-AENT
PointBus
Status
Field
Power
System
Power
0 2
0
43248
Network Address
Thumbwheel
Press either the +
or - buttons to