Ds200, Ds300 installation – Rockwell Automation 1397 200-300HP AC Line Disconnect Inst. User Manual
Page 2
1397 300HP AC Line Disconnect
2
1397-5.27 October, 1997
ON
OFF
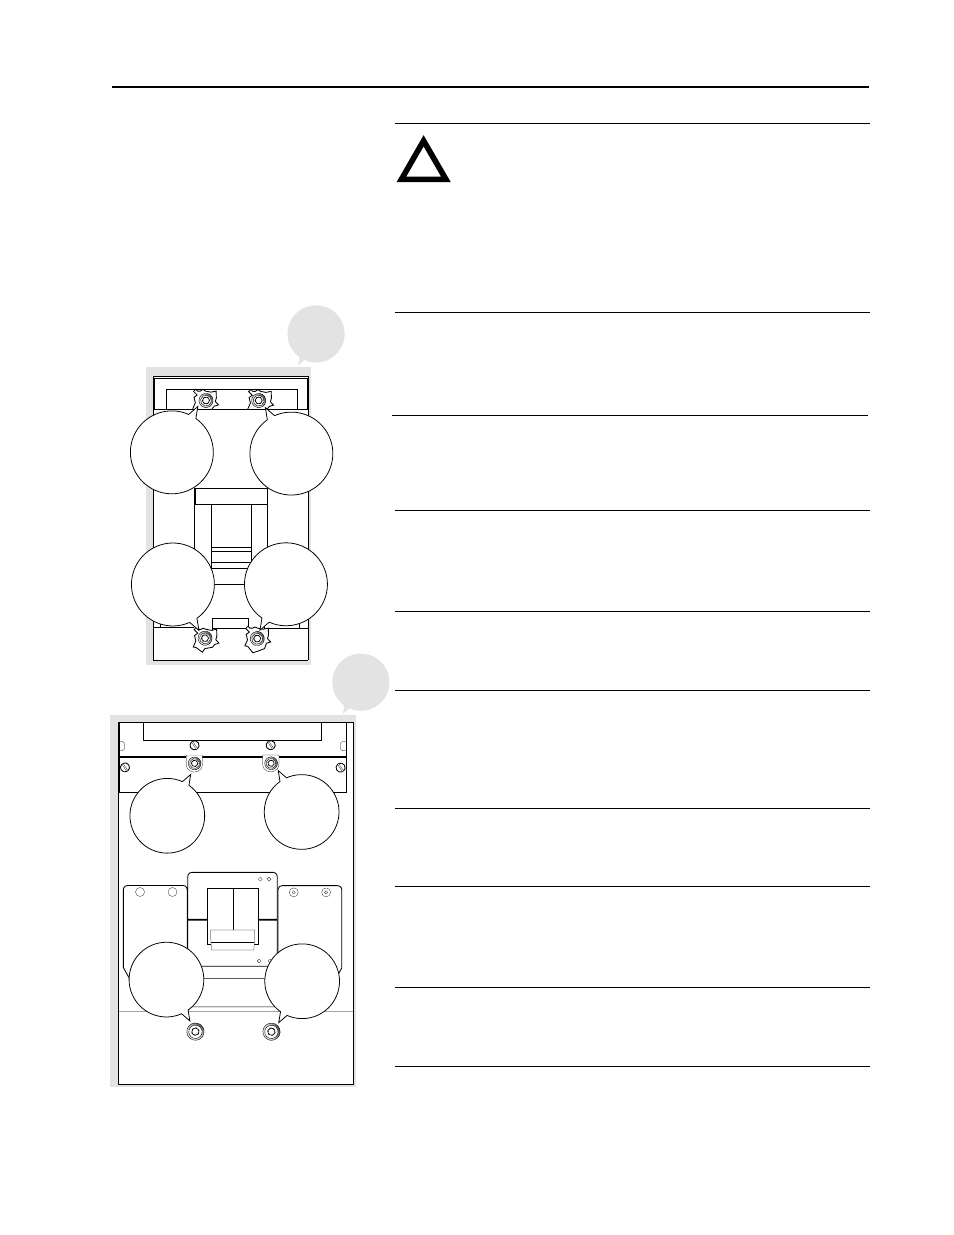
DS300 Disconnect
ON
OFF
M6 Bolt
&
Lockwasher
Inserted
Under
Lug Cover
DS200 Disconnect
M6 Bolt
&
Lockwasher
Inserted
Under
Lug Cover
M6 Bolt
&
Lockwasher
Inserted
Under
Lug Cover
M8 Bolt
&
Lockwasher
Mounting
Slot
M8 Bolt
&
Lockwasher
Mounting
Hole
M8 Bolt
&
Lockwasher
Mounting
Hole
M8 Bolt
&
Lockwasher
Mounting
Slot
M6 Bolt
&
Lockwasher
Inserted
Under
Lug Cover
Insulator
Insulator
❐
2
Lay the disconnect switch on it’s side with the cable lugs and
box terminals on the top facing away from you. Put (1) M6 or
M8 split lockwasher onto each of the M6
✕
90 or M8
✕
120 bolts.
❐
1
Remove and lockout all incoming power to the drive. Remove
the plastic line fuse cover and disconnect the incoming power
lines from the drive by removing the nuts at terminals 181, 182
&
183.
DS200
&
DS300 Installation
ATTENTION:
Electric Shock can cause injury or death.
Remove all power before working on this product.
The drive is at line voltage when connected to incoming AC
power. Before proceeding with any installation or
troubleshooting activity, disconnect, lockout and tag all
incoming power to the drive. Verify with a voltmeter than no
voltage exists at terminals L1, L2
&
L3 on the drive input
power terminal block.
!
❐
3
Insert (1) bolt
&
lockwasher into one the disconnects’s upper
bolt holes, then insert another bolt
&
lockwasher into the bottom
bolt hole diagonally opposite it.
❐
4
Place the insulator onto the back of the disconnect with the
double row of holes toward the bottom. The holes on the insulator
should go over the ends of the bolts inserted in
Step 2
.