Connecting the system to a network, Stylus and holder – UVP BioDoc-It System User Manual
Page 8
BioDoc-It Imaging System
8
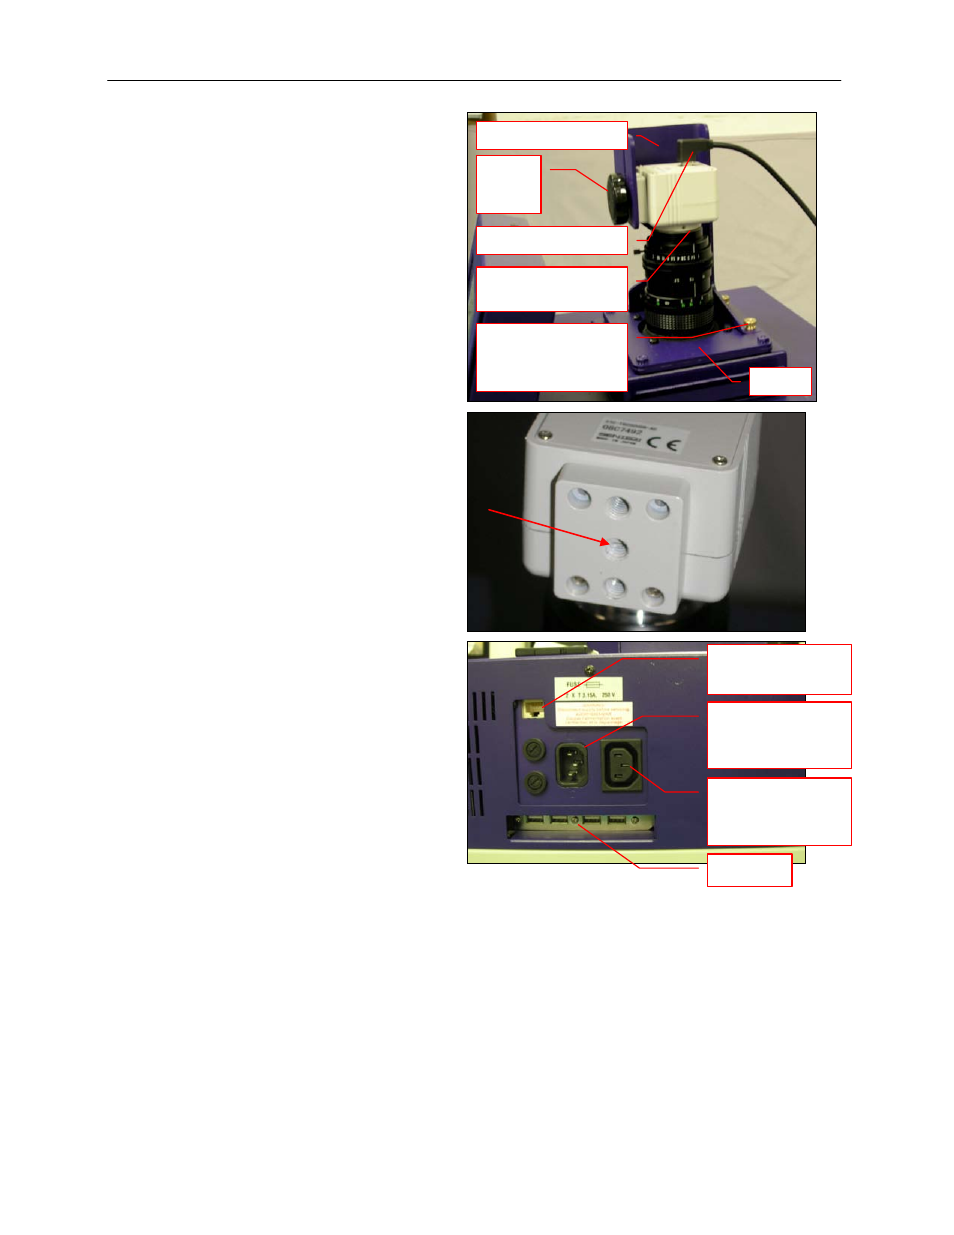
3. Using the four brass thumb screws provided,
secure the bracket to the base.
4. Slide the camera and lens assembly into the
camera bracket. Slide the lens through the
center hole in the gasket on the base and
use the gasket to form a light-tight seal
around the lens.
5. Insert and tighten the black thumb screw and
washer in the central hole in the camera to
secure the camera to the bracket.
6. Plug the camera cable into the top of the
camera and the other end into a USB port on
back of the darkroom.
7. Connect the jumper cord from the darkroom
to the transilluminator.
8. Connect the main power cord from the back
of the darkroom to a surge-protected power
outlet.
Connecting the System to a Network
The BioDoc-It has wired networking capability for saving and sharing files on a network. To set up the network
connection, plug a networked Ethernet cable into the rear of the BioDoc-It. Then, minimize the TS software
screen to access the Windows Start button and network setup functions by touching the Windows logo button
on the lower-right corner of the TS software. Contact your organization’s network administrator for further
network configuration instructions. (Note: Connecting the BioDoc-It to a network is not required to operate the
system)
Stylus and Holder
The BioDoc-It screen is touch sensitive. Use the stylus included with the system to operate the software
controls. For easy access to the stylus when operating the system, remove the tape from the back of the stylus
holder and adhere it to the BioDoc-It. Slide the stylus into the holder.
Camera and lens
assembly
Camera USB cable
Brass thumb screws
secure the bracket
to the base
Connection for
jumper cord to the
transilluminator
Connection for the
main darkroom
power
USB port
Camera bracket
Black
thumb
screw
Base
Ethernet port (for
network capability)