Identifying the touch screen functions and tools, Using the functions and tools, Min / sec / msec – UVP BioDoc-It System User Manual
Page 14
BioDoc-It Imaging System
14
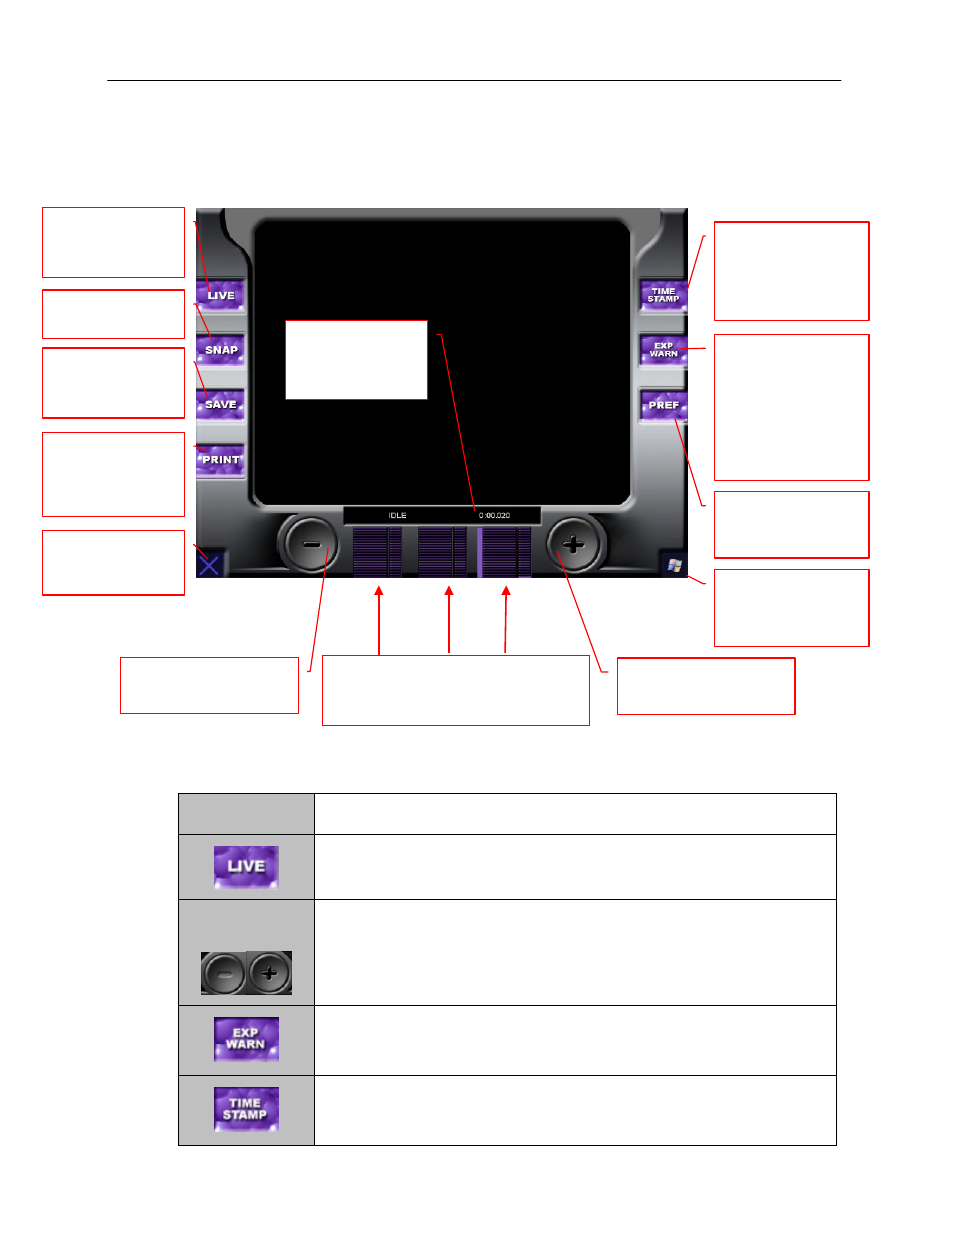
Identifying the Touch Screen Functions and Tools
Using the software touch screen allows convenient selection of image capture, save, print and other
functions of the system. Callouts are provided below to briefly describe the buttons.
Using the Functions and Tools
Tool/Function
Procedure
1. To see a preview of the image before snapping it, touch the LIVE button.
LIVE mode will be indicated in the status bar.
Adjust exposure
time
2. Adjust the exposure time by first selecting the time interval. Touch on the
corresponding bars, Minutes, Seconds, milliSeconds, from left to right,
respectively. These bars will be animated in LIVE/SNAP mode to show
progress as time elapses. Decrease or increase the time by touching the
minus or plus button respectively.
3. To view overexposed pixels, touch the EXP WARN button. Overexposed
pixels will be identified with a yellow or red color, depending on the how
saturated they are.
4. To add a date stamp to the image, touch the TIME STAMP button. This will
add UVP#####mm/dd/yy at the bottom right corner of the image. This
information is NOT burned into the image until the image is saved.
TIME STAMP
Adds a date stamp
to the image as
follows:
UVP####mm/dd/yy
EXP WARN
In Live Mode, the
system will show
overexposed pixels
in yellow
(overexposure) or
red (high
overexposure)
PREF
Navigate to the
Preferences screen
Windows Icon
Touch icon to go
access the Windows
desktop
OFF (X) – Shuts
down the TS
software
PRINT - Calls up
the Print dialog
box to choose print
options
SAVE
Store the captured
image
SNAP
Capture an image
LIVE
Preview an image
before snapping it
Decrease
integration time
Status Bar
Indicates mode of
operation and
exposure time
Min / Sec / mSec
Display time interval
Increase integration
time