Power outlet conversion, Installation, Hi300 – Regency Hampton HI300 Medium Wood Insert User Manual
Page 19
Hampton HI300 Wood Cast Insert
19
installation
07/23/08
918-378
HI300
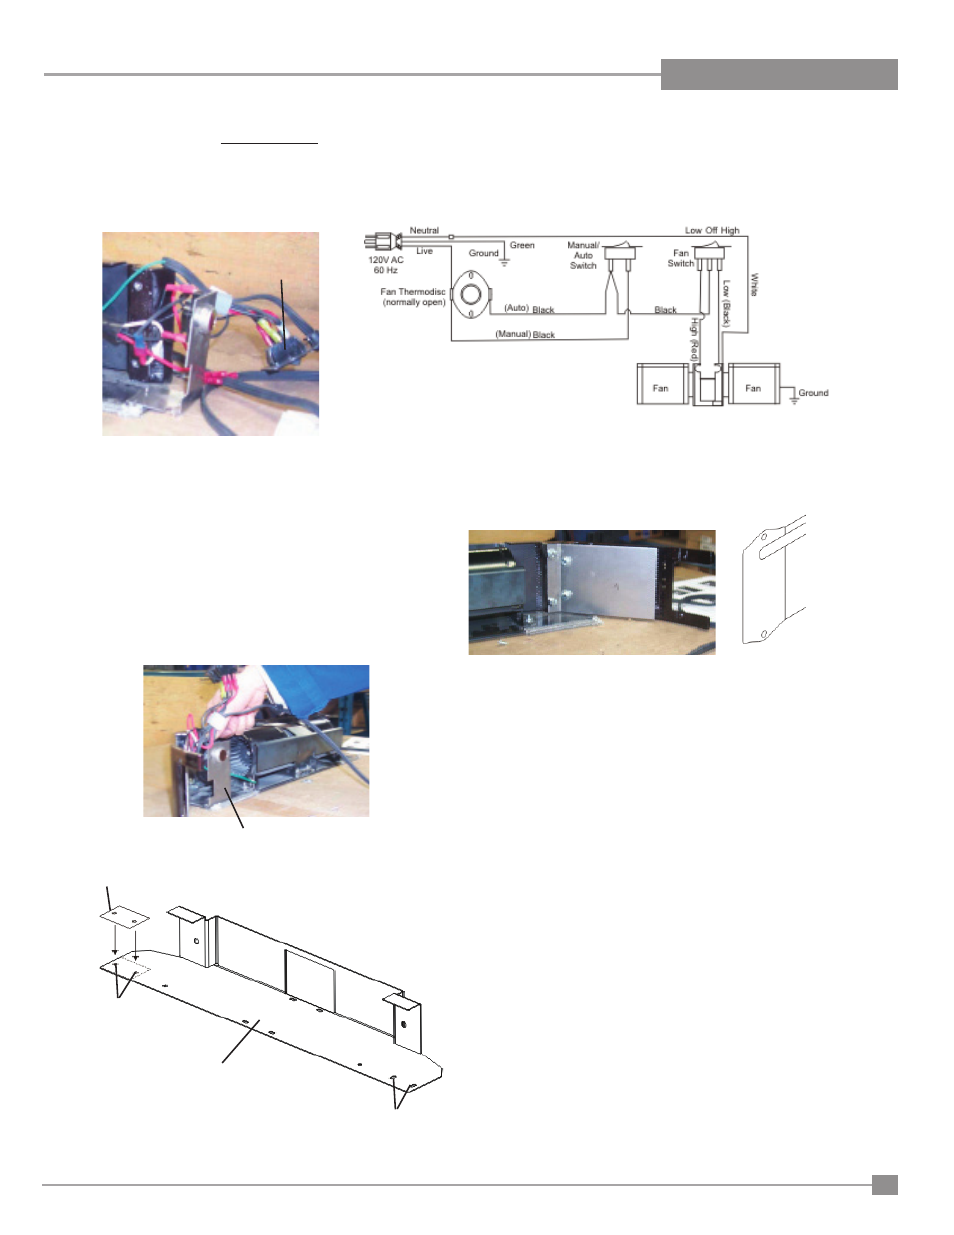
POWER OUTLET CONVERSION
10) Attach the thermodisc assembly to the mounting
holes located on the right side of the base of the
main fan body using the existing hardware - 2 bolts,
nuts and washers.
Important Note:
On older fan units these holes may require drilling.
Use template provided to drill holes. Place template
by aligning to the right corner of the thermodisc as-
sembly base. See Diagram 1.
11) Attach the new cover plate to the left side casting us-
ing 2x #6 32x3/8" Pan Head Phillips black screws.
Thermodisc Assembly
9) Remove the wires one at a time from the existing
switch plate, and attach each wire to the new switch
plate, each wire in the same position as it was on
the old switch plate (see wiring diagram). Discard
the old switch plate.
Switch
Plate
Left Cover Plate
Diagram 1
Thermodisc As-
sembly Base
Template (If required)
12) Attach the fan defl ector to the main fan body by
replacing the Phillips screw on the top of the fan
housing.
Location of Old
Thermdisc Holes
Location of New
Thermdisc Holes