Cast faceplate installation, Installation, Standard cast faceplate installation – Regency Hampton HI300 Medium Wood Insert User Manual
Page 11: Hi300
Hampton HI300 Wood Cast Insert
11
installation
standard cast faceplate
installation
12/23/10
918-300g
HI300
CAST FACEPLATE
INSTALLATION
Page 1 of 3
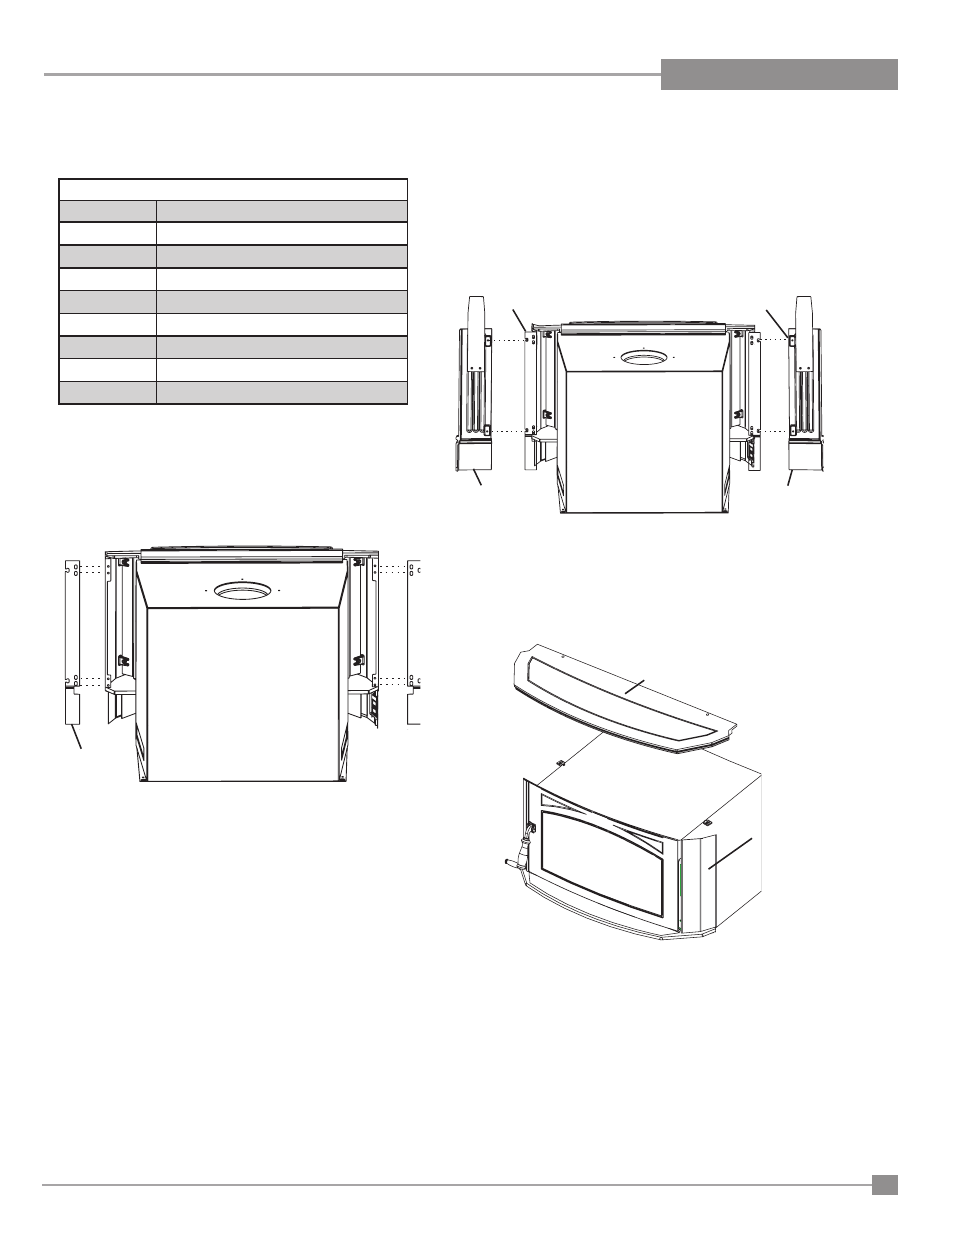
1) Secure the Side Mounting Brackets (packaged with Faceplate)
to the left and right side of the fi rebox using 4 bolts per mounting
bracket as shown in the diagram below.
Side
Mounting
Bracket
Backside of Unit Shown.
Backside of Unit & Faceplate Shown.
2) Secure the Left and Right Side Faceplate to the fi rebox by align-
ing the Mounting Holes with the Side Mounting Brackets taking
care to align vertically while each side rests on the hearth. Secure
using 1 bolt per bracket.
Side Mounting
Bracket
Mounting
Hole
Right Side
Faceplate
Left Side
Faceplate
3) Place Mantel Top onto the top of the fi rebox.
Mantel Top
Right Side
Cast
With the Mantel Top in place check to make sure there is no gap
between the nut retainer and the underside cast of the Mantel
Top. If there is a gap present you will need to lower that side cast
by loosening 2 bolts, see step 6 for bolt location (check to see if
level).
FACEPLATE CONTENTS LIST
Qty
Description
1
Left Side Faceplate
1
Right Side Faceplate
1
Top Faceplate
2
Side Mounting Brackets
4
1/4" - 20 x 1/2" Hex Head Bolts
4
1/4" Lock Washers
4
1/4" Flat Washers
2
47" Insulations