Installation, Fan installation, Serial no – Regency Hampton HI300 Medium Wood Insert User Manual
Page 17
Hampton HI300 Wood Cast Insert
17
installation
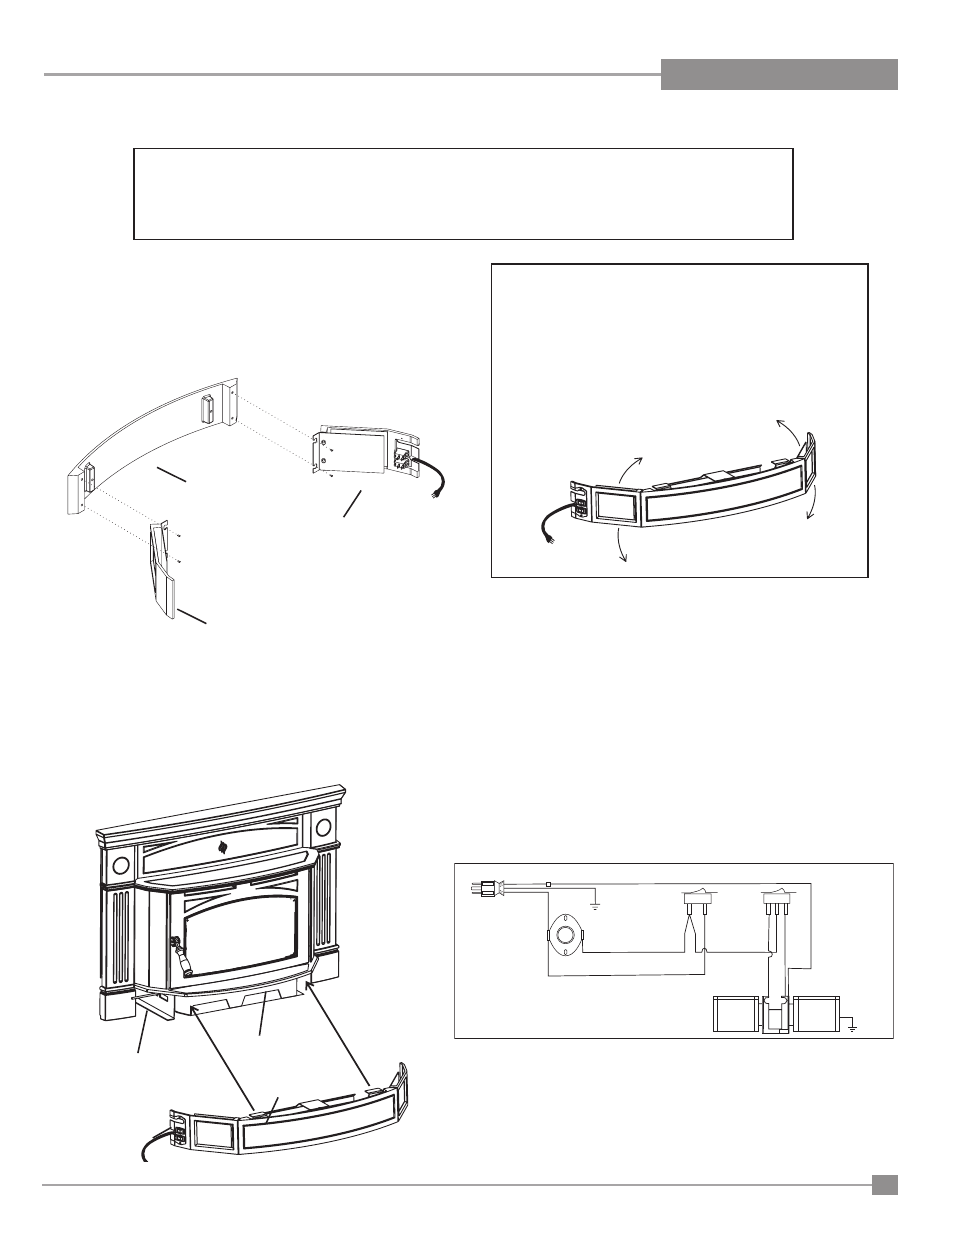
Backside of Fan Facia Shown.
Your fan should only be installed once the unit is in place in order
to prevent any damage to the fan.
1) Attach the Left and Right Side Fan Facia to the Front Fan
Facia by aligning the Side Facia screw slots with the hole
locations in the Front Fan Facia and secure using 2 screws
per side.
fan installation
3) Ensure that the power cord is not in contact with any hot stove
surfaces.
do not route poWer cord under
or in front of unit.
do not turn the fan on until your insert has reached operating
temperature or at least 30 minutes after starting fire.
Right Side
Fan Facia
Left Side Fan
Facia
Front Fan
Facia
2) Once the Fan Facia has been assembled carefully slide the
Fan into position by centering the Fan below the Ashlip and
align the Fan Support Clips with the Offset Clips under the
Ashlip.
note: the draft control rod is to fit through the top open-
ing in the switch plate.
iMportant
ensure that the left and right side fan facia do not
hit the sides of the faceplate when sliding the fan into
position as the casting may chip.
if the spacing between the side fan facia and the face-
plate requires adjustment, the side fan facia's can be
slightly pushed in or pulled out to fit accordingly.
Ashlip
Draft Control
Rod
Switch
Plate
Fan
Support Clips
Ground
Fan
Fan
Ground
Green
Neutral
Live
Whit
e
Fan
Switch
Manual/
Auto
Switch
Black
Black
High
(Black)
Low
(Red)
Black
Fan Thermodisc
(normally open)
120V AC
60 Hz
Blower/Fan Wiring Diagram
installer: Please record unit serial number here before installing blower.
Serial No.______________________________