Installation – Regency CI2600 Large Wood Insert User Manual
Page 21
CI2600/HI400 | wood insert
|
21
installation
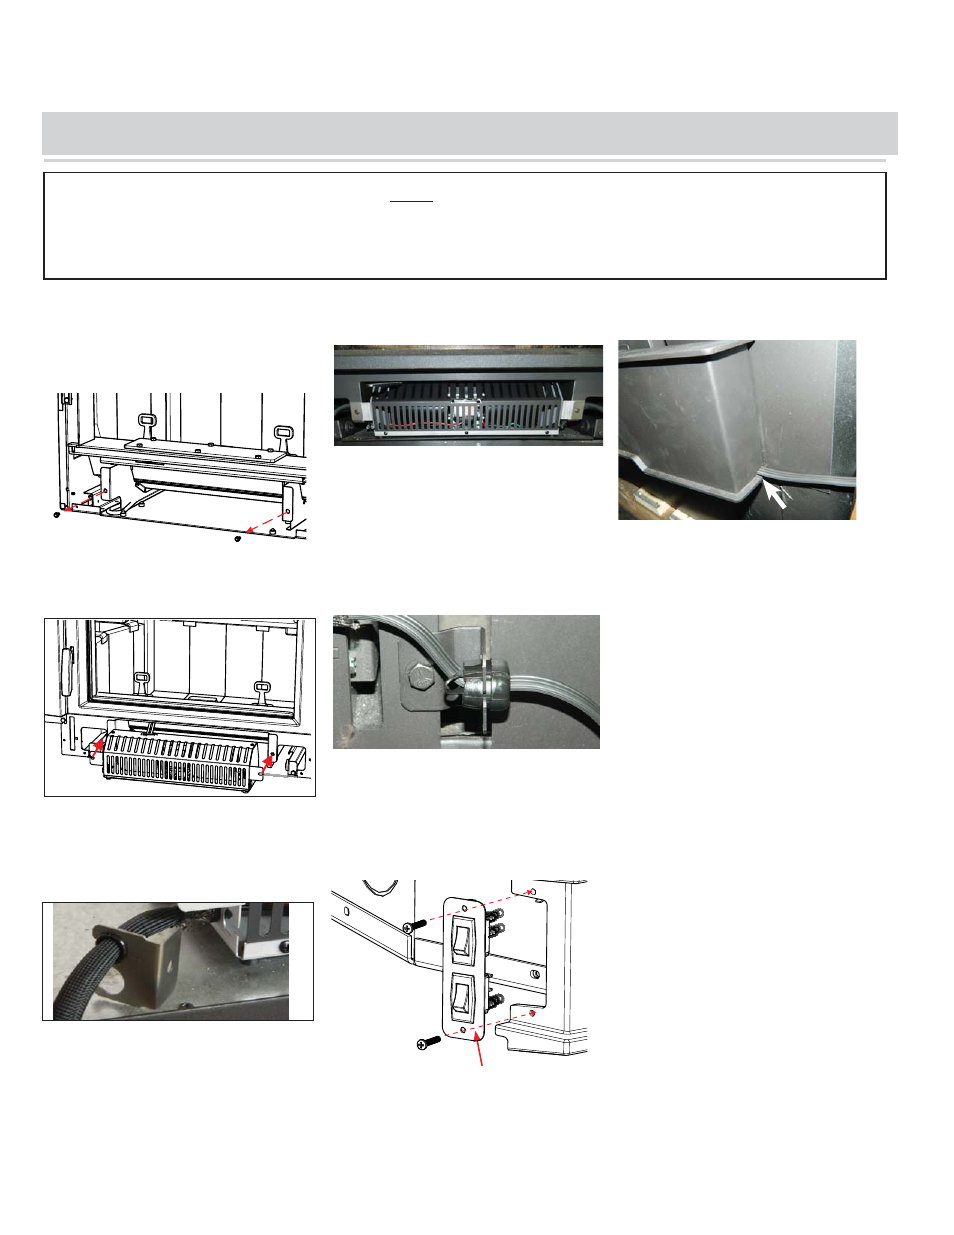
OPTIONAL FAN/BLOWER INSTALLATION
The fan should only be installed once the unit is in
place in order to prevent any damage to the fan.
1. Remove 2- 5/16" screws from locations
shown below—set aside for installation.
Installer: Please record unit serial number here before installing blower—serial number will not be visible after blower
is installed.
Serial No.
______________________________
2. Slide the fan cassette fully into position.
Remove 2 screws from locations shown
Secure fan with 2 screws removed in Step 1
Secure preset strain relief
Tuck cord to right side of faceplate
Line up fan cassette with screw holes.
7. Remove the dummy plug from the faceplate
being installed, by removing the 2 screws along
with washers and nuts. Discard dummy plug,
but keep hardware. Install fan switch assem-
bly with 2 screws, washers and nuts to lower
fascia before sliding faceplate into position.
8. Tuck Power Cord to the bottom right hand side
of the faceplate as shown.
Do not turn fan ON until your insert has reached
operating temperature or at least 30 minutes
after starting fi re.
Fan switch assembly
5. Remove 7/16" bolts from position shown
below.
**See specifi c faceplate installation instructions
for detailed instructions of fan switch assembly.
6. Align preset strain relief bracket to bottom
right corner of the faceplate, secure with 7/16"
bolt removed in Step 5.
3. Align screw holes on fan harness bracket
with holes in fan cassette mounting bracket
on right and left sides.
4. Secure using the two (2) 5/16" screws re-
moved from Step 1.