Installation – Regency CI2600 Large Wood Insert User Manual
Page 10
CI2600/HI400 | wood insert
10 |
installation
Your insert is very heavy and will require two or three people to move it into position. The insert can be made lighter by removing the cast iron
door by opening it and lifting it off its hinges. Be sure to protect your hearth extension with a heavy blanket or carpet scrap during the installation.
Evaluate your minimum cavity opening. If the cavity height lends itself to conduct the install without removing the fl ue collar, then just slide the unit into place
and position the liner within the fl ue collar and secure.
If the cavity dictates the fl ue collar needs to be removed or the optional offset fl ue adaptor is required, please follow the steps below.
1. Remove door, manual package, and bricks - see instructions in manual.
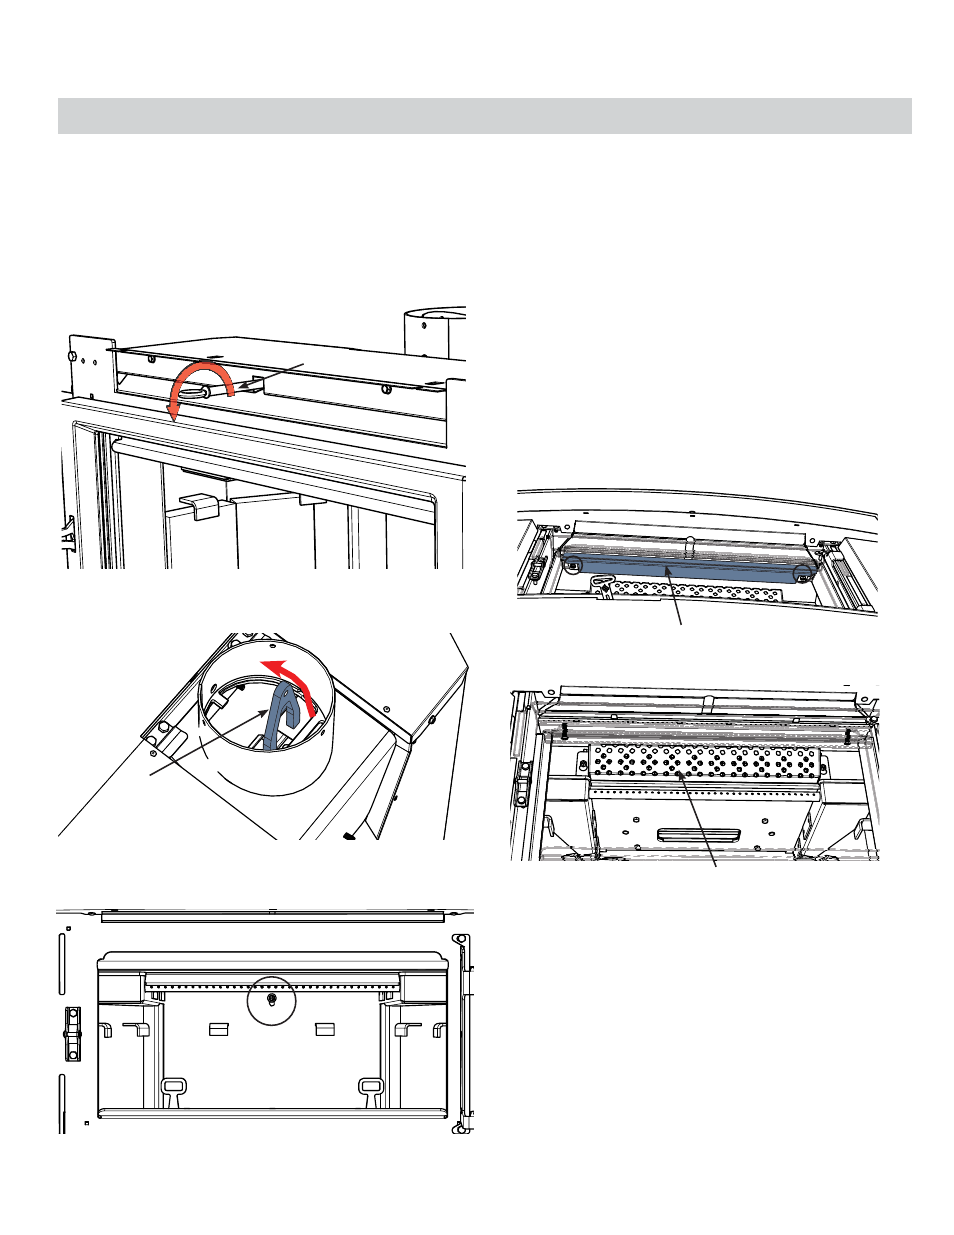
2. Remove Bypass Rod - turn counter clockwise.
3. The Bypass Rod was threaded through a "Fork" - access Fork through
the fl ue and remove by bringing it through the front of the unit.
4. From inside the fi rebox - remove 7/16" bolt at back of fi rebox to remove
the fl ue collar.
5. Install chimney liner, attach connector from fl ex kit with band and screws
(ensure tabs on connector are positioned so they won't get in the way
of the Bypass Rod - or remove them) attach fl ue collar with 2 or more
screws, to the liner within fi replace cavity.
Ensure to position at the proper height and angle to be able to attach the
unit.
6. Before sliding the unit into place and attaching the collar - the following
parts must be removed to allow access and a positive connection.
a) Primary
Air
Shield
b) Combustor
Flame
Shield
c) Combustor
d) Upper Shield - accessed through combustor opening
Remove Fork
Bypass Rod
A -Primary Air Shield - loosen 2 x 7/16"
bolts - slide forward to remove.
B- Combustor Flame Shield - loosen 2 x 7/16"
bolts to remove.
INSTALLING YOUR INSERT