Installation – Regency CI2600 Large Wood Insert User Manual
Page 15
CI2600/HI400 | wood insert
|
15
installation
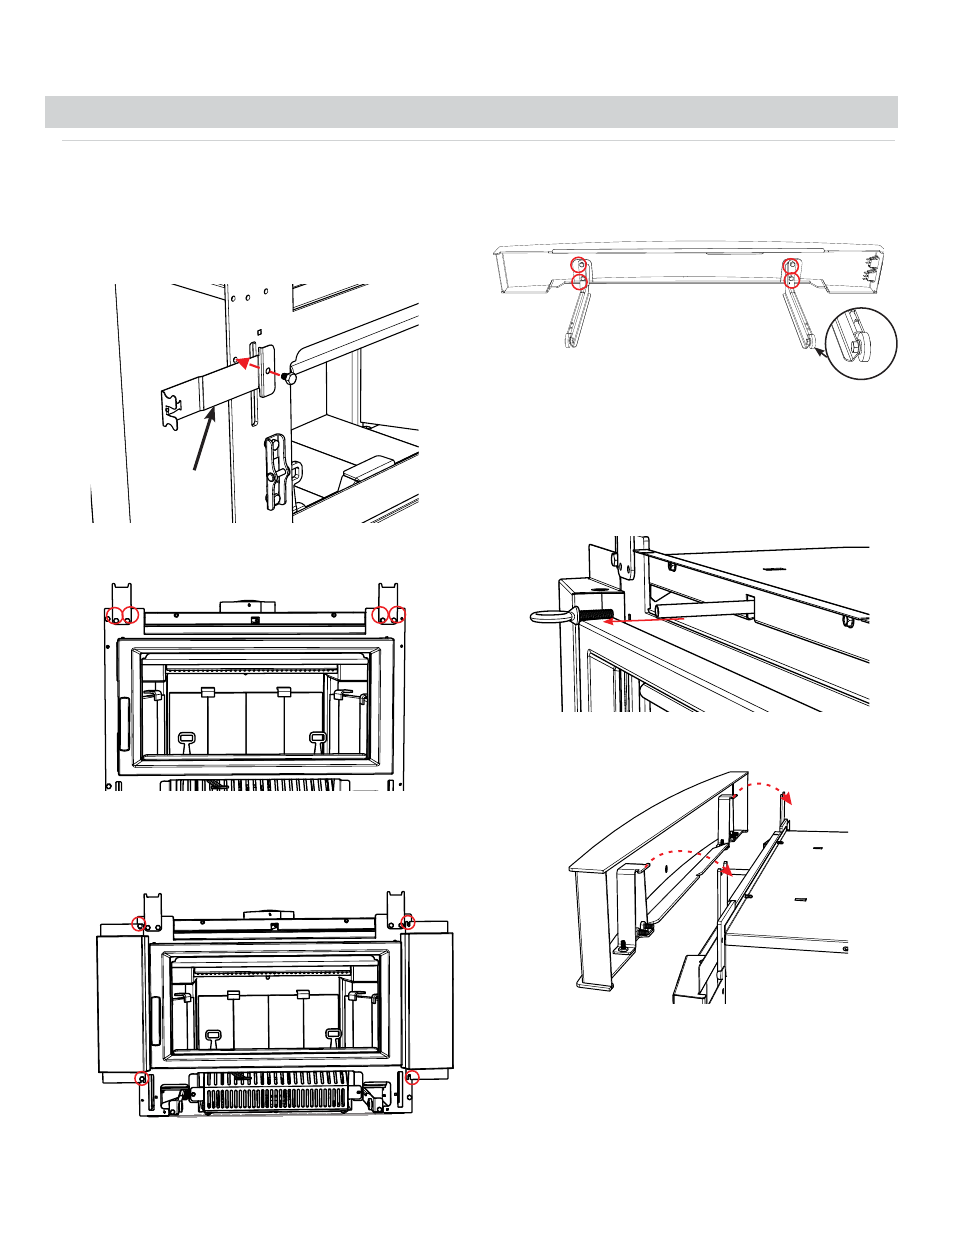
CONTEMPORARY FACEPLATE INSTALLATION
Remove unit door prior to installation of faceplate.
Remove all contents from the package and lay out.
NOTE: Bolts may be pre-installed on unit and will need to be removed
prior to each step of the noted instructions. As a result, there may be
spare bolts.
3. Install the left and right of the fascia panels using four 7/16’’ bolts.
1. Install tool and handle holder to the left side of the unit with on - 7/16"
bolt as shown below. (Note: part is packed with the manual package).
Handle / Tool holder
Fascia side panels installed with Bolts
4. Attach the left and right side rails to the back of the bottom fascia panel
using four 7/16’’ bolts.
NOTE: Wheels should be facing outward when completed.
NOTE: Fan cassette must be installed prior to this step. See fan install
instructions.
Brackets with Bolts
2. Install the upper left and right brackets using the four 7/16" bolts.
Rail system secured with 4 bolts
Back view of Top Fascia Panel lining up with the
brackets installed in Step 1
5. Remove the ring on the bypass rod by turning counter clockwise and
pull bypass rod forward to the open position. Then take the top fascia
panel and gently slide the bypass rod through the hole in the fascia
panel. Lift the fascia panel up slightly - push back to engage the brack-
ets installed on step 1.
Remove Ring from Bypass Rod