Installation – Regency CI2600 Large Wood Insert User Manual
Page 17
CI2600/HI400 | wood insert
|
17
installation
LOW PROFILE FACEPLATE INSTALLATION
NOTE: If installing blower, optional Fan cassette must be installed prior at
this point. See fan installation instructions for details.
If not installing blower—proceed to Step 6.
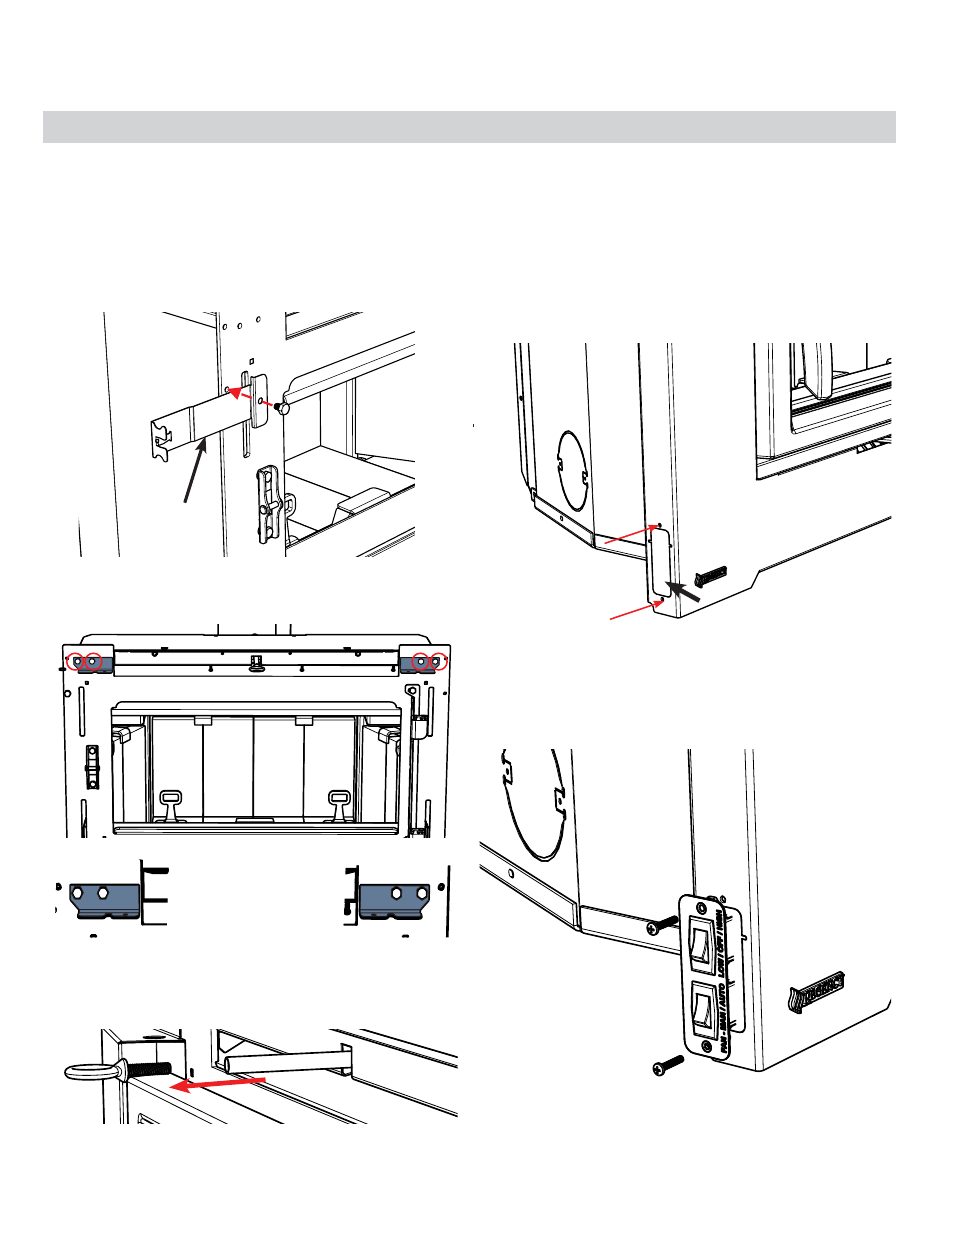
3. Remove the ring on the bypass rod by turning counter clockwise - pull
bypass rod forward to the open position.
Remove ring from the
bypass rod
Remove unit door prior to installation of faceplate.
Remove all contents from the package and lay out.
NOTE: Bolts may be pre-installed on unit and will need to be removed
prior to each step of the noted instructions. As a result, there may be
spare bolts.
1. Install tool and handle holder to the left side of the unit with on - 7/16"
bolt as shown below. (Note: part is packed with the manual package).
4. Remove dummy plate from left side of faceplate by removing 2 screws.
Set screws aside, use to secure the fan switch assembly in Step 5.
5. With fan cassette in position—take the fan switch assembly (attached
to the fan cassette wiring harness) and install into opening created by
dummy plate removal. Ensure fan switch assembly is fully seated onto
faceplate and secure with 2 screws from Step 4.
Handle / Tool holder
Dummy Plate
Install fan switch assembly
Brackets with Bolts
Left Bracket
Right Bracket
2. Install the upper left and right brackets using the four 7/16" bolts.
Identify proper orientation below before installing.