Installation – Regency CI2600 Large Wood Insert User Manual
Page 11
CI2600/HI400 | wood insert
|
11
installation
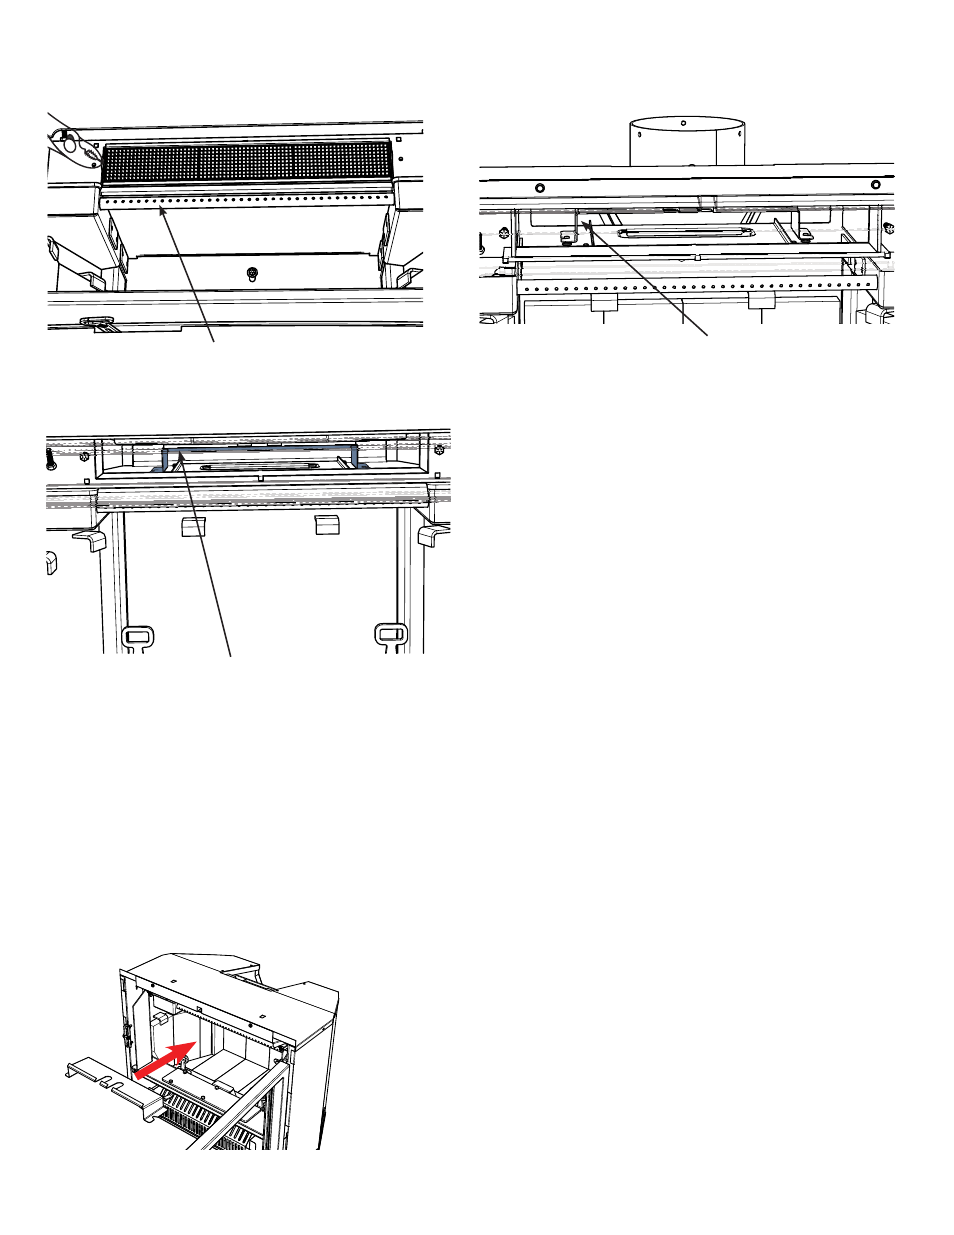
C - Combustor- remove with pliers
Tilt down and forward to ease removal.
D - Upper Shield - slide forward and lift up to remove.
E - Upper Shield - orientation for reinstall
Upper Shield - center between 2 vertical pins
7. Slide unit into position- ensure to centre with fl ue collar.
8. From inside the unit - grab the collar by accessing through the bypass
opening.
Pull the collar down and forward - use hook tool (provided with the unit)
to assist removal.
Secure with 7/16" bolt (removed in Step 4) while pulling collar down - to
ensure positive connection.
Ensure bolts is tightly secured and centred.
9. Reinstall the Upper Shield removed in Step 6e.
Ensure Upper Shield is centered in between 2 (two) vertical pins from
front to back.
When positioning the upper shield locate the vertical pins by feel.
When the shield parts are in place - slide to the back.
10. Reinstall "Fork" (removed in Step 4) on the bypass plate. Ensure the 5º
angled top portion of the Fork is facing towards the front of the unit.
Access through the combustor opening from inside the fi rebox to rein-
stall. Bypass plate may need centering before proceeding to next step.
11. Reinstall bypass rod through fl ue collar and into "Fork". Ensure bypass
rod is screwed in tightly. Test Bypass Rod to ensure positive connection
and review bypass opening.
12. Reinstall Combustor/Flame Combustor Shield / Primary Air Shield /Liner
Shield.
13. Reinstall Brick Liners and Door - (see detailed instructions in manual).
14. Center unit and install Faceplate (see instructions in manual).
15. Install Ring onto bypass rod.