Salsbury industries, This page for rear loading units only, Parcel locker installation – Salsbury Industries 3700 Series 4C Horizontal Mailboxes Single Parcel Lockers FRONT LOADING and REAR LOADING User Manual
Page 3: Illustration 6 - fastening mailbox unit to framing
THIS PAGE FOR REAR LOADING UNITS ONLY.
Parcel Locker Installation
1. Construct wall and mailbox support structure with drywall, 2x2
lumber, 2x4 lumber, and 3/8” plywood. 2x6 lumber may be used in
place of 2x4 lumber for a stronger wall. See illustration on Page 5.
2. Secure the 2 pieces of 2x2 lumber to the wall frame with 16d
penny (3-1/2” long) nails. Space each nail no more than 8” apart,
with the top and bottom nails three (3) inches from each end of the
2x2 lumber.
3. Cut a hole(s) in the wall according to the rough opening
dimensions. Each mailbox unit assembly should have its own
opening in the drywall.
4. Place unit(s) into rough opening(s).
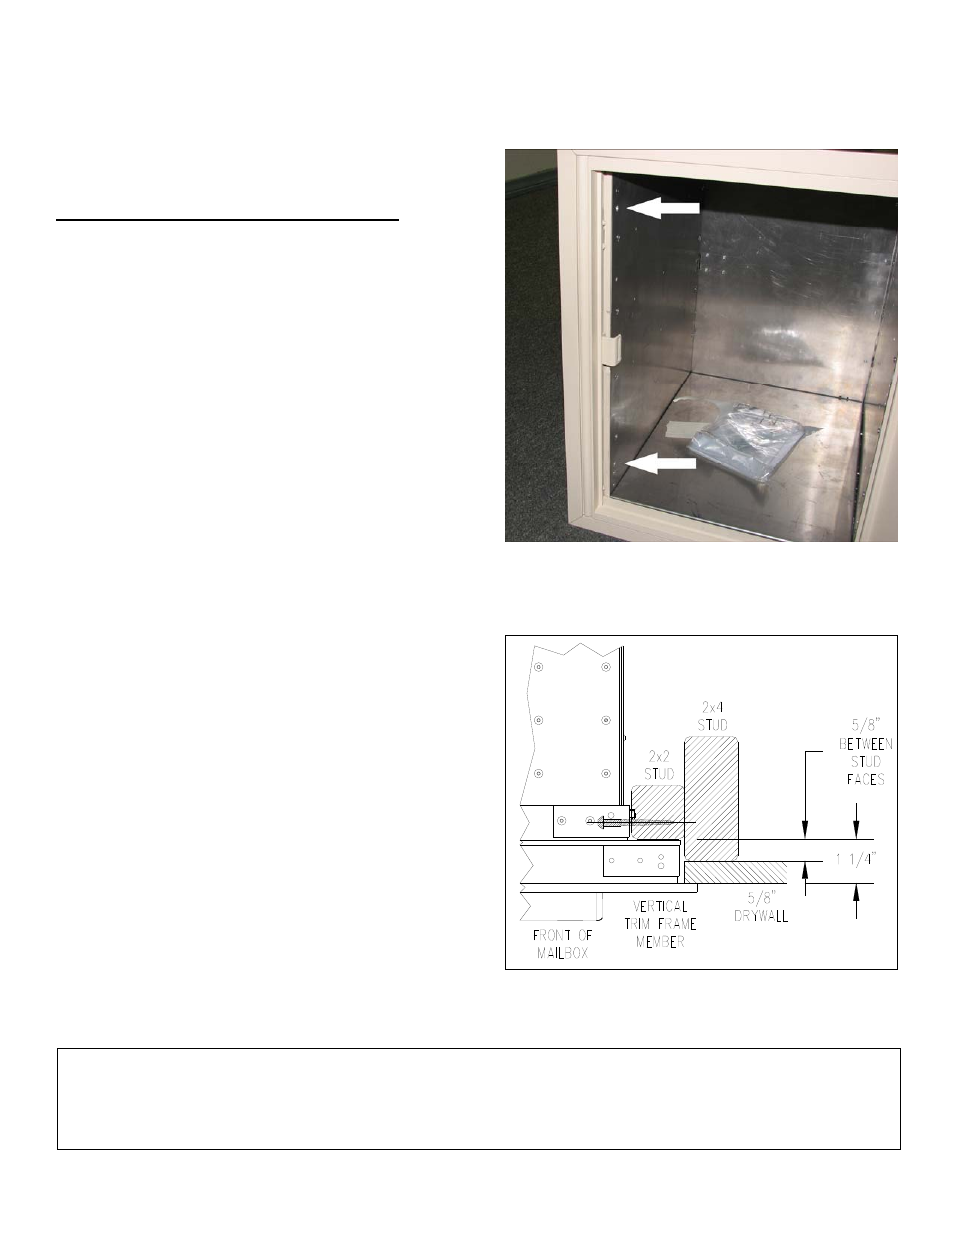
5. Open the parcel door to gain access to the mounting hardware
holes. See illustration 5 on this page. Note the mounting hole
locations and drill pilot holes into the studs. The holes are
approximately 2” in from the front face of the vertical trim frame
members. See illustration 6 on this page. Securely fasten to the
support framing with the #8x2” pan-head torx screws provided.
Install all 4 screws into the 2 holes provided in each of the right and
left side vertical trim frame members.
Caution: Do not deform, force, or twist the frame to fit an
incorrect rough opening or against an irregular surface. Do not
over-tighten the installation screws. If necessary, shim the
small space between the stud and the vertical, extruded-
aluminum trim frame.
6. Test the parcel locker door to ensure that it opens and swings
freely without binding or sticking.
Illustration 5 - Location of Mounting Hardware Holes
Illustration 6 - Fastening Mailbox Unit to Framing
SALSBURY INDUSTRIES
1010 East 62
nd
Street, Los Angeles, CA 90001-1598
Ph: 1-800-624-5269 Int’l Ph: 323-846-6700
Fx: 1-800-624-5299 Int’l Fx:
323-846-6800
www.mailboxes.com [email protected]
Installation instructions are provided as general guidelines. It is advised that a professional installer be consulted. Salsbury Industries assumes no product assembly or installation liability.
Copyright © 2009 Salsbury Industries. All rights reserved. (P/N 370178, Rev. 08, 9/23/09) Page 3 of 5