RaySafe i2 System User Manual
Page 13
13
RaySafe i2 System User Manual – Using the real time display
6
7
8
1
2
3
4
5
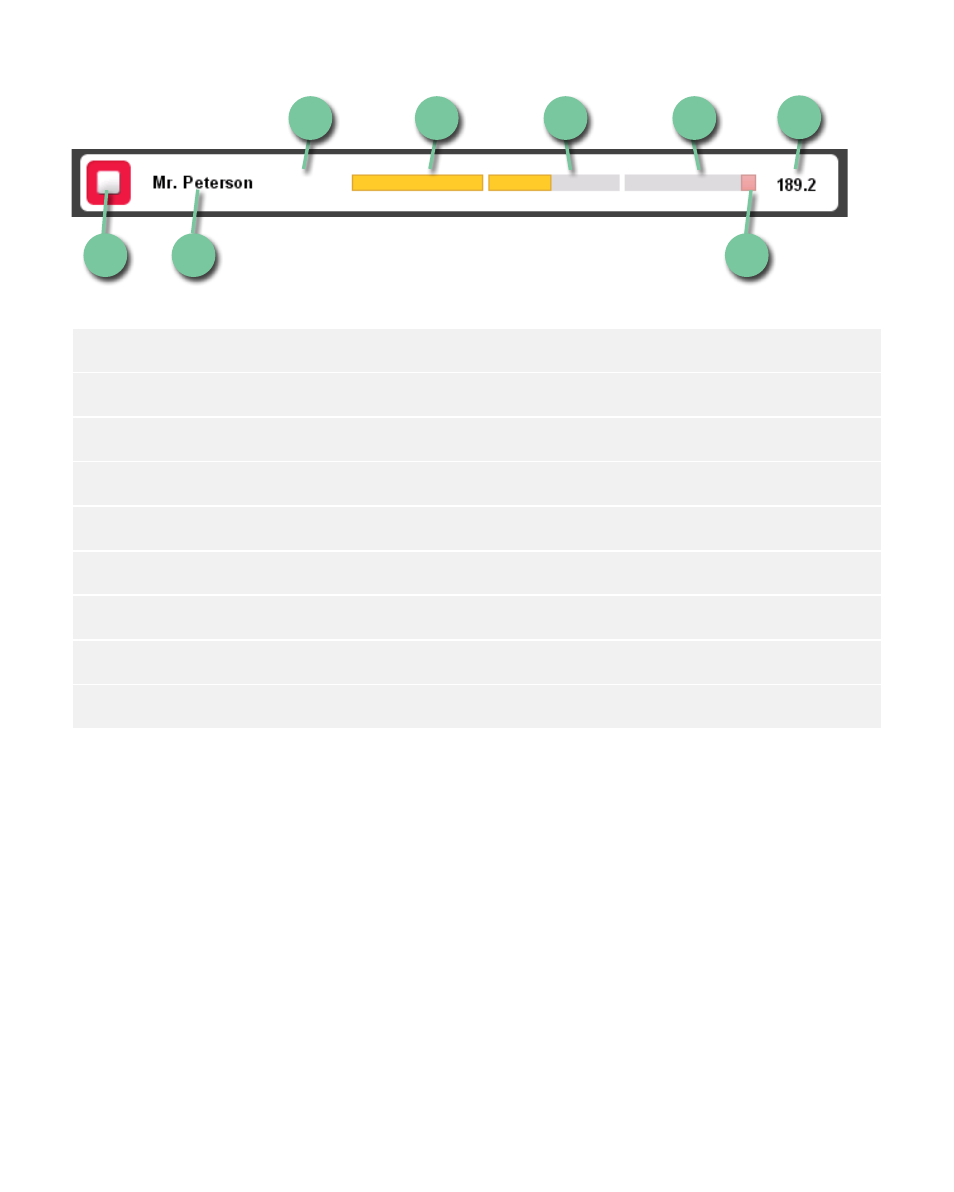
Figure 6. The online view elements
LEGENd
1 personal dose overview (see page 14) access (tap anywhere on the white bar)
2 Scale, green zone
3 Scale, yellow zone
4 Scale, red zone
5 Accumulated procedure dose
6 peak dose rate indication
7 displayed name
8 displayed symbol (color of the dosimeter)
the displayed name identifies the dosimeters. It may be truncated due to lack of space.
By tapping the white bar of a dosimeter, you will enter the personal dose overview of that dosimeter.
the dose rate scale is divided in three zones:
• green zone indicates < 0.2 mSv/h (< 0.02 rem/h).
• yellow zone indicates 0.2 – 2 mSv/h (0.02 – 0.2 rem/h). If you are exposed to radiation in the yellow zone
frequently, you should take actions to minimize the dose exposure.
• Red zone dose indications 2 – 20 mSv/h (0.2 – 2 rem/h) and should not occur often during normal
procedures. If you are exposed to radiation in the red zone frequently, you should take actions to minimize
the dose exposure.