Motor connections and considerations – Pololu Dual VNH5019 User Manual
Page 11
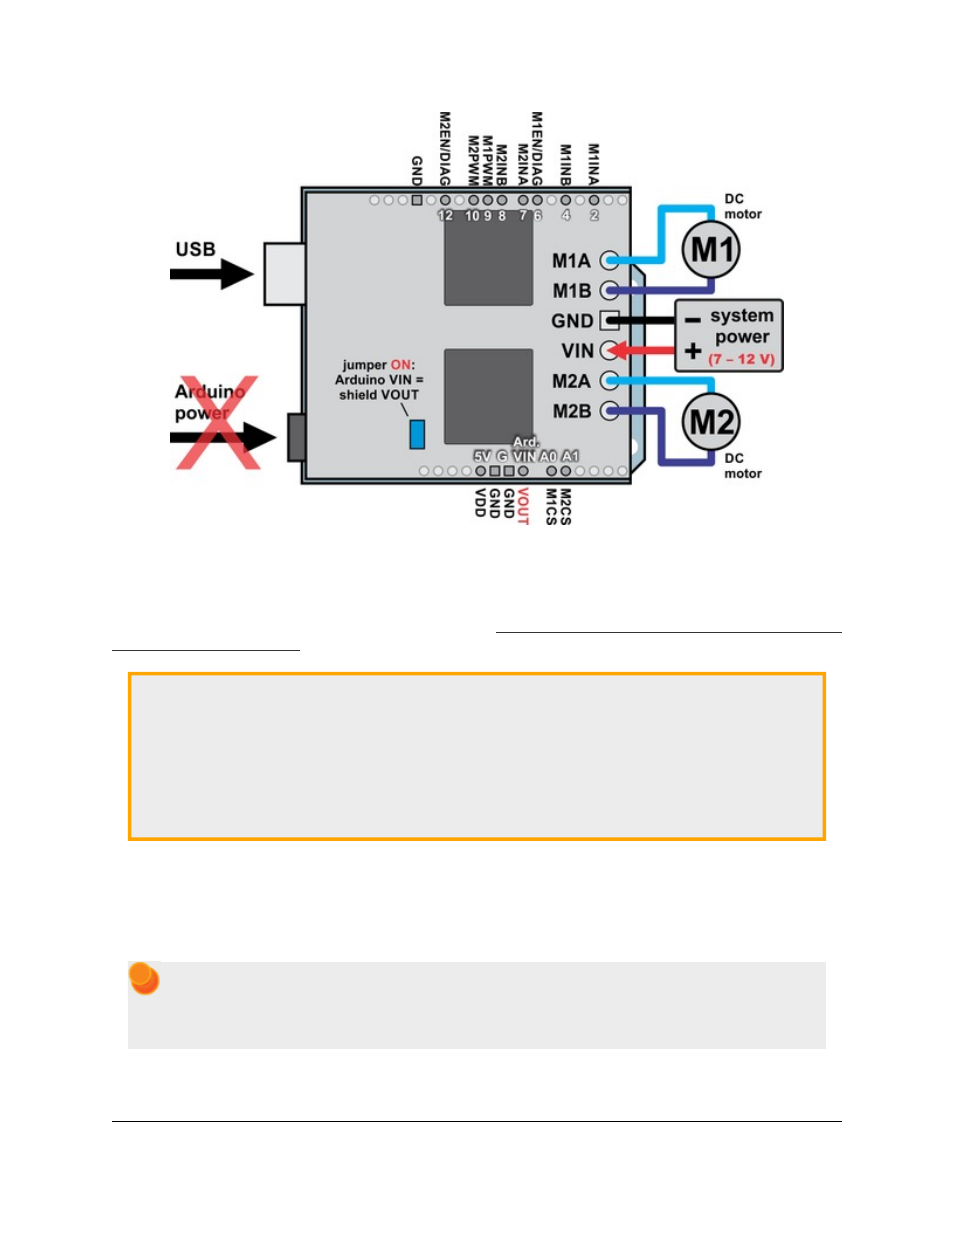
Dual VNH5019 motor driver shield with an Arduino (Arduino powered by the shield).
It is also possible to power your Arduino directly from the motor shield, as shown in the diagram above, which
eliminates the need for a separate Arduino power supply. When the ARDVIN=VOUT shorting block is in place, the
shield’s reverse-protected input power, VOUT, is connected to the Arduino’s VIN pin. (When power is connected
properly, VOUT is essentially the same as the shield’s VIN.) The Arduino’s power jack must remain disconnected at
all times in this configuration.
Warning:
When powering the Arduino from the motor shield, you must never connect a different power
supply to the Arduino’s VIN pin or plug a power supply into the Arduino’s power jack, as doing so will
create a short between the shield’s power supply and the Arduino’s power supply that could permanently
damage both the Arduino and the motor shield. In this case, it is also important that your shield power
supply is an acceptable voltage for your Arduino, so the full shield operating voltage range of 5.5 – 24 V
probably will not be available. For example, the recommended operating voltage of the Arduino Uno is 7
– 12 V.
Motor Connections and Considerations
This motor driver shield has two motor channels, M1 and M2, each of which can be used to independently control a
bidirectional brushed DC motor. Each motor channel is comprised of a pair of pins—MxA and MxB—that connect
to the two terminals of a DC motor and can deliver a continuous 12 A (30 A peak).
Note: It is also possible to connect a single brushed DC motor to both motor channels simultaneously
to deliver nearly twice the current as is available from a channel by itself. See
for more
information.
Pololu Dual VNH5019 Motor Driver Shield User’s Guide
© 2001–2014 Pololu Corporation
3. Getting Started with an Arduino
Page 11 of 28