Paxton Easyprox compact keypad User Manual
Page 2
Page 2
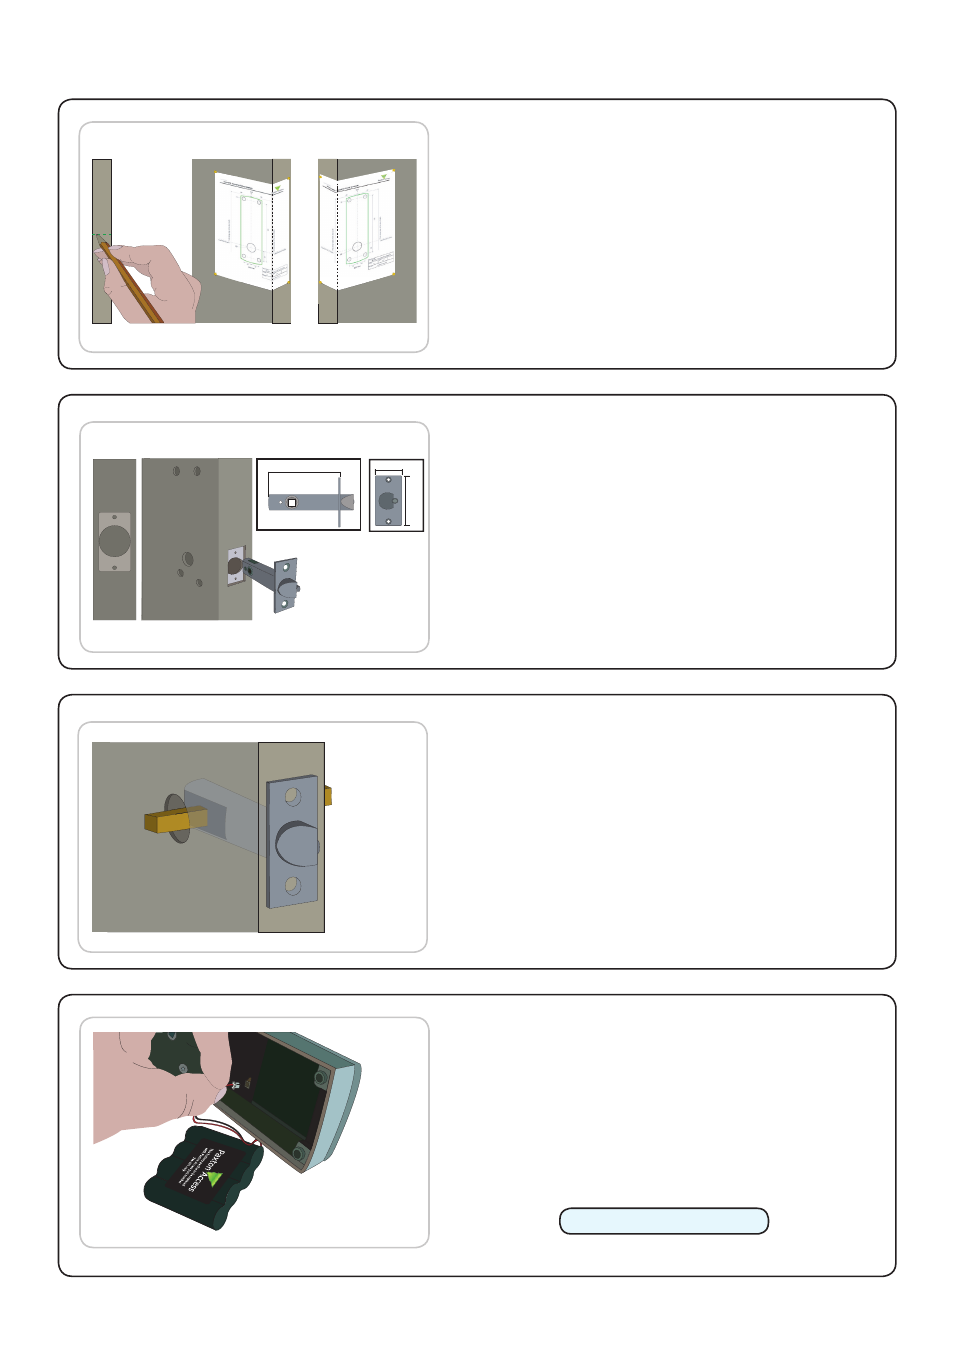
Decide on the lock height and mark this on the door.
Fold the template along one dotted line and tape it to the
door with the 'Centreline of Latch' at the required height.
Mark the 4 x 10 mm and 1 x 25 mm holes. Remove the
template, fold along the other dotted line and apply it to
the other side of the door at the same height. Mark the
holes as before.
Remove the access plate at the rear of the unit by
removing the top standoff screws. Push the battery pack
lead onto the white power plug.
Fit the battery pack and replace the access plate.
Installing the hardware
Step 1 - Marking out
Step 2 - Drilling
Step 3 - Fitting the latch
Step 4 - Enrolment
Drill a 25 mm hole in the door edge at least 80 mm deep
to accept the latch.
Drill the 4 x 10 mm holes for the mounting screws and
one 25 mm hole for the spindle. To ensure accuracy
you should drill these holes from both sides of the door
towards the centre. This also avoids the risk of damaging
the door face when the drill breaks through.
Slide in the latch and draw around the faceplate.
Remove the latch and score the outline with a Stanley
knife to avoid splitting the wood when chiselling.
Chisel a 3.5 mm rebate allowing a flush fit for the latch.
Re-fit the latch with the plunger facing away from the
door frame and secure with two latch screws.
Cut the spindle to length (Door thickness + 18 mm) and
slide into the latch.
The unit will click twice and commence to beep regularly.
The Easyprox must now be initialised.
Please refer to Initialising a new system.
The unit will stop beeping and is now active.
25
57
80
To wake up the unit, briefly depress the external handle.