Enrolling a paxlock, Software installation, Step 10 - fitting the handles – Paxton Net2 PaxLock User Manual
Page 4
Page 4
The current specification for compatible PC hardware, network and operating systems is available on our
website at the following link:
http://paxton.info/720
Net2 has NO PaxLock detection function. It is recognised that there could be security issues if the
wireless units were detectable from outside the site. During installation, a PaxLock unit binds to a Net2Air
bridge which will then only talk to registered units.
Devices cannot be added to the system if commissioning mode is disabled.
An entry is then made on the Doors screen and a special icon is used to denote the wireless connection.
A PaxLock must bind to a Net2Air bridge before it will enrol itself onto the Net2 system. The term 'bind' is
used to denote the fixed relationship between a wireless unit and its bridge.
1. Create a user record in the database and assign a Net2 token to the user. (This record can be deleted after
the installation is complete.)
2. You must now wake up the PaxLock by using the front push button.
3. Present the user token to the PaxLock.
4. The Red and Green LED's will flash alternately while the unit configures.
The PaxLock transmits the number and waits for a response from Net2. If more than one bridge replies, the
unit checks the signal strength and selects the strongest bridge to communicate with. The Net2 software
confirms that the token number is in the database and registers the PaxLock/bridge binding. The LED's will
go out when the process has finished.
The software must be in commissioning mode which is the default setting. If this has been turned off it must
be enabled in the Server Configuration Utility.
Enrolling a PaxLock
The Net2 software should be loaded on the controlling PC and at least one Net2Air bridge configured to
communicate with the unit.
Full documentation is supplied with the Net2Air bridge unit and also on the website as follows:
X
AN1051 - Installing Net2 software <
http://paxton.info/1520
>
X
Ins-30084 - Net2Air USB bridge <
http://paxton.info/926
>
X
Ins-30085 - Net2Air Ethernet bridge <
http://paxton.info/920
>
Software installation
Download the latest version of Net2 software at:
http://paxton.info/1438
before commissioning this product.
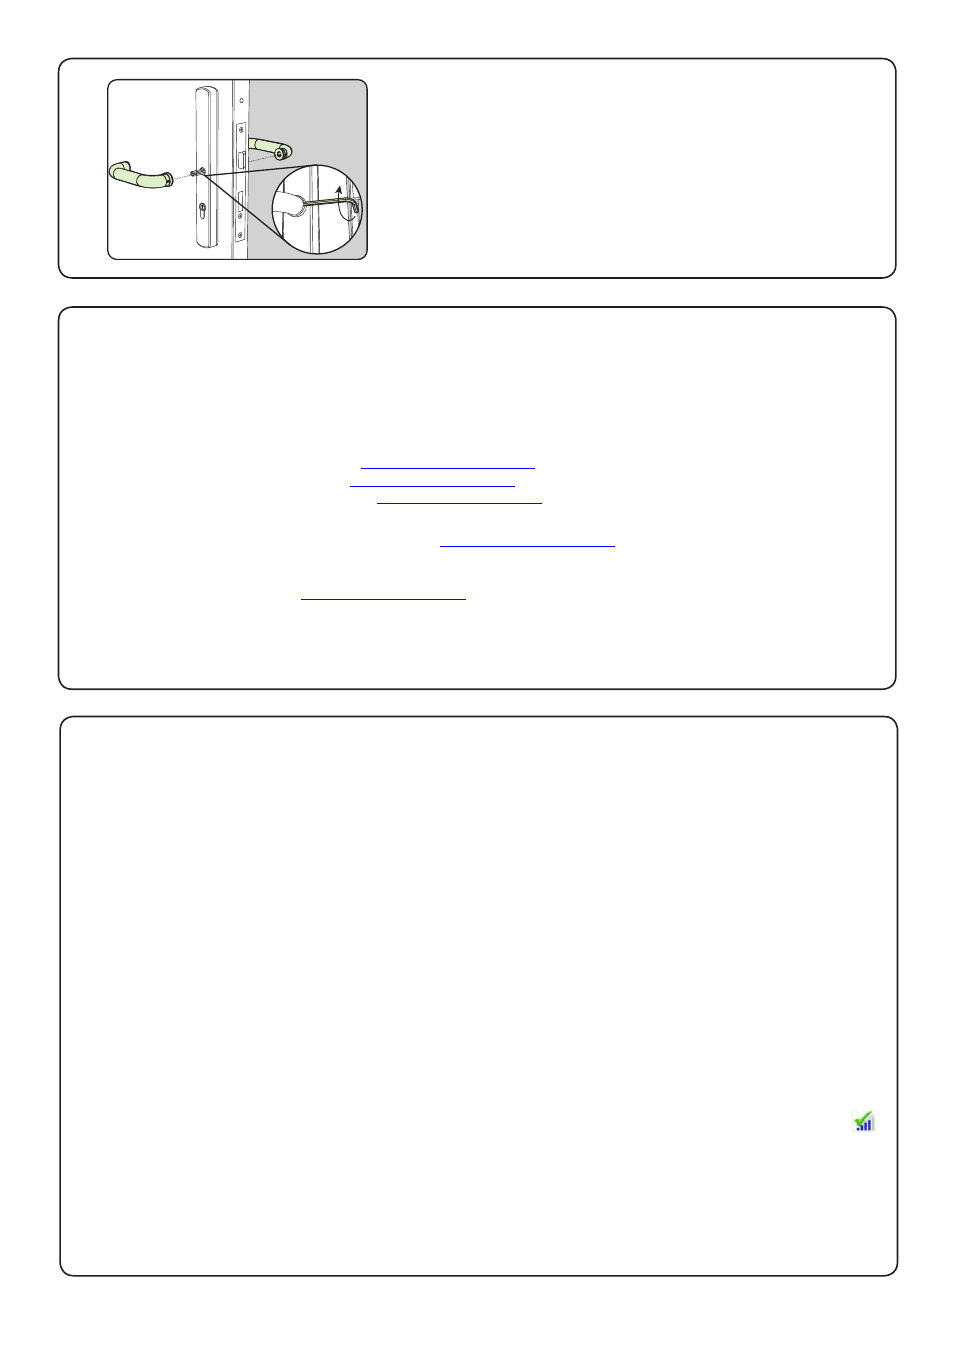
Step 10 - Fitting the handles
Fit the two handles and secure with the grub screws provided.
Check the mechanical operation of the lock and that the
handles operate freely.
Some of the Net2 features (e.g. Fire alarm integration, Anti-passback, Lockdown) are not available on this
product as wireless communication is not suitable for data critical applications.