Maintenance – Multiquip JTNSW20HTCSL User Manual
Page 33
JTNS20H/SW20H-SeRIeS RIDe-ON pOWeR TROWeL • OpeRaTION maNuaL — Rev. #4 (10/15/13) — page 33
maintenance
Trowel arm removal
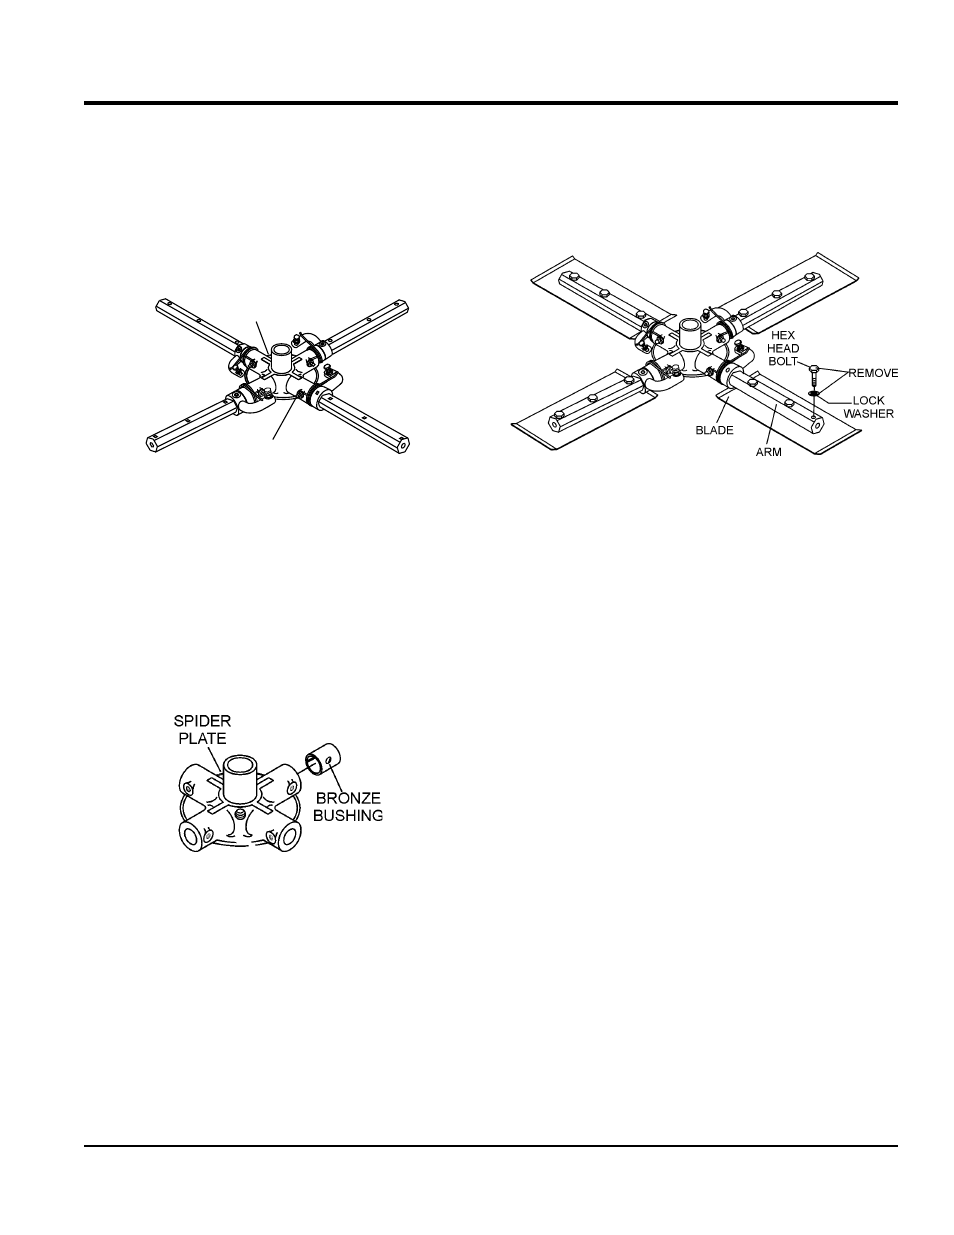
1. Each trowel arm is held in place at the spider plate by
a hex head bolt (with zerk grease fitting). Remove the
hex head bolt/zerk grease fitting from the spider plate.
(Figure 32)
2. Remove the trowel arm from the spider plate.
Figure 32. Removing Zerk Grease Fitting
3. Should the trowel arm inserts (bronze bushing ) come
out with the trowel arm, remove the bushing from the
trowel arm and set aside in a safe place. If the bushing
is retained inside the spider plate, carefully remove
the bushing.
4. Examine the bronze trowel arm bushing insert (Figure
33), clean if necessary. Replace bushing if out-of-round
or worn.
Figure 33. Bronze Bushings
SPIDER
PLATE
ZERK
FITTING
Trowel Blade Removal
1. Remove the trowel blades from the trowel arm by
removing the three hex head bolts (Figure 34) from
the trowel arm. Set blades aside.
Figure 34. Trowel Blades
2. Wire brush any build-up of concrete from all six sides
of the trowel arm. Repeat this for the remaining three
arms.