Clip-loc – Metal Sales Clip-Loc Installation User Manual
Page 32
© Metal Sales Manufacturing Corporation/ Subject to change without notice/ Effective Date 2/03
812.246.1935 (Corporate Offi ce) • www.mtlsales.us.com
31
CLIP-LOC
R
AKE
P
ARAPET
(O
FF
M
ODULE
) O
VER
D
ECKING
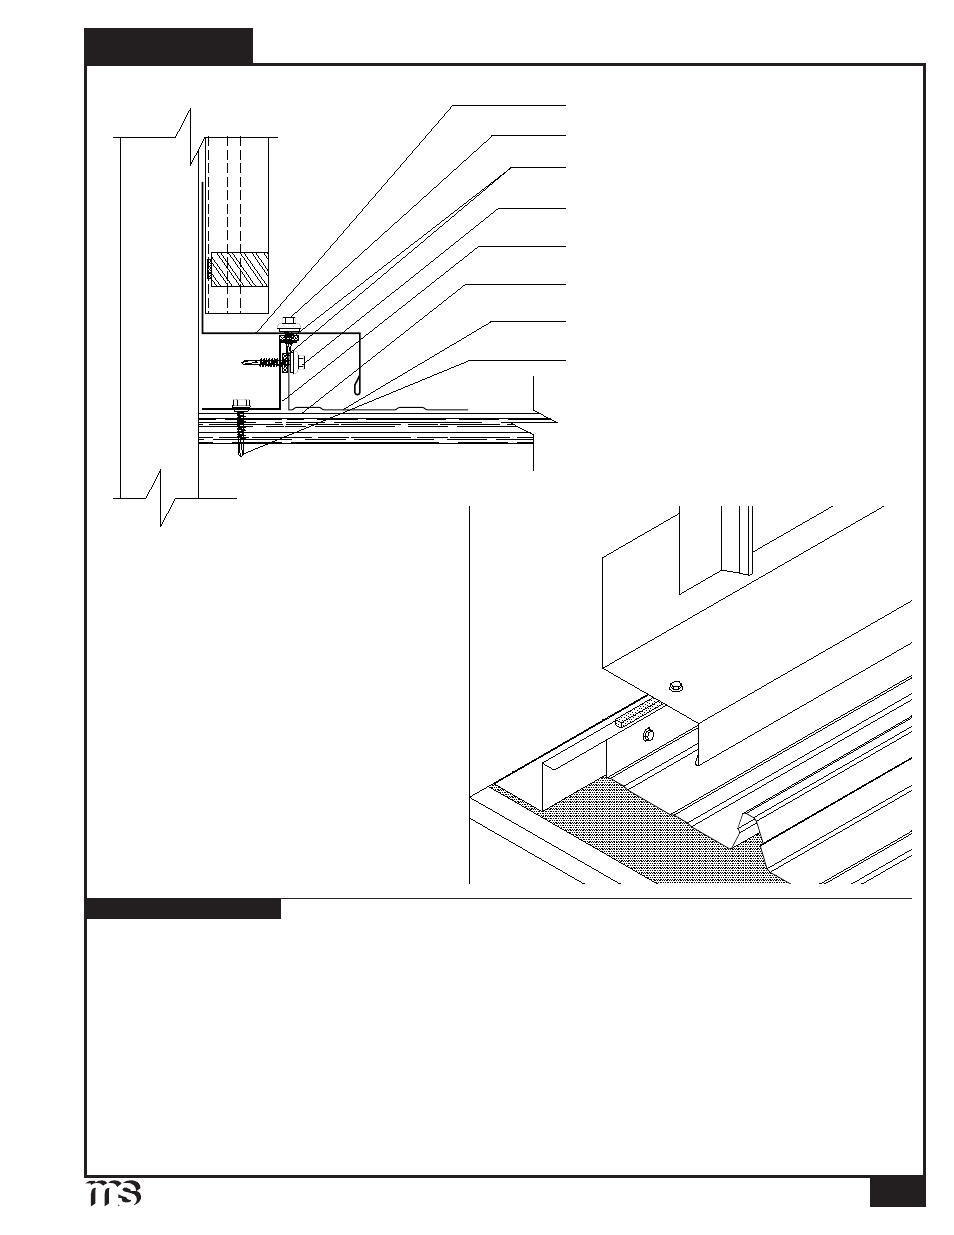
Clip-Loc Floating Rake Zee and Clip-Loc panels must be installed prior to rakewall installation (see page 21-22). Panel
must be field bent up 1
5
/
8
".
1. Apply a row of Double Bead Tape Sealant between Floating Rake Zee and field bent panel rib. Fasten field bent panel rib to
Clip-Loc Floating Rake Zee with 12-14 x 1½" SD XL 1'-0" o.c.
2. With Clip-Loc panel properly fastened to Clip-Loc Floating Rake Zee, apply a row of Double Bead Tape Sealant across top of
Floating Rake Zee.
3. Install Clip-Loc Rakewall flashing on top of Floating Rake Zee. Fasten through Clip-Loc Rakewall, sealant, and into Clip-Loc
Floating Rake Zee with ¼-14 x
7
/
8
" Stitch XL 1'-0" o.c. Stagger Stitch fastener so that there is no interference with 12-14 1½"
SD XL already installed.
4.Install Counter Flashing,Reglet,or wall panel and fasten to parapet wall with appropriate fastener 1'-0" o.c. If Counter Flashing
or Reglet is used seal to parapet wall with tube sealant. Do NOT fasten Clip-Loc Rakewall to wall.
5. If two or more flashings are required, lap the flashing over the previously installed flashing by a minimum of 2" placing a bead
of tube sealant between the flashings and securing with pop rivets 2
1
/
2
" o.c.
Double Bead Tape Sealant
#
1
/
4
-14 x
7
/
8
" Stitch XL (1'-0" o.c.)
Clip-Loc Panel
Moisture Barrier (by others)
Floating Rake Zee
Clip-Loc Rakewall
12-14 x 1
1
/
4
" Shoulder Tech (1'-0" o.c.)
12-14 x 1
1
/
2
" SD XL (1'-0" o.c.)
1:12 Slope
Minimum
INSTALLATION NOTES
Field bend panel rib up 1
5
/
8
"