3 checking the component parts, 4 checking the rotor thickness, Checking the component parts – Lenze MDxMA-MHxMA-MFxMA-MDERA-MHERA Three-phase AC motors User Manual
Page 48: Checking the rotor thickness, Maintenance/repair, Stop, Danger
Maintenance/repair
Maintenance operations
Checking the component parts
l
48
BA 33.0005−EN 2.0
8.3.3
Checking the component parts
With assembled brake
l
Check function of ventilation and control
l
Measure the air gap (adjust if necessary)
l
Measure the rotor thickness (replace rotor if necessary)
l
Thermal damage to armature plate or flange (dark blue
tarnishing)
^ 49
^ 49
^ 48
After removing the brake
l
Check clearance of the rotor gearing (replace worn−out
rotors)
l
Wear of the torque bearing on threaded sleeves, dowel
pins and armature plate
l
Checking springs for damage
l
Checking armature plate and flange/endshield
– Evenness size 06...12 < 0,06 mm
– Evenness from size 14 on < 0,1 mm
– max. run−in depth = rated air gap of brake size
^ 50
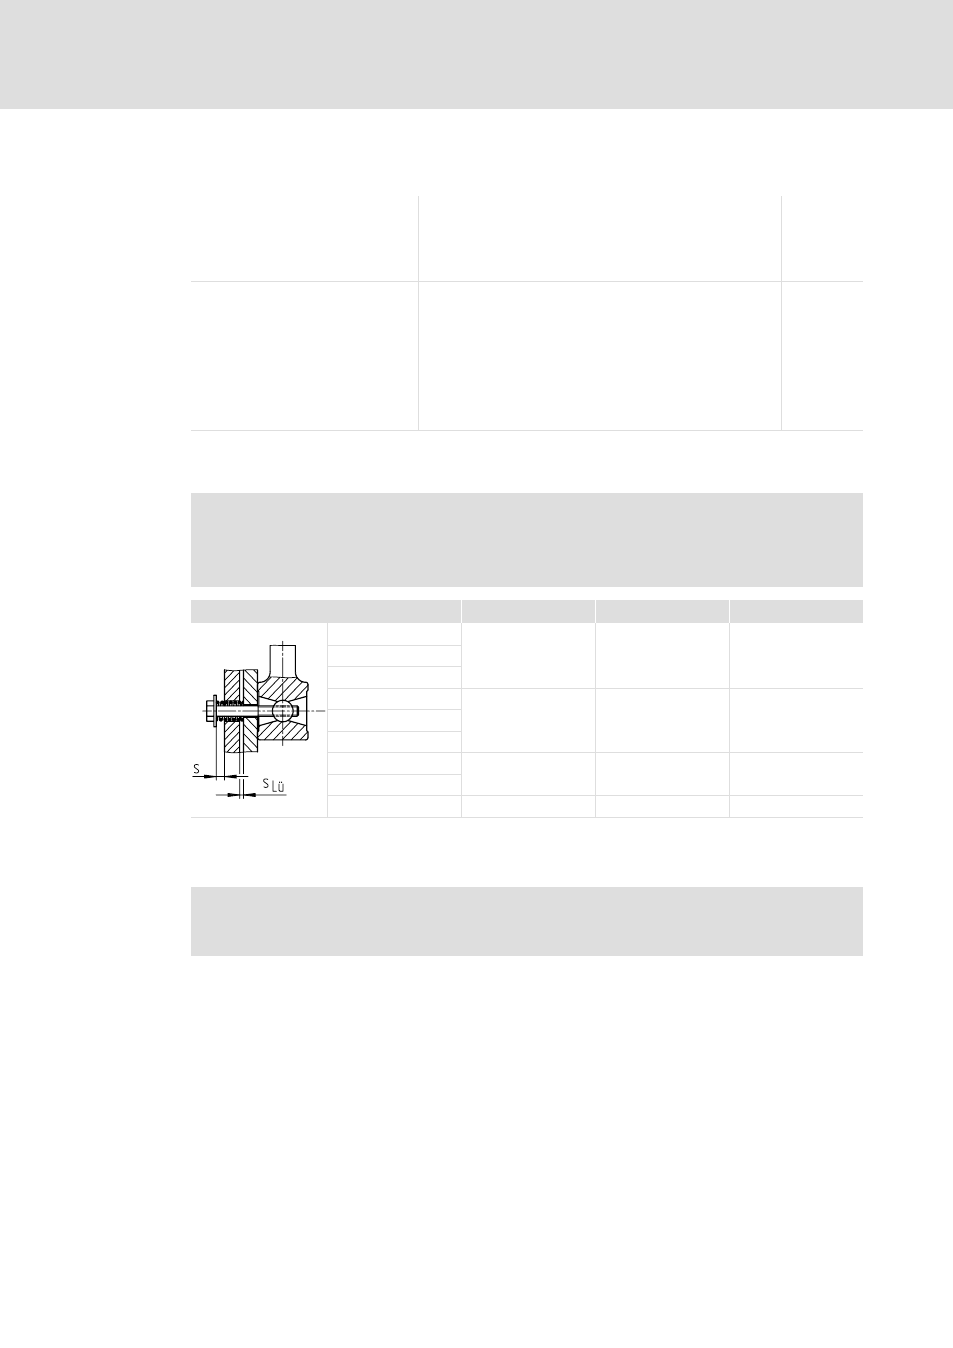
Check the mounting dimension of the manual release
(
Stop!
Dimension "s" must be maintained! Check air gap "s
Lü
"!
(
, Operating Instructions INTORQ BFK458)
Size
s
Lü
(mm)
s
+0.1
(mm)
s + s
Lü
(mm)
06
0.2
1
1.2
08
10
12
0.3
1.5
1.8
14
16
18
0.4
2
2.4
20
25
0.5
2.5
3
8.3.4
Checking the rotor thickness
}
Danger!
When the rotor thickness is checked, the motor must not run.
1. Remove fan cover and cover ring if attached.
2. Measure rotor thickness with calliper gauge. If a friction plate is attached, ensure a
flanged edge at the outer diameter of the friction plate.
3. Compare measured rotor thickness with minimally permissible rotor thickness
(values
^ 51).
4. If required, exchange the entire rotor. Description
^ 50.