Operating the vibrocheck – Leica Biosystems VT1200/VT1200 S User Manual
Page 40
38
Instructions for Use V 1.4 RevC – 09/2013
When LED on VC is green and LED in RUN/
STOP is yellow, the blade starts to vibrate with
the amplitude set. Speed = 0, amplitude can be
changed at any time.
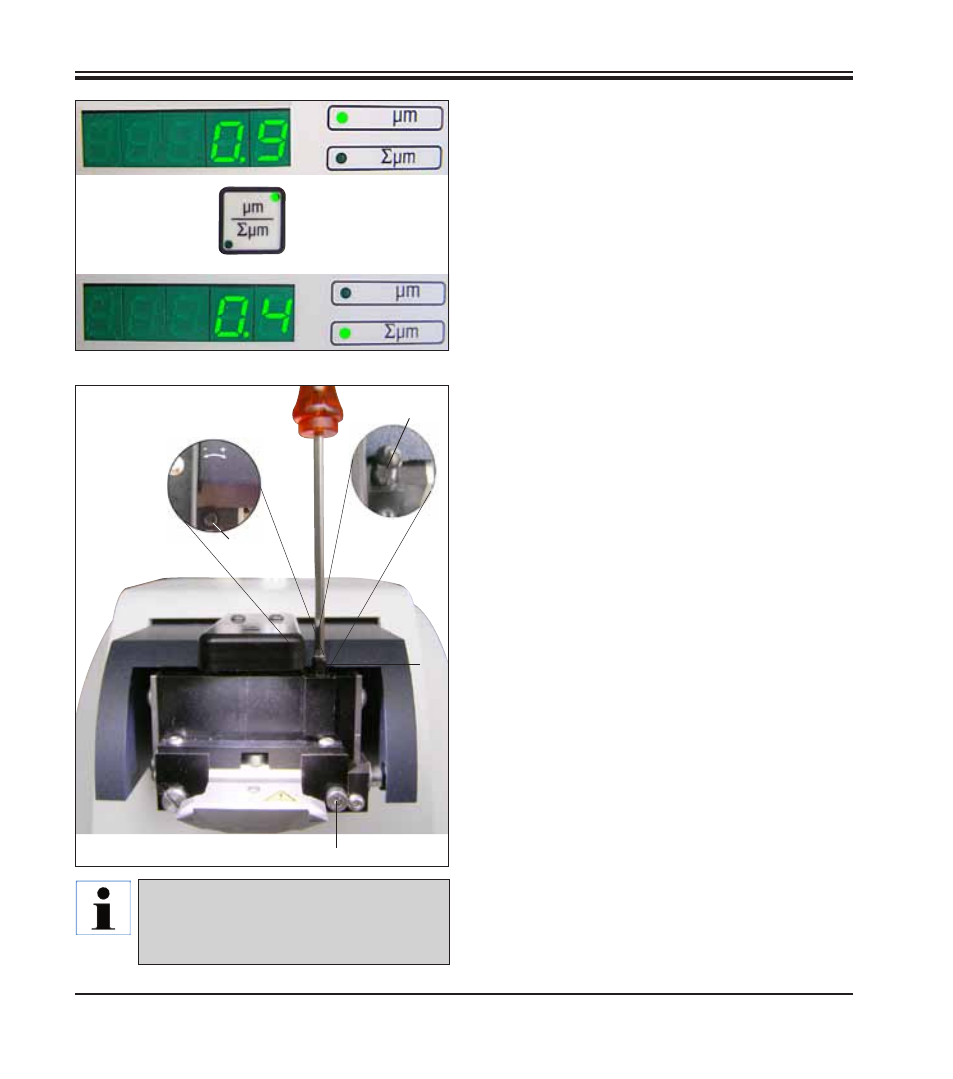
On the (5-digit) display, the deviation in height
amplitude is shown in µm (e.g. 0.9 µm). This value
can be either positive or negative. The display
can be switched using the µm/∑µm key. Then a
number appears (e.g. 0.4). This means clockwise
rotation by a turn of 0.4 (
"+" see 18a
) – (Neg. op-
erational sign means counterclockwise rotation
–
see 18a.
) If the value is "0", no improvement of
the height amplitude is possible.
5. Press the STOP key. Using a size 3 Allen key,
unscrew the clamping screw (16) only slightly,
pull off the cap (17) by pulling it upwards (keep
it in a safe place) and turn the adjusting screw
(18) by the corresponding value (here, a turn of
0.4) clockwise (in the "+" direction, 18a) using a
size 3 Allen key. Tighten the clamping screw (16)
clockwise.
6. Press the RUN key, check the value, repeat
steps 5-7 if necessary.
16
17
18
Fig. 27
7. If the measured value is accepted, press
DOWN (flashes green). VC moves to lowest
position - blade is moved to the rear. LED on
VC illuminates red again (LED on RUN/STOP
is off).
8. The instrument now expects the VibroCheck
to be removed. To do so, disconnect the USB
plug connection of the VC to the basic instru-
ment and pull the VC off of the dovetail guide.
LED in DOWN key continues to flash – wait
until LED in DOWN button goes out.
The normal operating status is now restored.
6.
Operating the VibroCheck
18a
18
2
1
If the display shows ∑µm (2) "0" (opti-
mal) and the value in µm (1) is unaccept-
ably high, the blade must be replaced.
Fig. 26