Instrument setup – Leica Biosystems IPC User Manual
Page 38
36
Instructions for Use V 1.9 RevD – 05/2013
Fig. 45
87
86
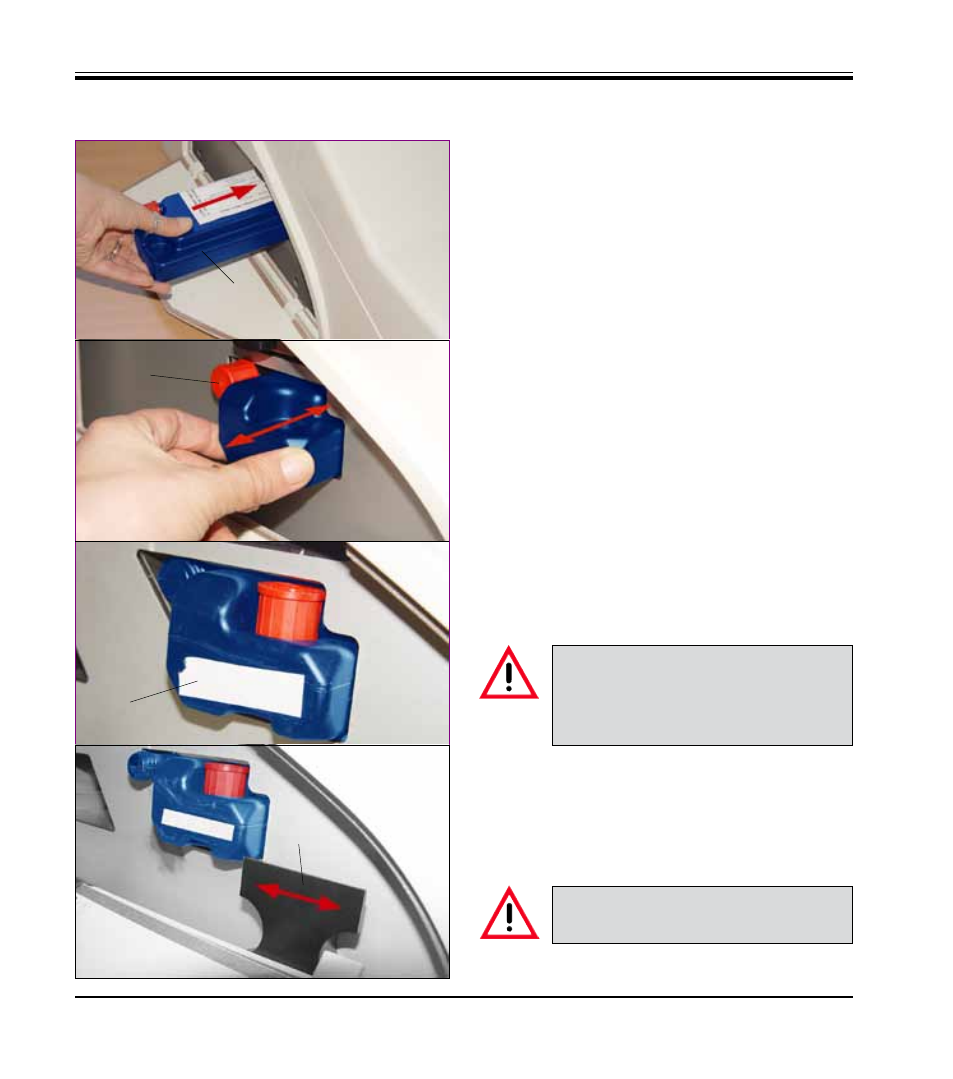
4. Instrument Setup
Exchanging the cartridge
(continued)
Fig. 42
Fig. 44
Fig. 43
65
66
• Remove the ink cartridge (66) from the delivery
carton and shake it a few times, then remove
the protective foil.
• The ink cartridge must be replaced after
60,000 printouts or 3.5 months. The instrument
setup date can be recorded on the white sur-
face (65) on the front (Fig.
44
).
• Insert the cartridge into the slot. Loosen the
red screw-on cap one full turn but do not
remove it yet.
• Insert the cartridge completely into the recep-
tacle applying moderate pressure. You have
to use a certain amount of force to pierce the
seals.
• Withdraw the cartridge from its slot by about
1,25 inches (30 mm) and push it back in as
far as it will go; repeat this step two or three
times.
• Now unscrew the red screw cap (87) com-
pletely from the nozzle of the cartridge and
store it in the recess provided in the cartridge
for this purpose (
Fig. 43, 44
).
This step is very important to ensure
safe operation of the printer.
Very important!
Prior to each transport, the cap (87)
must be screwed onto the nozzle to
prevent the ink from spilling.
• Right next to the slot opening there is a safety
catch (86,
Fig. 45
). Moving this catch to the side
secures the ink cartridge against falling out.