4 instrument setup – Leica Biosystems IPC User Manual
Page 25
23
Leica IP C
• Unscrew the 8 screws (2 –
Fig. 12
) on the sides
of the wooden box and loosen the cover.
• Remove the accessory box (7 – includes ac-
cessories and packaging material) – directly
under the lid.
• Unscrew the 8 screws (3 –
Fig. 12
) at the bot-
tom of the wooden box on the exterior.
• Remove the interior carton around the instru-
ment.
• Carefully remove the wooden box from the
baseplate.
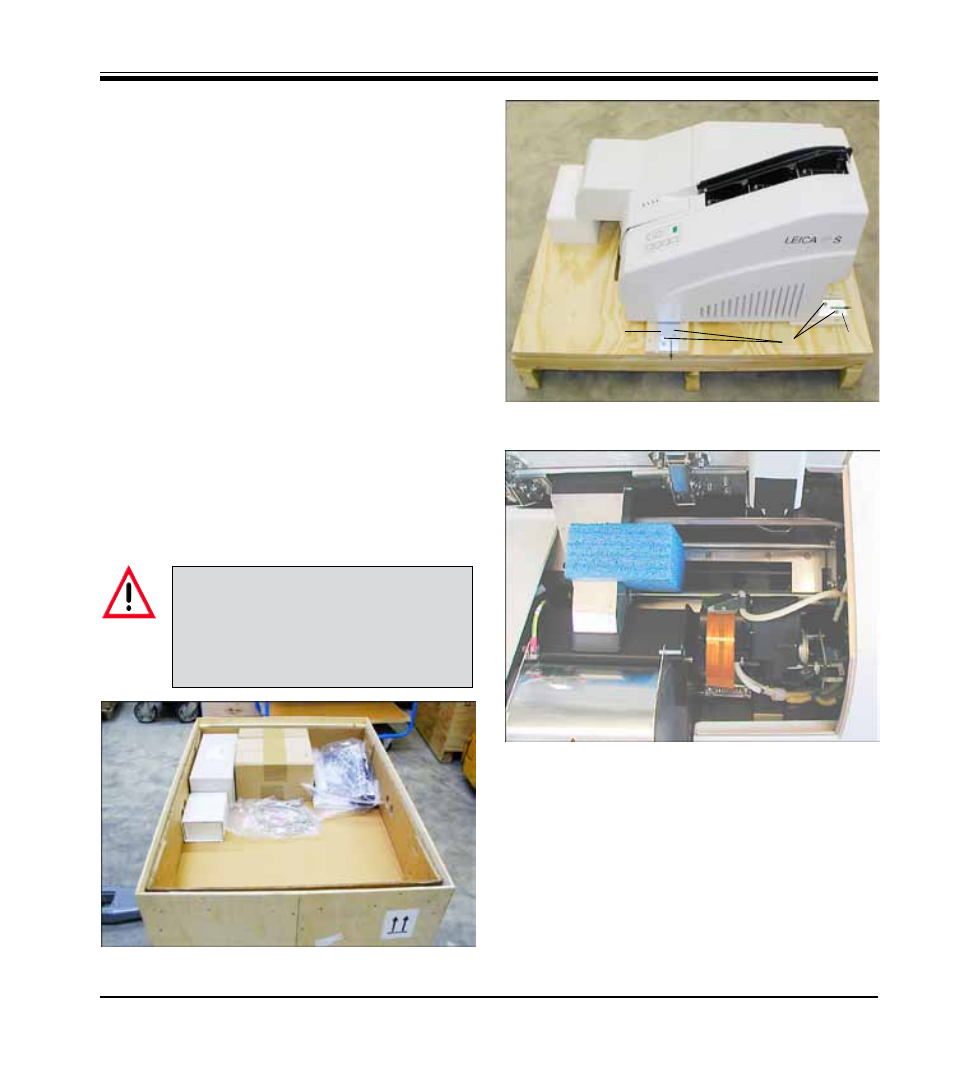
• The printer is secured to the wooden floor
of the box with 4 plates (5). Loosen the two
screws (4 –
Fig. 14
) on the base of the instru-
ment. Remove the plate from the bottom.
• Place the printer from the baseplate on a sta-
ble laboratory bench - or, if present, on the
automated unload station. Make sure that the
stage is leveled!
When unpacking the printer, at least
two people (one person on each side
of the printer) are required to lift the
printer out of the box and place it onto
the laboratory bench.
Fig. 13
7
4
5
5
Fig. 14
Fig. 15
6
• When the instrument has been set up at
its final area of use, remove the blue foam
transport anchor (6 –
Fig. 15
, pull upwards).
4 Instrument Setup