Installation – HMC Electronics ASG-SD2500-10FX-SY X-PAQ Precision Fastening System User Manual
Page 7
Page 7
Installation
Installation of the ASG-CT2500 is very straightforward. Follow these steps to connect your system for
the first time:
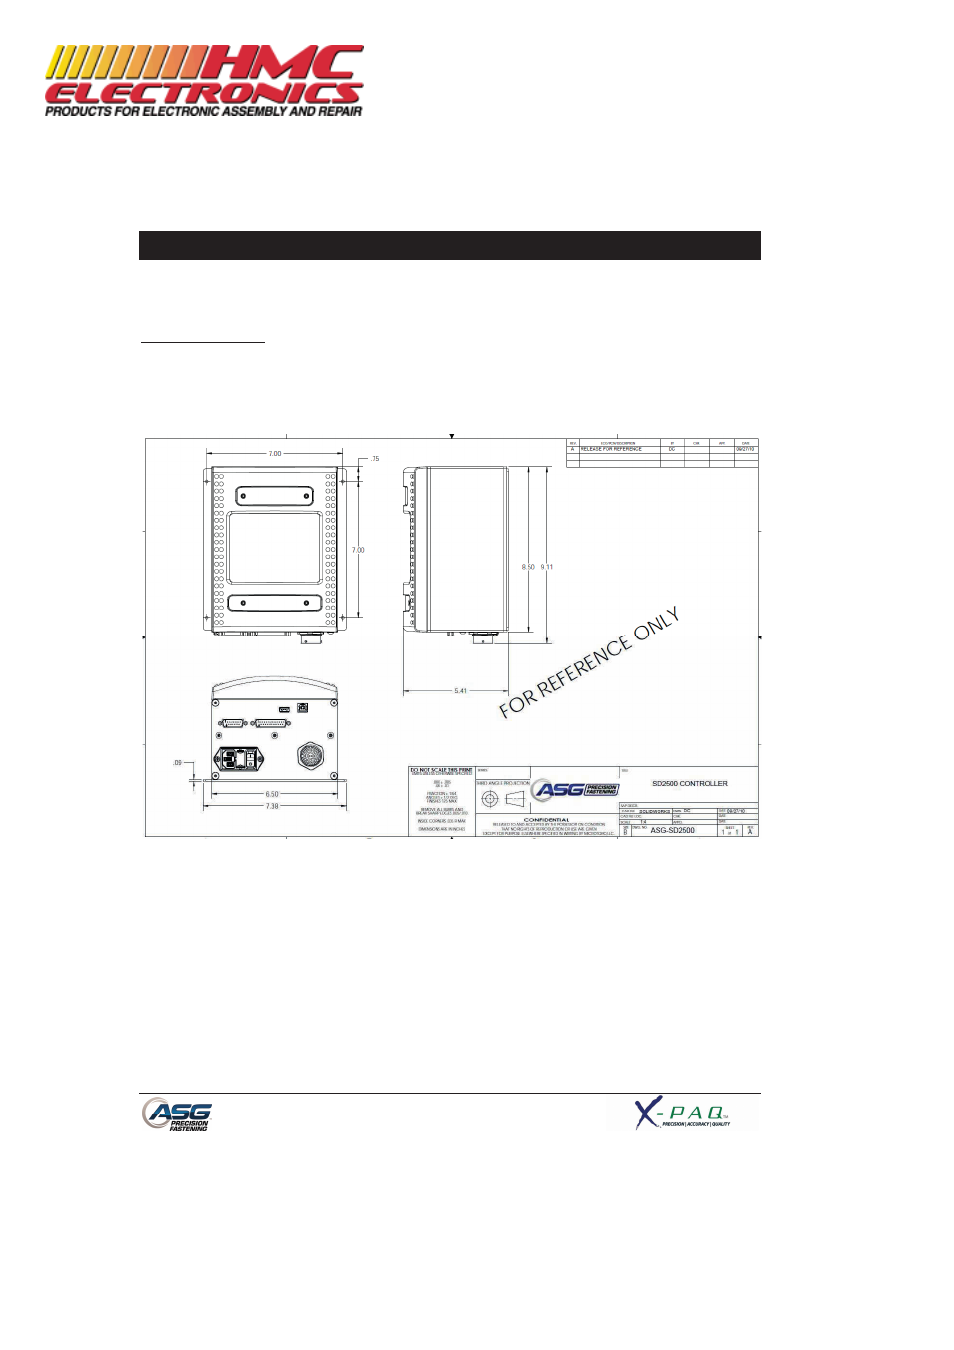
Controller Mounting:
The ASG-CT2500 comes standard with a mounting plate for attaching to the wall, workbench, or tool
stand. Secure the controller using the (4) provided holes in the mounting plate. These provided holes
are meant for #6 screws, but can be enlarged to suit user’s needs.
Ensure the controller power cord can reach a properly grounded receptacle without creating a trip
hazard in the work area. The controller should also be mounted within view of the operator, and should
be accessible and within reach for programming and modification.
Documentation Provided By HMC Electronics
33 Springdale Ave. Canton, MA 02021
(800) 482-4440
- ASG-SD2500-10PL-SY X-PAQ Precision Fastening System ASG-SD2500-10PS-SY X-PAQ Precision Fastening System ASG-SD2500-20FX-SY X-PAQ Precision Fastening System ASG-SD2500-20PS-SY X-PAQ Precision Fastening System ASG-SD2500-35FX-SY X-PAQ Precision Fastening System ASG-SD2500-35PL-SY X-PAQ Precision Fastening System ASG-SD2500-35PS-SY X-PAQ Precision Fastening System ASG-SD2500-50PL-SY X-PAQ Precision Fastening System ASG-SD2500-50PS-SY X-PAQ Precision Fastening System