Gamber-Johnson 7160-0136 User Manual
Page 2
Cradle Accessories
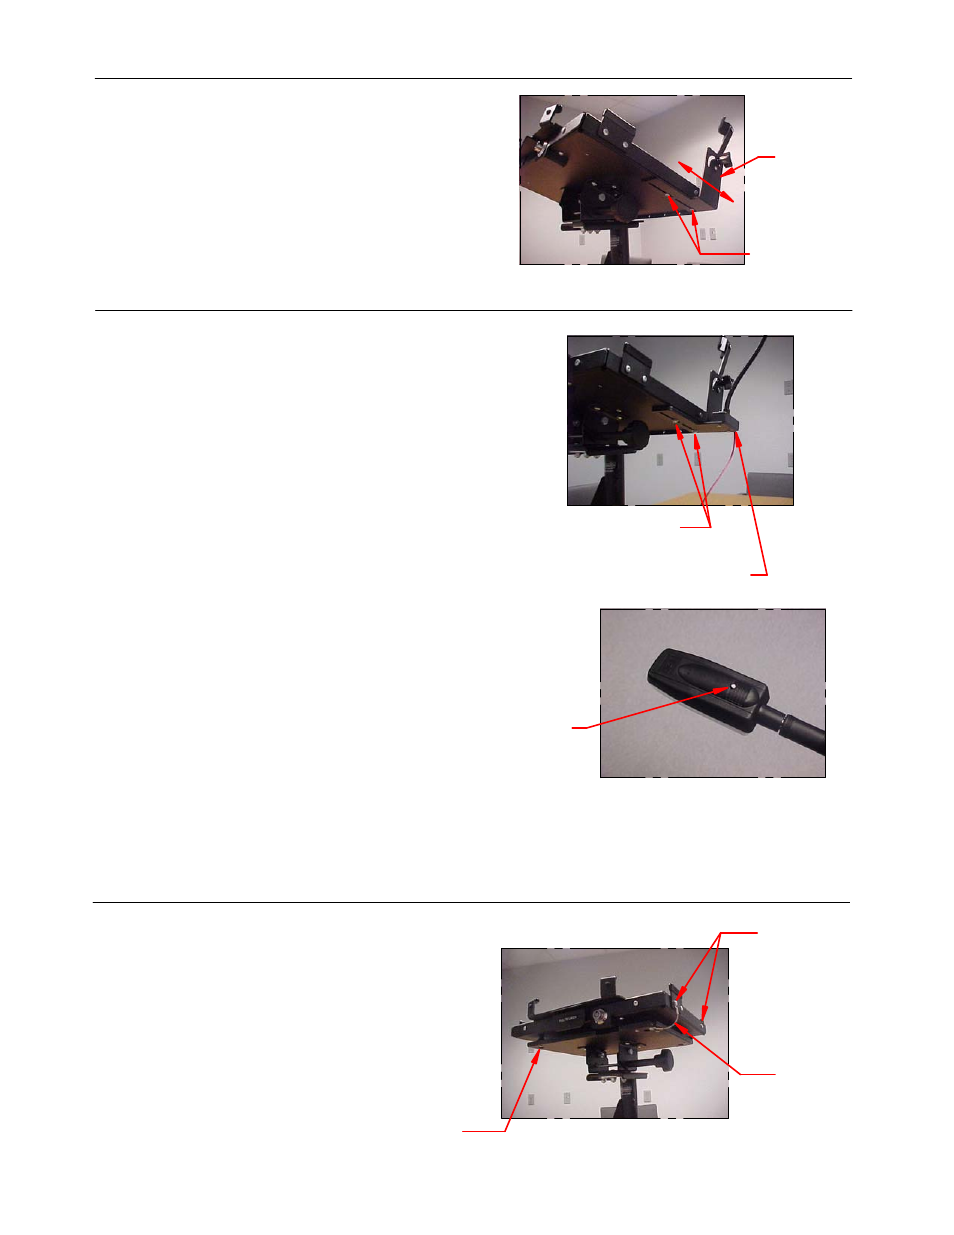
7160-0124 Screen Support Assembly
Use two #8-32unc x .50 long Phillips Pan Head Screws
and two #8 Flat Washers to attach the Screen Support
Assembly to the bottom of the CF52 cradle as shown.
Position Screen Support Assembly forward or
backward to support Power Plug or allow access to
USB ports. Bend the Screen Support Arm slightly, if
needed, to contact the computer display.
If you need assistance or have questions, call Gamber-Johnson at 1-800-456-6868
7160-0123 LED Light Assembly
Use two #8-32unc x .50 long Phillips Pan Head Screws
and two #8 Flat Washers to attach the
Light Assembly to the bottom of the CF52 cradle.
If the Screen Support Accessory is also used place the
Light Assembly on the bottom side as shown.
The LED is powered using the red and black wires on
the back of the light base. The LED Assembly is
designed to operate on 12volts DC.
In a negative ground vehicle:
Connect the RED wire to the positive pole of the
vehicle battery or power distribution box. It is
recommended that a user-supplied fuse holder and 1
amp fuse be installed on red wire. Connect the Black
wire to a suitable chassis GROUND or the
NEGATIVE pole of the battery.
Turn on LED by pressing the Activation
Button on head of LED Assembly.
LED has three light options: White, Red and White/Red. Press the Activation Button to toggle
throught options.
Hold the Activation Button down for approximately one second to turn LED off.
7160-0136 Isolator Assembly
Use four #8-32unc x .50 long Phillips Pan Head
Screws, inserted thru each isolator, to attach the
Isolator Assembly to the bottom side of the CF52
cradle.
Attach two safety straps using existing screws which
hold the side tab on and which hold the cradle side
together, as shown.
Screen Support
#8-32 x .50 Screws
& #8 Flat Washers
Safety Strap
Existing
Side Screws
#8-32 x .50 Screw
thru each Isolator
#8-32 x .50 Screws
& #8 Flat Washers
LED Light Assembly
Activation Button
2 / 2