Flint & Walling Centrifugal Packages - CJ103 User Manual
Page 9
9
95 North Oak Street • Kendallville, IN 46755 • Copyright © 2010. All rights reserved.
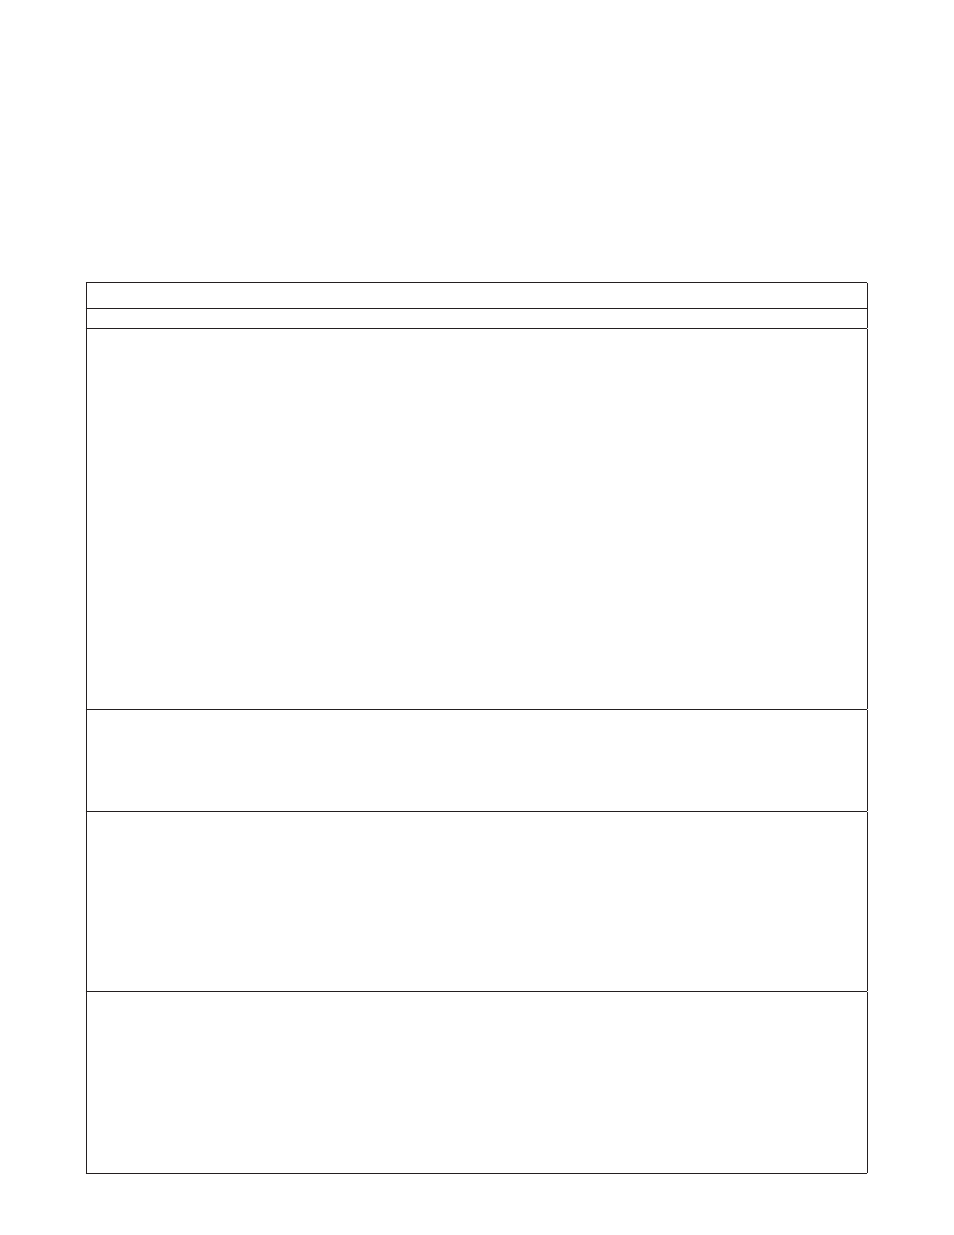
Troubleshooting Chart
Symptom
Possible Cause(s)
Corrective Action
Little or no
discharge
1. Pump not primed
1. Prime unit
2. Total head too high
2. Shorten suction lift and/or discharge
head
3. Suction head higher than
pump designed for
3. Lower pump inlet
4. Impeller clogged
4. Clean
5. Incorrect rotation
5. Refer to wiring information
6. Leak in suction line
6. Repair or replace
7. Inadequate foot valve
7. Make needed adjustments
8. Impeller damaged
8. Replace
9. Foot valve or suction line not
submerged deep enough in
water
9. Submerge lower in water
10. Insufficient inlet pressure or
suction head
10. Increase inlet pressure by adding
more fluid to fluid source
11. Wrong size piping
11. Make needed adjustments
12. Casing gasket leaking
12. Replace gasket
13. Suction or discharge line
valves closed
13. Open
Loss of suction
1. Air leak in suction line
1. Repair
2. Suction head too high
2. Lower pump inlet
3. Insufficient inlet pressure or
suction head
3. Increase inlet pressure by adding
more fluid to fluid source
4. Clogged foot valve or strainer
4. Clean or replace
Pump vibrates
and/or makes
excessive noise
1. Mounting plate or foundation
not rigid enough
1. Reinforce
2. Foreign material in pump
2. Clean
3. Damaged impeller
3. Replace
4. Cavitation present
4. Check suction line for proper size and
be certain valve is open. Remove
excessive loops in suction line
5. Worn motor bearings
5. Replace
6. Bent impeller shaft
6. Replace
Pump will not start
or run
1. Improperly wired
1. Refer to wiring diagram
2. Blown fuse or open circuit
breaker
2. Replace fuse or close circuit breaker
3. Loose or broken wiring
3. Tighten connections and replace
broken wiring
4. Impeller clogged
4. Clean
5. Motor shorted out
5. Replace
Pumps leaks at
shaft
1. Worn mechanical seal
1. Replace
2. Bent impeller shaft
2. Replace
2. Follow steps as outlined under Rotary Seal
Replacement to remove the pump body,
diffuser, impeller and rotary seal.
3. Remove bolts that connect the motor to the
mounting ring and pull motor away.
4. Replace motor with standard Nema J jet
pump motor by positioning motor against the
mounting frame and assembling with four (4)
3/8” x 3/4” cap screws. The mounting base is
connected at the bottom of the mounting frame
with two (2) 3/8” x 1/2” cap screws.
5. Follow steps of Rotary Seal Assembly to
reassemble the remainder of the pump.
BECAUSE DAMAGE TO THE SHAFT SEAL IS
MOST LIKELY TO OCCUR IN DISASSEMBLY, A
NEW SEAL WILL BE NECESSARY.