Change out the af cards (if present), N o t e – ETC Sensor CE Rack (ESR) ECEM to CEM3 Retrofit User Manual
Page 13
2
The Retrofit
11
becomes stressed or pinched.
Step 5:
Insert the backplane tabs in the
sides of the rack.
Step 6:
With the tabs fully inserted in the
sides of the rack, pull the
backplane towards the front of
the rack to line up the screw
holes in the upper side corners
to line up.
Step 7:
Install one screw with a sleeve in the upper-corner (for single-height backplanes)
or the middle of the rear edge (for dual-height backplanes) of each side of the
backplane.
Change out the AF Cards (if present)
If your rack supports Advanced Features (AF)
you will need to replace the AF cards as well.
CEM3 only supports use of the newer-style AF
cards, which have eight address switches and
two LEDs (shown at right).
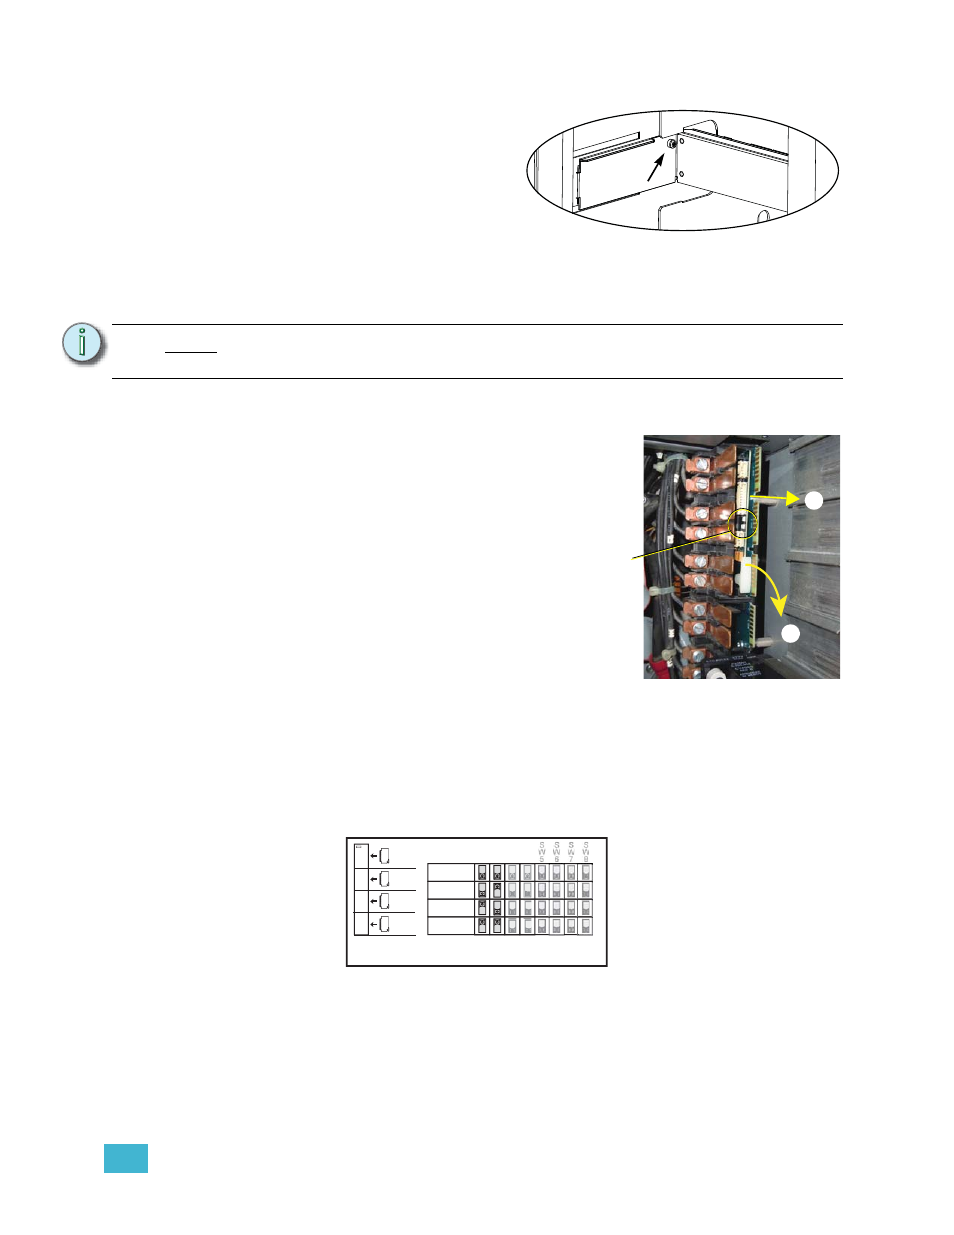
AF cards are located on the right side of the
dimmer module slot between the copper neutral
busses and the dimming circuitry cards.
To replace the AF cards:
Step 1:
Remove the old AF cards by flipping
the white retainer tab on the cards into
the down position.
Step 2:
Pull the old cards out of the slots.
Step 3:
Set the DIP switches on the new cards according to the chart below. Only the first
two DIP switches are used.
Step 4:
Slide the new AF cards completely into the vacant slots starting with card #1 in
the top. The number of cards depends on rack size.
Step 5:
Flip the white tab up to lock the new card in place.
N o t e :
You cannot use the old screws without the additional shoulder-sleeve as they will
block the CEM3 from being fully inserted.
Screw with
sleeve
Single-height backplane shown.
Flip tab down, pull card out
1
2
LEDs found
on newer
cards
AF Card Addressing
Card 1
Card 2
Card 3
Card 4
S
W
1
S
W
2
S
W
3
S
W
4
1
ESR3-12
ESR3-24
ESR3-48
2
3
4
Sensor+
Off = Switch in down position
ESR3-36