Enerpac WCR-Series User Manual
Page 10
10
ENGLISH
Fig. O
5
Maintenance and troubleshooting
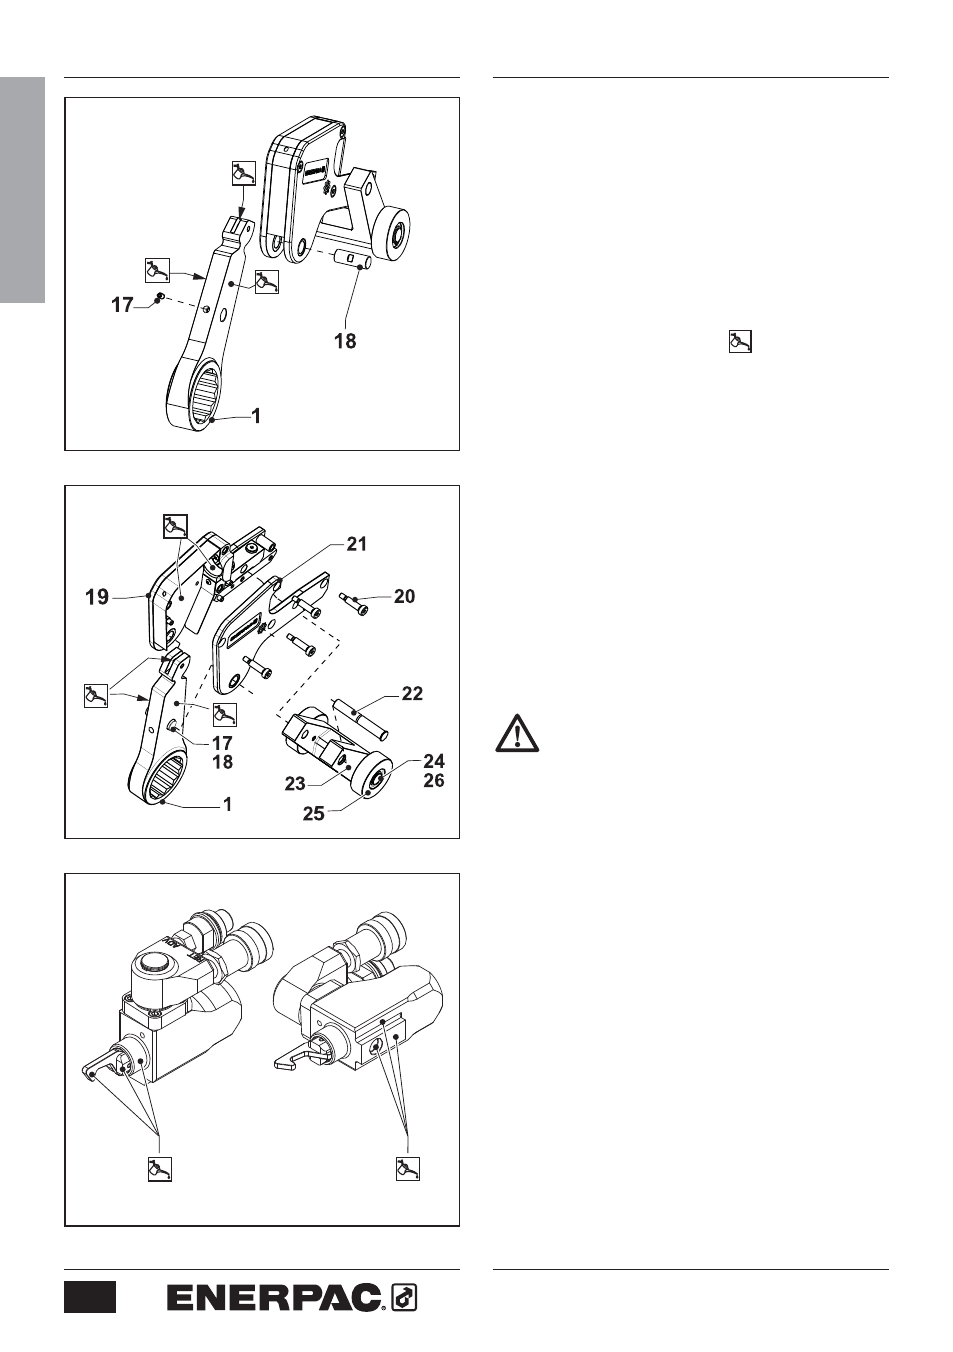
5.1 Spanner replacement (Fig M)
•
Remove drive unit from cassette.
•
Loosen and remove
set
screw (17).
• Tap
spanner
pin (18) on one end and
remove it from the cassette.
•
Slide spanner (1) out of cassette
housing.
•
Apply a thin coat of molybdenum
disulphide lubricant
to the sides
of the new spanner and to the
spring
pin
at top of spanner.
•
Slide new spanner (1) into cassette
housing. Align hole in spanner with
mating holes in sideplates.
• Install
spanner
pin (18) through holes.
Before installation, be sure that flat
area of pin is aligned with
set
screw
hole in spanner.
•
Apply a small amount of Loctite 243
to threads of
set
screw (17).
• Reinstall
set
screw (17).
5.2 Preventative maintenance (Fig N & O)
Preventative maintenance can be
carried out by the user. Full
maintenance must be carried out by
an approved and authorized
technician appointed by Enerpac.
Recommended service intervals are:
a) 3 months – Heavy Duty use
b) 6 months – Normal use
c) 12 months – Infrequent use
-
Non destructive testing must be
carried out if the tool has been used
under severe conditions.
5.2.1 The roller cassette
•
Remove drive unit from cassette.
• Remove
the shoulder screws
(20). Lift
and remove the sideplate (21).
•
Remove spanner (1),
spanner
pin (18)
and
set
screw (17) as an assembly.
• Remove
reaction
roller bracket
pin
(22) and reaction roller bracket (23).
Fig. N
Fig. M