Caution – Elkhart Brass Sidewinder 7161 EXM UHP User Manual
Page 7
EXM UHP– Installation Instructions
(Step 1 – Mount and Wire All System Components)
7
Installation Step 1: Mount and Wire All System Components
Installation instructions have been included for all
EXM components. The reader is advised to
skip all instructions that pertain to components not included in his or her own
EXM system.
A.
EXM Monitor –
Before mounting the
EXM
monitor, ensure that space allows for
monitor to be rotated and calibrated.
Disconnect all electrical connections.
Thread monitor onto male 2.5” NPT thread
using Loctite 592 or equivalent thread
sealant. Tighten using a strap wrench on the
hex portion of the monitor base.
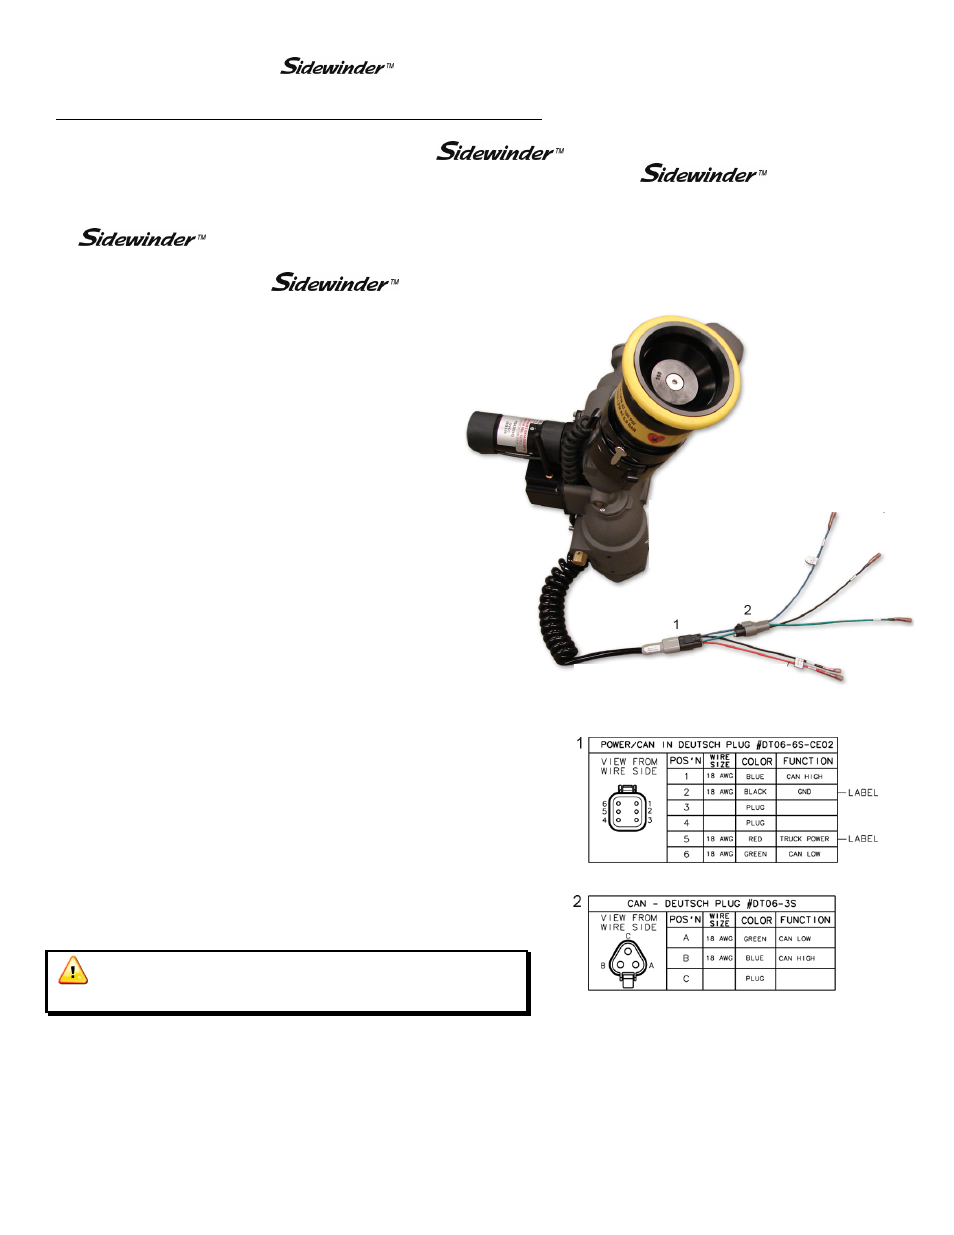
If the monitor will use a CAN string to
communicate with other EXM components,
connect plug 2 leads to the appropriate CAN
string leads.
o If the CAN leads will not be used,
replace wires with appropriate plugs.
Supply power to the monitor by connecting
the red and black leads from the 6 pin
connector to an appropriate power source.
Install a 20 Amp fuse into the positive
power lead for a 12V system (10 Amp for
24V system) to protect the monitor electrical
components.
Refer to the respective plug figures for
information on the plugs’ pins.
Caution:
Do not use motors or discharge as
leverage to tighten monitor.