Prepare site • prepare burner • mount burner, Inspect installation site – Carlin EZGasPro User Manual
Page 4
Model EZGas Pro gas burner — Instruction manual
Carlin part number MNEZGas Rev. 10/28/13
– 4 –
Where appliance instructions differ from this manual, follow the appliance instructions.
1. Prepare site • prepare burner • mount burner
Inspect installation site
Inspect, repair and/or replace vent system
Do not install this burner unless you have verified
the entire vent system and the appliance are in good
condition and comply with all applicable codes.
The vent and chimney must be sized and constructed
in accordance with all applicable codes. If intended for
use with an oil burner as well, the vent system must
comply with relevant codes for both gas and oil firing.
Appliances equipped with a gas conversion burner are
treated as fan-assisted appliances.
The vent system must not be pressurized unless the
vent piping and vent system are designed accordingly.
The vent must provide draft at all times (negative pres-
sure in vent).
Do not install or use an existing manual damper in the
vent connector or vent.
Do not connect the appliance vent connector to a
chimney or vent serving a fireplace, incinerator or
solid-fuel-burning apparatus.
In a cold climate, do not vent into a masonry
chimney that has one or more sides exposed to
the outside. Install a listed stainless steel liner to
vent the flue products.
A defective vent system could result in severe personal
injury, death or substantial property damage.
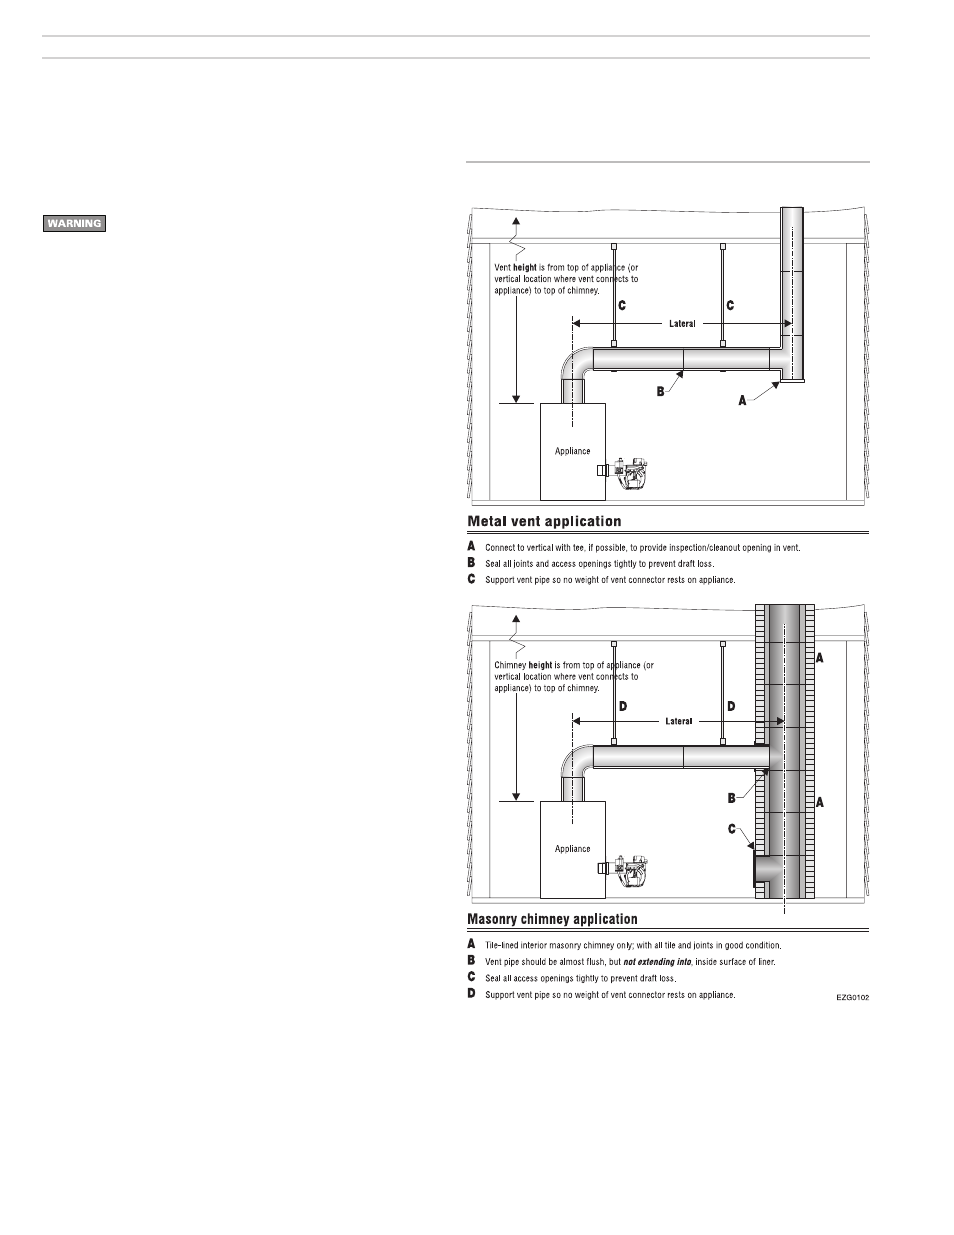
Vent/chimney sizing
• Follow all local codes when sizing the vent and chimney
• Refer to the appliance manufacturer’s manual, when available,
for venting recommendations.
Prepare vent/chimney
• Secure all metal vent joints with screws, following the vent
manufacturer’s instructions. Seal all joints in the vent system
and chimney. Repair masonry chimney lining and repair all
mortar joints as needed.
• Where draft fluctuations are likely, install a double-acting baro-
metric draft regulator in the vent piping. (The damper must be
located in the same space as the appliance.) Install a manual
reset spill switch in the top of the draft regulator outlet. Wire the
switch into the appliance limit circuit to shut off the appliance/
burner if sustained downdraft should occur. Refer to the appli-
ance manufacturer’s instruction manual for recommendations
regarding the need for a barometric draft regulator.
• Provide support for the vent piping. Do not rest the weight of
any of the vent piping on the appliance flue outlet.
Figure 1 Vent and vent connector installation