2 electro- blotting procedure, 3 removing the blot – C.B.S. Scientific DCX-700 User Manual
Page 16
16
Dual Cool DCX-700 Instructions 9-30-13
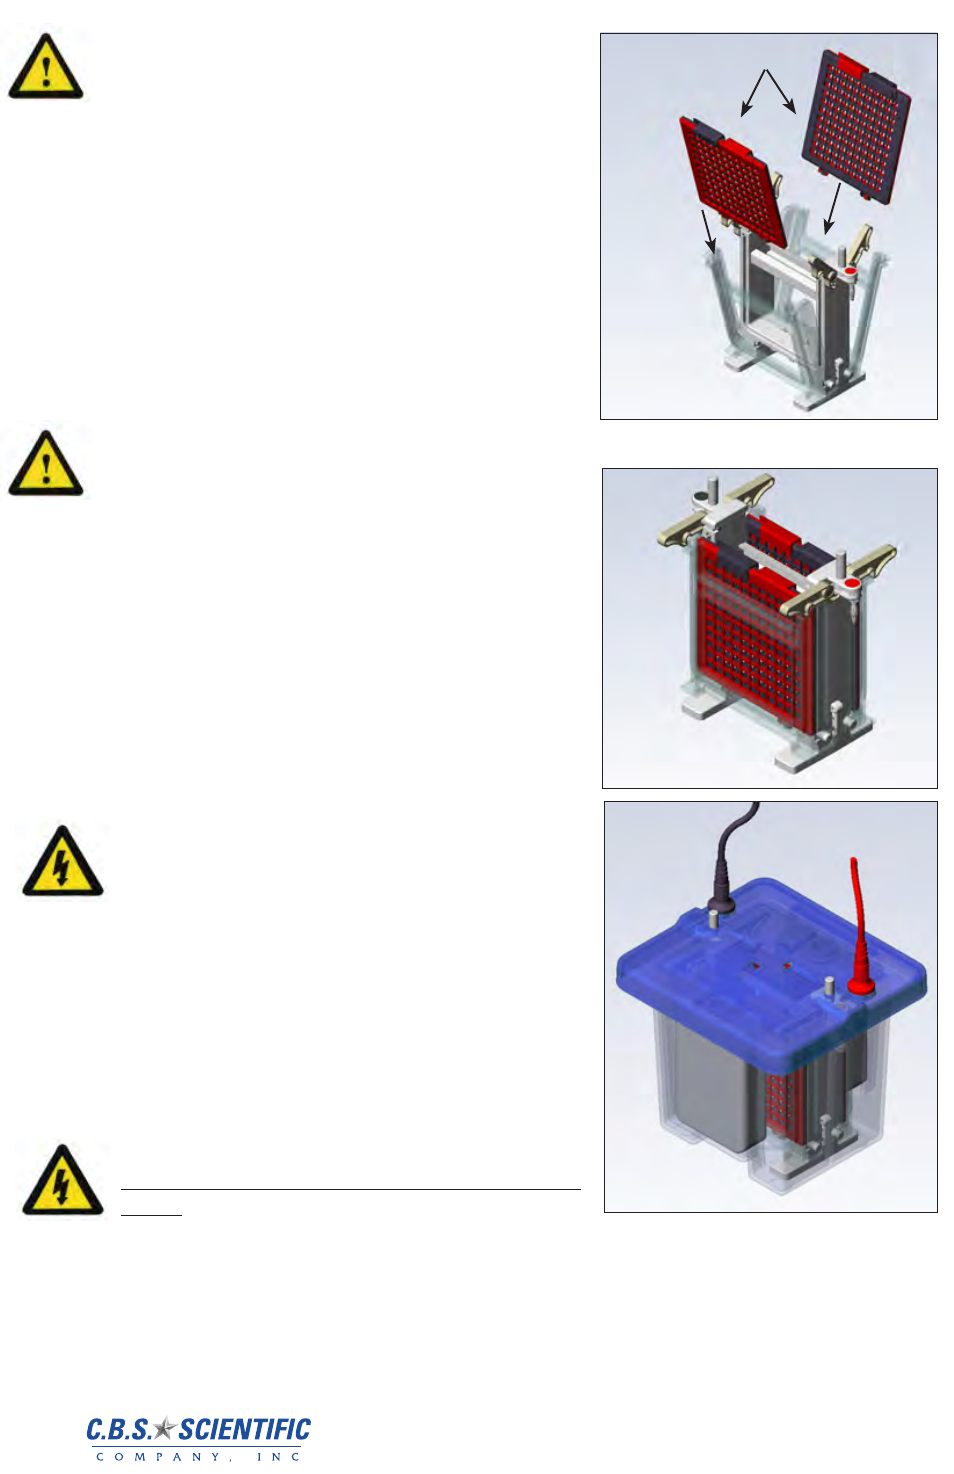
4. Insert blotting casettes into core making sure
that red side faces outward. See diagram 5.
5. Close doors and re-latch by pressing down on
the white latches so that assembly looks like
that shown in figure 6. If running one blot, slide
white reservoir conversion plate into the side
without the blotting cassette.
5.2
Electro- Blotting Procedure
1. Place stirring bar in bottom corral of lower res-
ervoir. Place frozen freezer blocks in side recep-
tacles. Place core/blotting cassette assembly
into lower reservoir. The anode (red) and cath-
ode (black) electrodes are color-coded on both
the core/cassette assembly and lower reservoir.
Ensure the red dot on the cassette assembly is
on the same side as the red receptacle on the
lower reservoir.
2. Pour 1 liter of freshly prepared, chilled (4º) buffer
into lower buffer reservoir. Buffer will percolate
into central core.
3. Attach safety cover. The unit should look as
shown in figure 7 and is ready for power.
4. Connect the leads to the power supply, match-
ing the color-coded red to red and black to
black.
See Section 6.2 for recommended
power conditions. Begin transfer by electro-
phoresis.
5.3
Removing the Blot
1. Turn the power supply off and disconnect the
leads from the power supply. Remove the
safety cover from the unit, by placing thumbs
on white posts next to red & black connectors,
then pushing down while pulling up with fingers
under lid
.
Do not remove safety cover by pulling up on
leads!
2. Blotting cassettes can be removed by leaving
the core in place and opening the top latches of
the core, opening the doors and lifting the cas-
settes out. Unlatch the blotting cassettes and
remove blot from blotting sandwich.
5
red side
black sides
6
7