C.B.S. Scientific DCX-700 User Manual
Page 12
12
Dual Cool DCX-700 Instructions 9-30-13
4.1
Alternate Protocol: Using Gel Wrap™ Gasket Casting Method
(Not using Pre-cast gels)
1. Place all components in an authorized work area. You will need: glass plate set,
Gel Wrap™ Gasket, spacer set, comb, 3 GPC-0002 clamps, and polyacrylamide
solution. Prepare and clean glass plates by hand washing both plates with a high
quality lab detergent followed by a complete rinsing with dH
2
O. Air-dry or use a
lint-free tissue. Spray/wipe the chosen inner surfaces of the plate set with 95%
ethanol and dry with lint-free tissue.
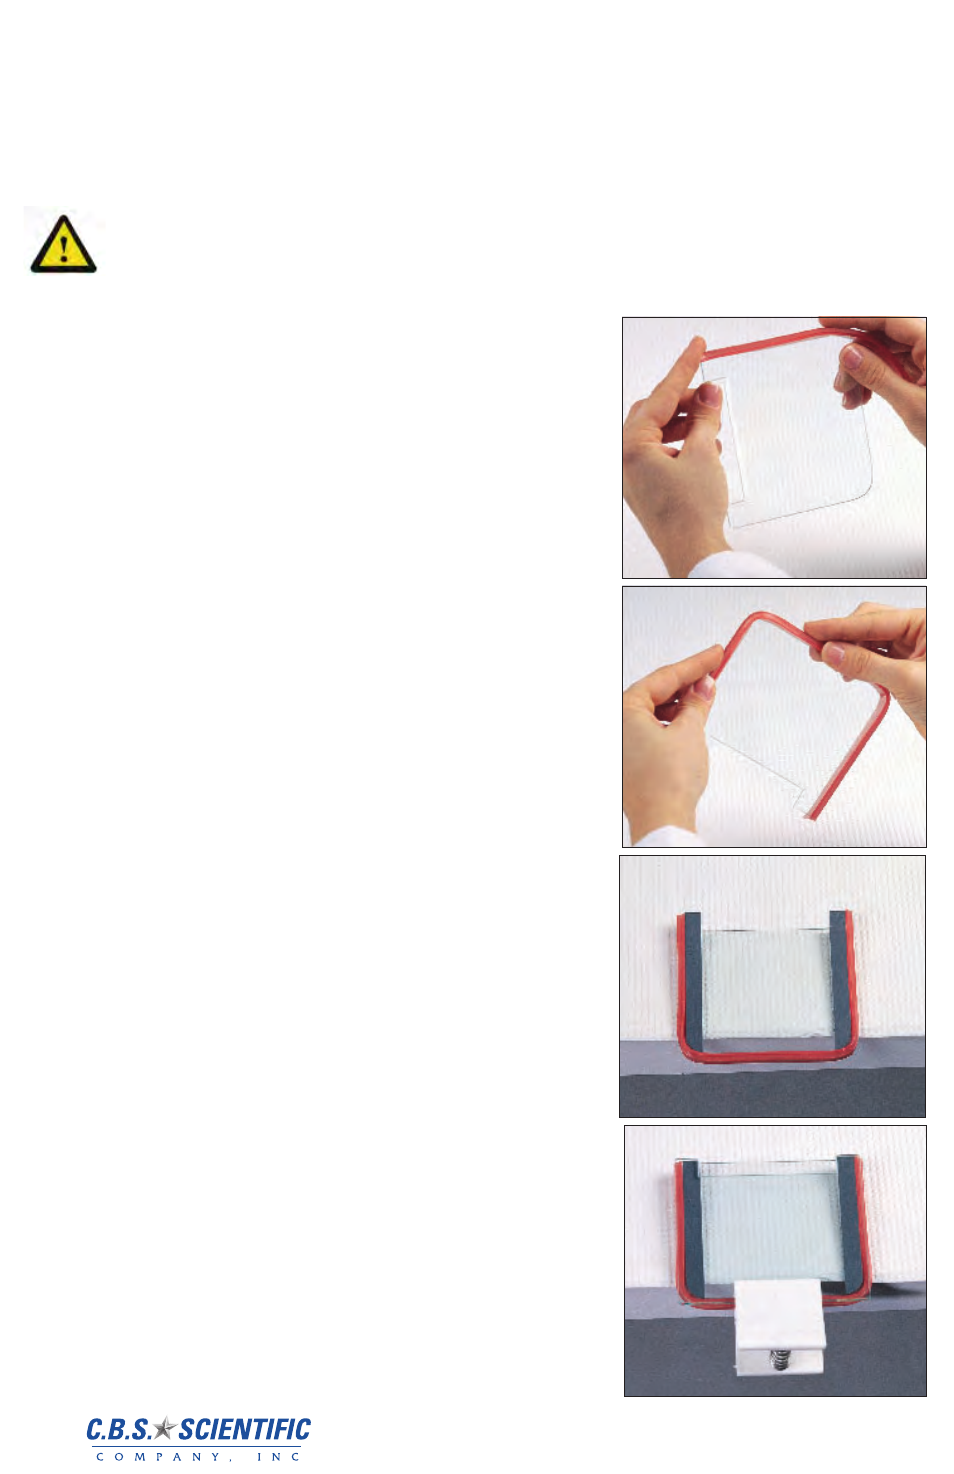
2. Start gel casting procedure by holding the 3mm
thick, notched back plate with the rounded
bottom corners and applying the gasket around
one side of the glass plate. Note: one side of
the “U” shaped gasket is flat, and the other
side has tubing that will act as a seal around
the spacers.
3.
When applying the gasket over the rounded
corners of the notched glass plate, make sure
the cuts on the gasket align with the rounded
corners of the glass plate. Once the gasket
is pushed over the bottom edge and corners,
work it down the remaining side.
4. Place the gasketed plate on the lab bench with
the tubing side up, and extend the bottom of
the plate over the edge of the bench, approxi-
mately ¾ of an inch. Place the spacers along
side the inside edges of the gasket. Be sure
the rounded corner end of each spacer is fac-
ing the outside bottom of the plate, following
the radius of the glass.
5. Place the thinner unnotched back plate on
top of the bottom assembly, starting from the
bottom edge and gently easing the plate down.
Verify the gasket is smooth around the edges
and then
clamp along the bottom.
6. Lift the assembly and stand it on the base of the
clamp. For leveling, push glass plate assembly
down until it stops against clamp body. Clamp
the sides of the assembly with additional casting
clamps on either side. As each clamp is at-
tached, be sure the gasket is aligned between the
plates forming a seal.
7. Apply PAGE solution to gel plate sandwich using
a syringe or pipette. If using a stacking gel, pour
desired height of running gel, then overlay a small
amount of dH
2
O or 0.1% SDS solution to top of
gel.
8. After polymerization, rinse with buffer, add stack-
ing gel solution and insert comb. For regular, unit
percentage gels, add polyacrylamide solution to
correct height, and insert comb. Allow gel to set,
usually 20 minutes. Extra gel solution in pipette
or syringe can be monitored to test polymeriza-
tion of gel mix.
9.
Disassembly (see right and below right). Hold the
clamped plate assembly with one hand. Remove
the gasket by starting at one of the top ends and
pulling up and out on the gasket until it releases
from the plate, up to the bottom of each of the
white clamps. When each clamp is reached DO
NOT remove it, instead feed the gasket down
through the clamp body and repeat pulling up and
out. Continue feeding until the gasket is fully de-
tached. Once gasket is removed, detach clamps.
If gel, is not to be used immediately, wrap entire
plate sandwich with plastic wrap tightly to seal
and store at 4°C for up to a month.