Bd10 maintenance – Barranca Diamond BD10 Power Feed Trim Saw User Manual
Page 21
21
DIAMOND BLADE
Periodically, the diamond blade on the BD10 Trim Saw will need to be resharpened should slow or poor sawing
performance occur. Dull or “glazed over” diamonds will either not cut thus stalling the saw and shutting off the
motor, or the rock vise and rock material will ride up the blade and possibly damage the blade or “dish” the
core. Once the saw begins to labor or struggle to cut gemstones, the user is advised to use a sharpening stick
and resharpen the blade. Resharpening can be performed either with the automatic power feed (stick secured
in vise) or manually with the power feed disengaged and a few thin slabs cut from the sharpening stick. If no
sharpening stick is available, the user could use an abrasive material such as cinder block or brick to remove
the glazing over the diamonds on the rim of the blade.
Eventually all diamond blades wear out and must be replaced with a new blade. New continuous rim diamond
blades (303 Pro for example) should be mounted on the blade arbor so that the arrow marked on the steel
core is pointing in the direction of blade rotation while in use. If the arrow cannot be found, use a hand lens
or magnifying glass to inspect the rim and see the head and tail of any individual diamond. To correctly
mount the blade, the head of the diamond must cut first into the rock with the tail trailing behind. For notched
rim diamond blades (301 Supreme/Gemking models for example), it does not matter which way the blade is
orientated on the arbor shaft.
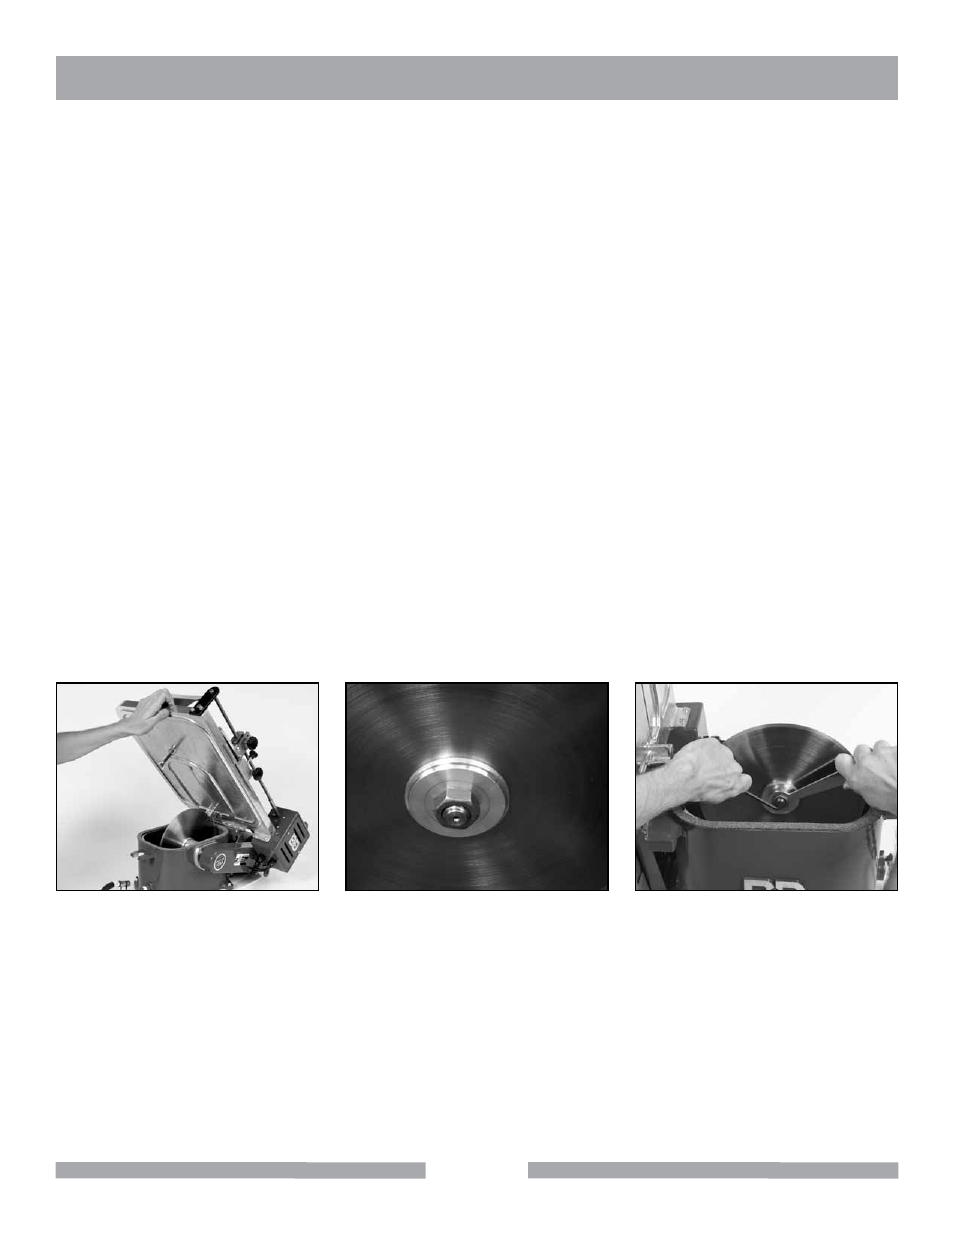
DIAMOND BLADE INSTALLATION AND REMOVAL
To access the diamond blade for inspection or replacement, loosen the wing nut that secures the saw table to
the reservoir tank and open the saw table to the up position (Fig. 33). The blade is mounted on the 5/8" blade
arbor between two aluminum blade flanges (Fig. 34). A 5/8"-11 left-handed jam nut secures the flanges and
blade to the arbor shaft. Hold the blade shaft with the allen key provided and use the provided 15/16" wrench to
tighten or loosen the jam nut (Fig. 35). The jam nut has left handed threads and is turned counterclockwise to
tighten and clockwise to loosen. DO NOT OVER TIGHTEN THE JAM NUT!
Fig. 33. Lift table
Fig. 34. Arbor and Flanges
Fig. 35. Loosen jam nut
BD10
MAINTENANCE