Add rock and gravel, Installing the microskim, Cont – Aquascape MicroPond & MicroPondless Kits (99763, 99764, 99765 & 99769) User Manual
Page 8: Step 8
8
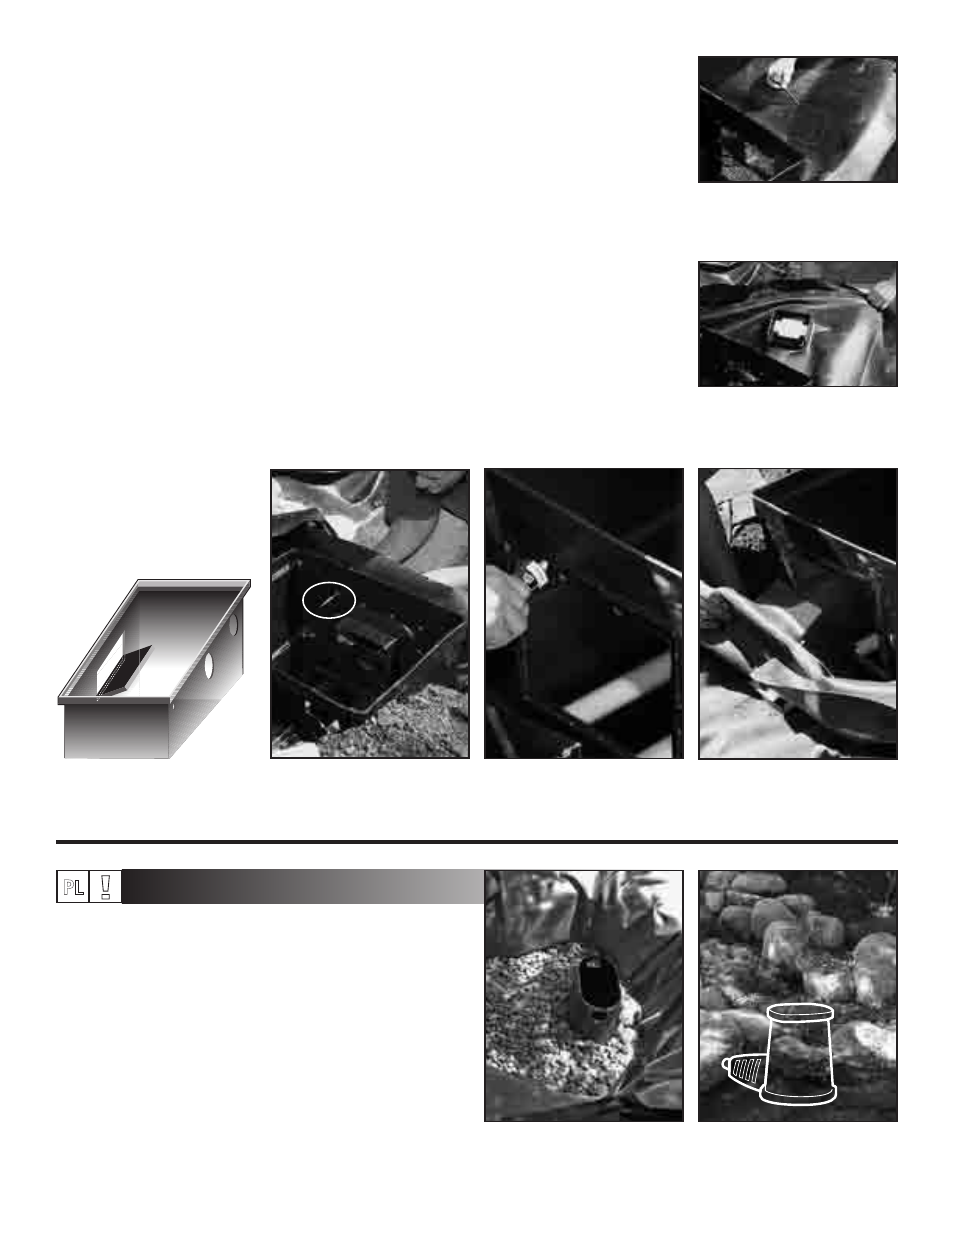
Add rock and gravel
Rocking in the
Pondless
®
Waterfall
• Add 1 ½” to 2” size gravel into the
basin up to the side of the basin.
(See fig. 25)
• A finishing layer of decorative
gravel can be added to the top
if desired.
• Set larger boulders (6” – 18”)
around the perimeter to sup-
port the edges of the basin. The
plumbing from the MicroFalls
®
filter should be brought over
a slightly lowered edge of the
liner and to the location of the
MicroPondless
®
Vault. Boulders
and gravel can be used to hide
the plumbing.
(See fig. 26)
Fig. 26 Placement of MicroSnorkel
™
Vault and MicroCentipede
™
Module
within basin.
Fig. 20 Place skimmer faceplate
through liner and place into
skimmer for alignment.
• Cut the inner box using a pair of
scissors, and insert the skimmer
faceplate into the hole.
(See fig. 20)
• Make sure MicroSkim
®
faceplate
is in the upright position.
(See fig. 21)
• Temporarily install the faceplate
and liner to the skimmer using
two screws in the upper corners.
Using an awl or nail poke the
first hole in the liner all the way
through to the inside of the filter
box.
Be careful not to dam-
age the threads on the nut
inserts when punching the
holes with the awl! Remove
the awl or nail while holding the
faceplate and liner in place and
begin threading one of the
screws into filter. Repeat this
process for the other screw.
(See fig. 22)
• Now remove the faceplate from
the skimmer, keeping the screws
installed through the faceplate
and liner.
• Apply a bead of fish-safe silicone
sealant around the skimmer
opening, over the nut inserts.
Pre-installing the two screws in
the earlier steps will make it easy
to line up the skimmer faceplate
after the silicone is applied and
will keep the silicone in as thick
of a bead as possible.
(See fig. 23)
• Replace the skimmer faceplate
and the two corner screws, and
then proceed with the bottom two
corners
(See fig. 24). Make sure
the holes in the faceplate that
the weir flap clicks into are on
the bottom.
• With the 4 corners secured, you
may now punch the remaining
holes with your awl and thread in
all the screws. Again, be careful
not to damage the threads on the
nut inserts.
• Let dry for at least one hour before
introducing water!
Note: Power tools are not recom-
mended for installing the screws
and may strip the nut inserts.
Fig. 22 Using an awl, poke holes
through the liner at screw holes; tem-
porarily screw top corners into place.
Fig. 24 Carefully replace the
skimmer faceplate into the silicone
lined opening.
Fig. 23 After alignment remove face-
plate and apply silicone sealant.
Installing the MicroSkim
®
cont...
Fig. 25 Add gravel into the basin.
STEP 8
PL
Fig. 21 Skimmer faceplate is
properly placed when hinge is on the
bottom.
!
Fig. 19 Mark the skimmer opening
on liner and cut an area 1.5” inside
that mark.