Build the waterfall, Step 12, Pd/pl – Aquascape MicroPond & MicroPondless Kits (99763, 99764, 99765 & 99769) User Manual
Page 11
11
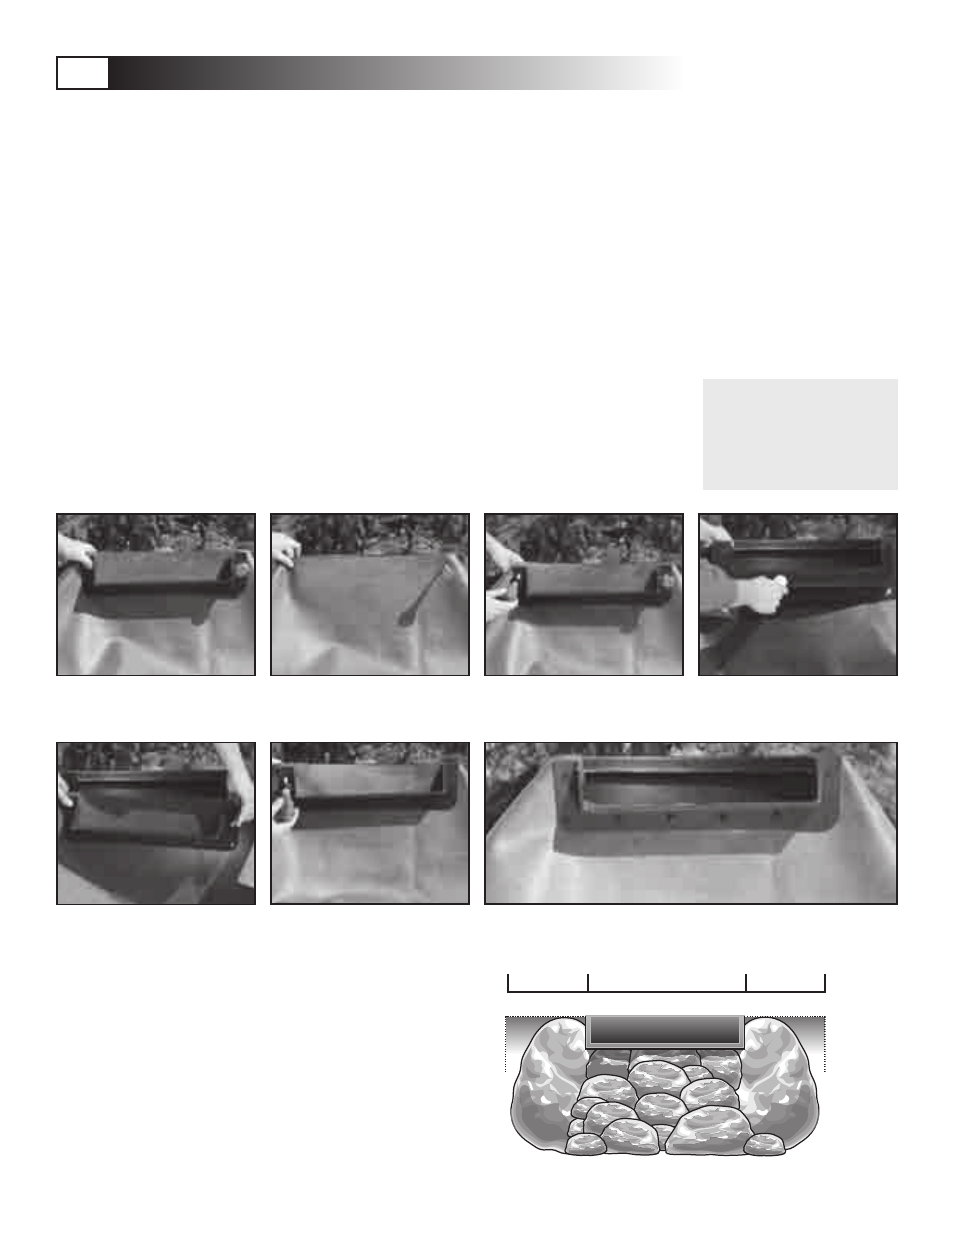
Fig. 32 Make sure you have a few
inches of slack liner along the front
base of your biofilter box
Build the waterfall
Note: Filter mats and media nets are
not needed if installing a
MicroPondless
®
system.
Hook up the MicroFalls
®
• Prior to installing the waterfall lip,
make sure the face of the filter
and liner is clean and free of dust
and debris.
• Have someone hold the liner
against the MicroFalls
®
while you
line up the waterfall snout over
the liner. Make sure there are no
wrinkles and the liner comes up
above the sides of the MicroFalls
®
.
Be sure that you have a few inches
of slack liner along the front base
of your MicroFalls
®
. This will help
reduce tension on the waterfall lip
when placing boulders in front of
the unit.
(See fig. 32)
• Temporarily install the waterfall lip
and liner to the MicroFalls
®
using
the two outermost screws. Using
an awl or nail, poke the first hole in
the liner all the way through to the
inside of the MicroFalls
®
.
(See fig.
33 & 34) Be careful not to dam-
age the threads on the nut inserts
when punching the holes with the
awl! Remove the awl or nail while
holding waterfall snout and liner
in place and begin threading one
of the screws into the filter. Repeat
this process for the other screw.
Note: Power tools are not recom-
mended for installing the screws
and may strip the nut inserts.
• Now remove the waterfall lip
from the MicroFalls
®
, keeping
the screws installed through the
waterfall lip and liner.
• Place a thick bead of silicone
across the insert nuts on the front
of the MicroFalls
®
(See fig. 35 &
36). Pre-installing the two screws
in the earlier steps will make it
easy to line up the waterfall snout
after the silicone is applied and
will keep the silicone in as thick of
a bead as possible.
• Reattach the waterfall lip and liner
using the two pre-installed screws.
(See fig. 37)
• Using an awl or nail, poke the
remaining holes in the waterfall lip
and install the rest of the screws.
(See fig. 38)
• Let dry for at least one hour before
introducing water!
• Install the two filter pads into
the MicroFalls
®
.
• Add approximately 10 lbs of lava
stone or Aquascape BioBalls
™
(not
included) into the media net. Set
the media bag on top of the filter
mats
(see picture on page 16 for
an example).
Fig. 33 Poke holes in the liner all
the way through to the inside of the
filter box.
Fig. 34 Thread screws into the filter. Fig. 35 Place a thick bead of
silicone across the insert nuts.
Fig. 36 Line up the waterfall lip.
Fig. 37 Reattach the waterfall lip
and liner.
Fig. 38 Install the rest of the screws and remove extra liner, using the water-
fall lip as a guide.
*Please Note: Filter media is not
included with the MicroPondless
®
Waterfall unit. The aggregate in
the basin provides a much larger
surface area for bacteria to grow
than the filter media do.
Creating the waterfall
• Place two larger boulders on
either side of the waterfalls you
are creating in order to “frame”
the waterfalls. The water will be
running between the two larger
boulders you’ve set in place.
(See fig. 39)
• You can now begin to stack the
rocks between the two larger
boulders. These are the rocks that
the water will be running over, so
take your time and be creative.
Start with the larger rocks on the
bottom and work your way up to
the smaller ones on top.
• Small stones and gravel can be
used to fill in the gaps between the
larger waterfalls stones.
Rock
Rock
2 feet
Liner
2 feet
Liner
Fig. 39 The water will be running between the two larger boulders.
STEP 12
PD/PL