Hook up and level the microfalls, Step 4, Pd/pl – Aquascape MicroPond & MicroPondless Kits (99763, 99764, 99765 & 99769) User Manual
Page 4
4
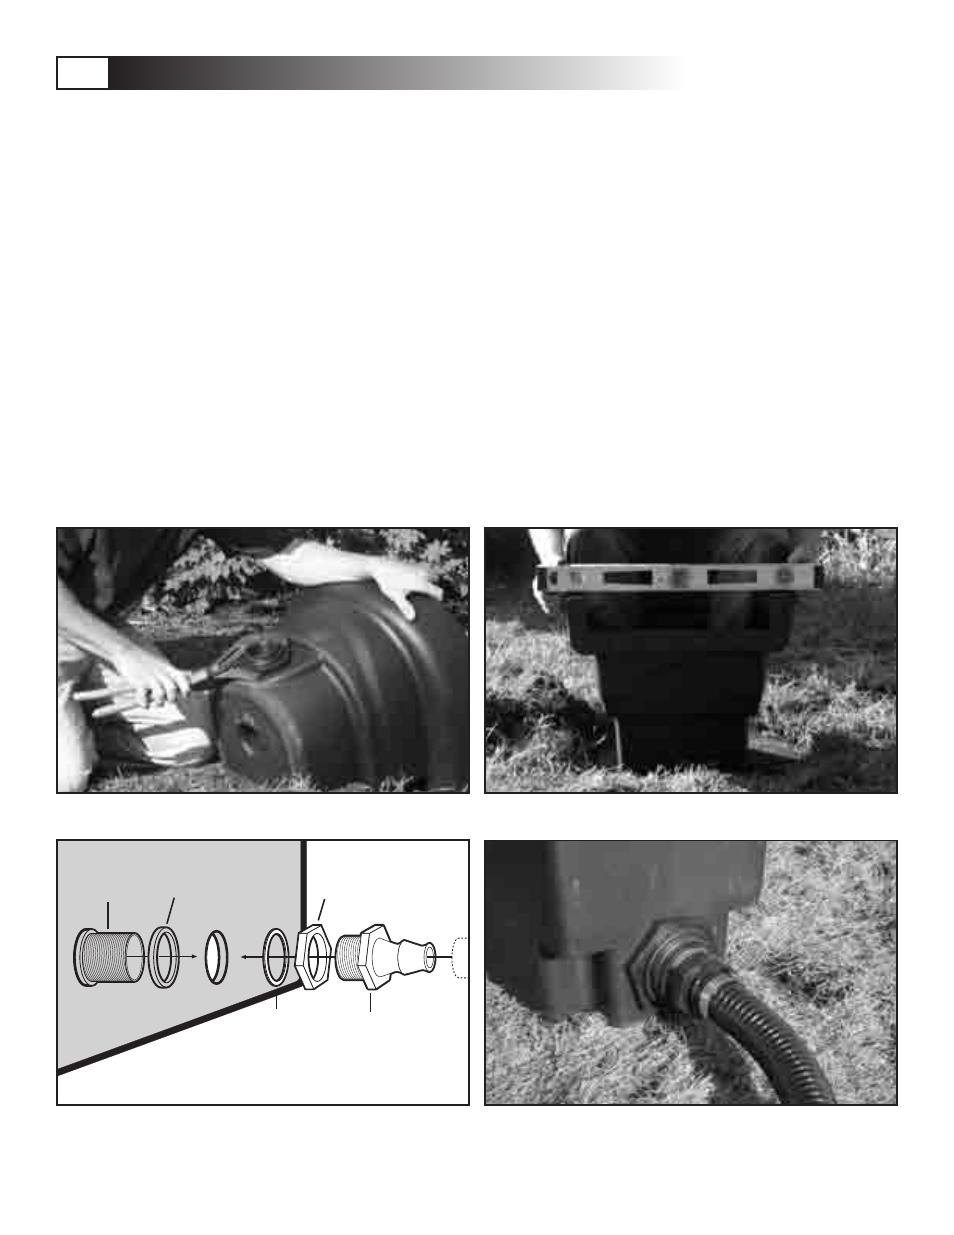
Fig. 4
Attach bulkhead fitting.
Fig. 5
Bulkhead assembly.
Barbed
Fitting
Nut
Plastic
Washer
Rubber
Gasket
Bulkhead
Fig. 6
Level the MicroFalls
®
side to side as well as front to back.
Fig. 7
Finished bulkhead assembly.
• The first step is to install the bulk-
head fitting in the hole provided
in the back of the MicroFalls
®
. The
rubber washer should be located
on the inside of the MicroFalls
®
.
Tighten the nut on the outside until
the rubber washer begins to bulge.
This should only be approximately
one turn past hand-tight. Be
careful not to over tighten the
nut, which could possibly crack
the bulkhead. Please note that
the bulkhead fitting is reverse
threaded. So, in other words,
turn the nut counterclockwise to
tighten!
(See figs. 4 & 5)
• Now install the barb fitting
included with your kit into the
bulkhead fitting. A PVC slip fitting
has also been included in case you
are using flexible PVC pipe. Use
some of the silicone sealant to coat
the threads of the fitting, in order
to help provide a watertight seal.
• Now it’s time to position the Micro-
Falls
®
in the desired location.
• The MicroFalls
®
should be set at
or slightly below the grade of the
yard. Simply remove a section of
sod or a few inches of soil in order
to create a firm foundation for
the MicroFalls
®
to sit. Design tip
- Keep the waterfall to the scale
of the yard! The goal should be to
create the perception that Mother
Nature herself has constructed
the waterfall. Avoid creating a
“volcanic look” by trying to raise
the MicroFalls
®
in a flat backyard.
• Be sure to compact the area
beneath the MicroFalls
®
box using
a hand tamper or some other heavy
flat object that can be pounded
onto the soil. This will help prevent
any future settling.
• Use a 2’ bubble level in order
to make sure your MicroFalls
®
is properly set into position. Your
MicroFalls
®
should be level from
side-to-side and tilt forward ¼ of a
bubble on a 2’ level. This will make
sure the water comes over the front
of the MicroFalls
®
and covers the
entire spillway.
(See fig. 6)
• The filter is now ready for the
kink-free pipe and hose clamp to
be slipped onto the pipe fitting.
The connection is designed to be
tight and it may take some force
to get the pipe on the barb fitting.
Twisting the pipe clockwise may
help thread the pipe onto the
fitting. Have someone hold the
MicroFalls
®
in place in order to
prevent it from shifting out of level.
Once installed, the hose clamp can
be tightened to secure the pipe on
the fitting.
(See figs. 5 & 7)
• Double check to make sure the
MicroFalls
®
is still level after
installing the plumbing.
Hook up and level the MicroFalls
®
STEP 4
PD/PL